iMessages in iCloud is a feature of the Messages app which lets you sync all iMessages through iCloud to other devices using the same Apple ID, offering some other nice benefits in that process. You may have thought that was already how iMessage worked on the iPhone, iPad, and Mac, but it turns out that’s not exactly the case. Instead, Messages in iCloud is a new feature that is available from iOS 11.4 onward.
This article will explain what Messages in iCloud is, as well as show you how to enable the feature on your iPhone or iPad.
What is Messages in iCloud?
You may be wondering what Messages in iCloud is and how it works. Well, according to Apple in the release notes of iOS 11.4 system software, Messages in iCloud does the following:
– it stores your messages, photos, and other message attachments in iCloud, potentially freeing up storage space on your devices
– all prior messages will appear on a new device if you sign in to that device with the same iMessage account
– and, if you delete a message or conversation from one device they will be removed from other devices using the same Apple ID.
If this all sounds appealing to you, then here is how you can enable the feature on your iOS device.
How to Enable Messages in iCloud in iOS
You must be running iOS 11.4 (or newer) for iMessages in iCloud to be available as a setting option on a device, if you haven’t updated yet then do so before going any further.
- Open the “Settings” app on your iPhone or iPad
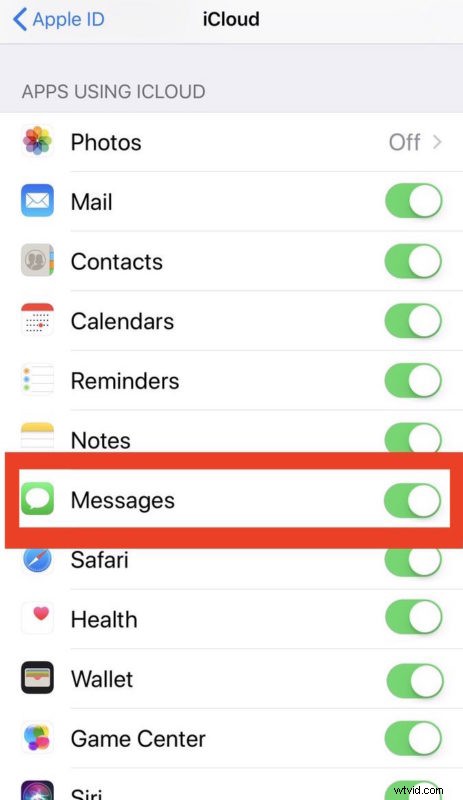
- Tap on your name at the very top of the Settings screen * to access iCloud Settings
- Scroll down to locate “Messages” and tap the toggle switch next to that setting to the ON position

Now that you have Messages in iCloud enabled, your messages should upload and transmit between iCloud servers and your various devices using iMessages.
To use Messages in iCloud on the iPhone or iPad you must have iOS 11.4 or later installed, and for the Mac you must have macOS High Sierra 10.13.5 or later installed. Mac users can enable Messages in iCloud with these instructions, and like iOS if it is not enabled manually then the feature is not turned on by default. Prior versions of either system software do not support the feature.
It remains to be seen, but hopefully enabling iMessages in iCloud will also permanently fix Messages appearing out of order on iPhone and iPad devices, a problem that seems to happen randomly for various versions of iOS.
* Yes, tapping on your name in the iOS Settings app is how you access iCloud Settings nowadays.
Did you enable Messages in iCloud? What do you think so far? Let us know your experiences with iMessages in iCloud in the comments below!