The iPhone has three slow motion modes – here’s why and how to use each when you’re shooting video.
Shooting slow motion smoothes out handheld shake, stretches time, and makes things look more cinematic — and less like everyday life. The iPhone has some of the best slow motion capabilities of any camera under $5,000, so how do you get the most out of it?
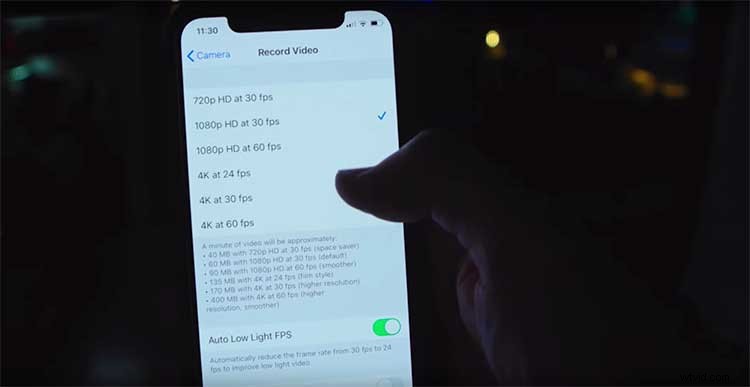
The three main iPhone slow motion modes are 60p, 120p, and 240p. The “p” (short for progressive) is a way of signifying frame rate over shutter speed.
The 60p Mode
The 60p mode adds a layer of dreaminess to an otherwise normal clip. Slowed down to 24p in post, it creates a cinematic look without freezing the motion or making the action take too long. This works great for a tracking shot on someone walking — or for pushing in on a subject of interest.
The 120p Mode
The 120p mode stretches out a moment in time, like a leap into water or a backflip. It works best for human movement that benefits from a dramatic presentation. This mode is more narratively powerful than 60p, so you wouldn’t want to overdo it on something like a long walking scene. Save it instead for more resonant actions that benefit from longer playback.
The 240p Mode
The 240p mode is super slow. Every second in real time is going to take ten seconds to play back. This is great for something that lasts a fraction of a second, like hitting a fastball or breaking a balloon.
A common mistake people make with slow-motion is actually shooting too slow and then ending up waiting for the right moment. Ten seconds of 240p is almost two minutes at playback speed.
Subjects to Shoot
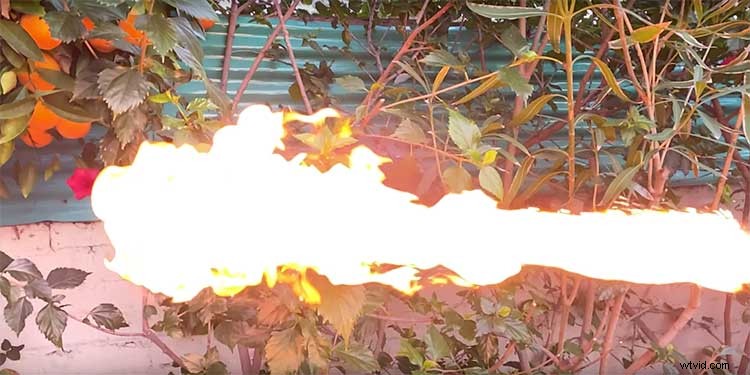
A good rule of thumb is that the slower you go, the more action and motion you need in the frame. That means moving the camera — as well as making certain something is happening to the subject. Water is a great slow motion subject because of how active it is. Sand, paint, and fire also make compelling slow motion footage because of how dynamically they move and interact.
If you end up shooting too much slow motion, and have an unwieldy clip, you can go in and trim it in the iPhone’s edit tab before you import it into your computer. I’ve found airdrop is the simplest way to transfer files from phone to computer, if both are on the same network.
Editing Your Clip
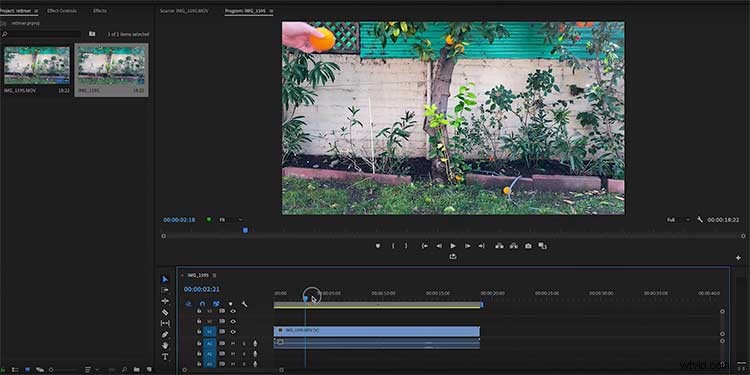
Once you’ve shot your clips, take them into Premiere — or your NLE of choice. If you shot 60p normal speed video, you’ll need to tell your editing program that you shot this in slow-motion, but you want to play it back at normal speed. Right-click the clip and choose Interpret Footage, then set it to match your timeline, usually 24 or 23.976. Now when you drag these into your edit, they’ll play back at the speed you want.
As with any new form of cinematography, it’s best to experiment as much as possible. Since you always have the camera with you, go ahead and give it a shot!
Looking for more videography tips and tricks? Check these out.
- 5 Tips for Rigging an iPhone for Filmmaking Projects
- Can You Successfully Shoot a Film on the New iPhone 11 Pro?
- How to Capture Exceptional Video Footage with Just an iPhone
Interested in the tracks we used to make this video?
- “Jump In” by Fugu Vibes
- “Streets of Brooklyn” by Life Is An Epic Film
Cover image via Hadrian/Shutterstock.