You can make your voice sound robotic by multiplying your audio track and using Audacity’s Paulstretch, Pitch changer, Graphic EQ and Reverb tools to modulate your voice into a robotic version. You can also use the panning feature to add a stereo effect.
This is how it makes your audio sound
Before:
After:
If you wanna make a slightly less evil sounding version skip the pitch changing, EQ and stereo parts and you’ll have three identical tracks which won’t sound as hardcore.
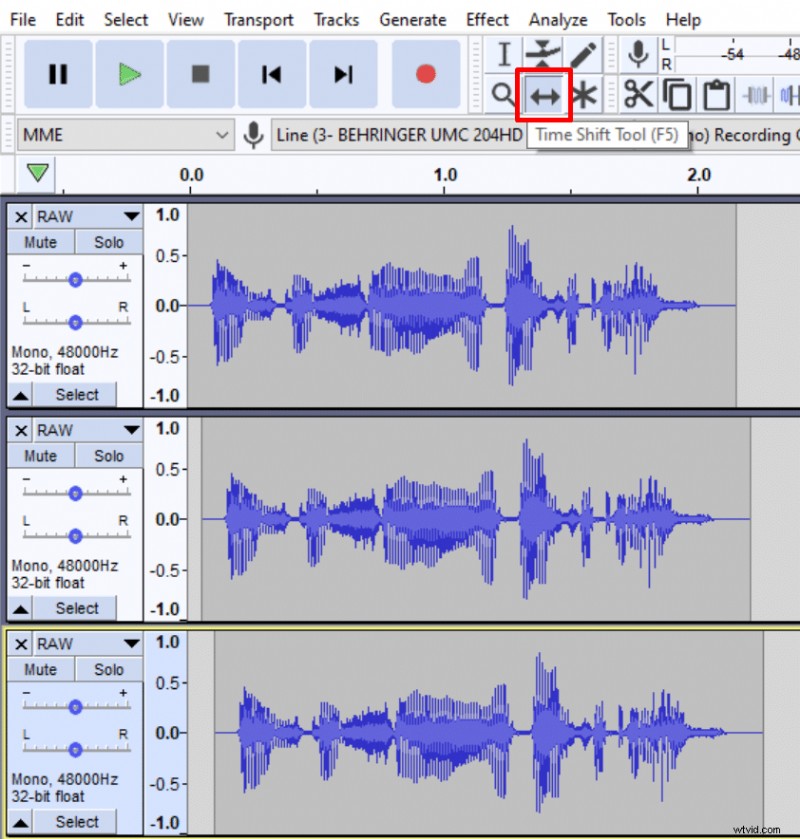
1. Multiply your track
To create a robotic voice in Audacity first step is to multiply your track into 3 separate ones by copying and pasting it twice. Then nudge two new tracks slightly on the timeline using Time Shift Tool (F5) to create a small discrepancy of roughly 0.1s. Once you nudge them go back to the Selection Tool (F1).
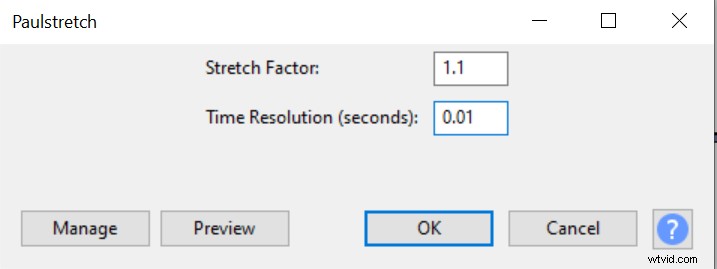
2. Apply Paulstretch
Select all of your tracks and go to Effect->Paulstretch. Set Stretch Factor to 1.1 and Time resolution (seconds) to 0.01, click ok.
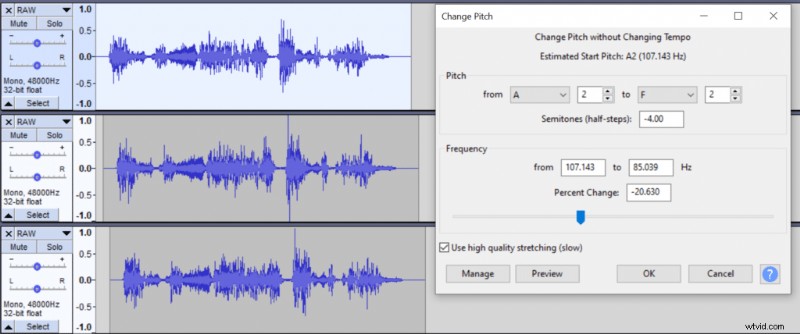
3. Change the pitch
Select the first track and go to Effect->Change pitch. Lower the pitch by 4 semitones. This will create a deep robotic voice in the first track.
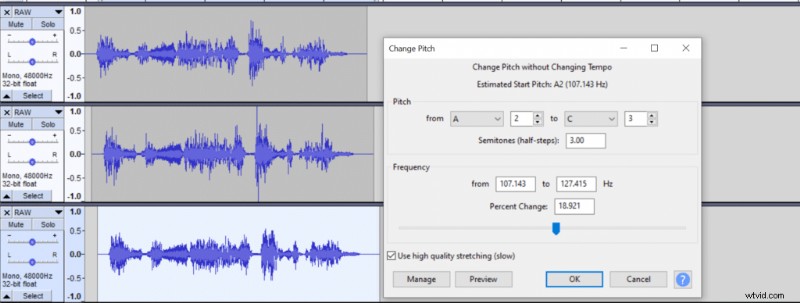
Use the same effect to add 3 semitones to the third track to create a high pitched robotic voice in the third track.
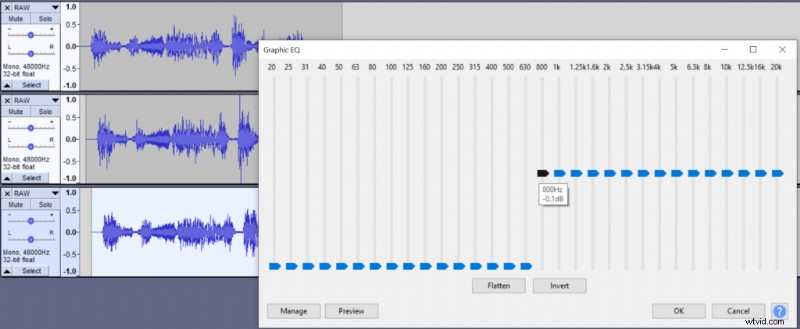
4. Apply EQ
Select the third track and go to Effect->Graphic EQ and remove all the frequencies around up to 630Hz. This will further increase the pitch of the third track.
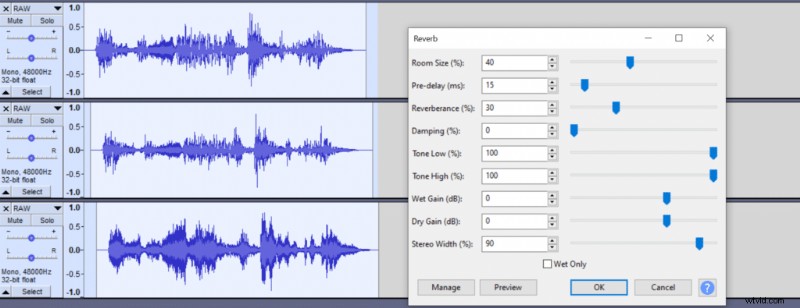
5. Apply Reverb
Select all of your tracks and go to Effect->Reverb and set your Room size to 40%, Pre-Delay to 15ms, Reverberance to 30%. Click OK. It’ll add reverb and create a feeling as if you were in a laboratory corridor or something like that.
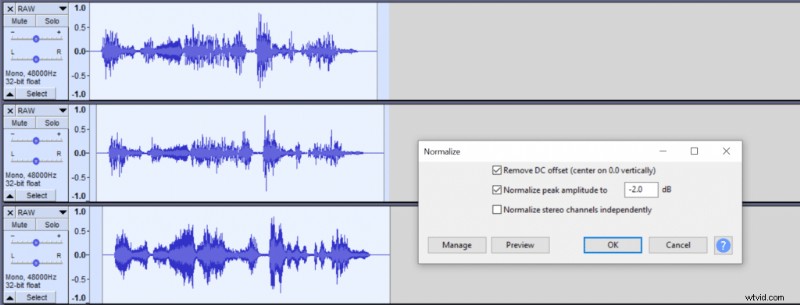
6. Normalize tracks
To make all of your tracks match in volume select all of them and go to Effect->Normalize, set it to -2dB.
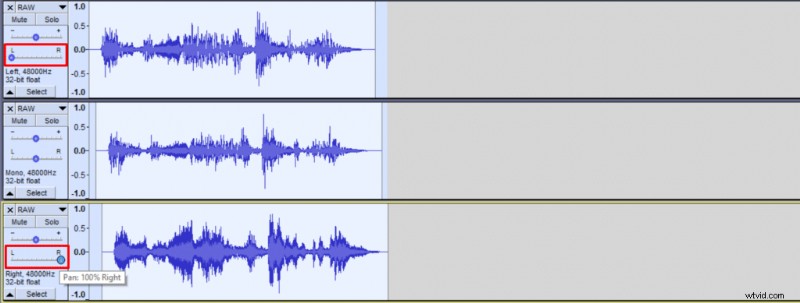
7. Make it stereo
This step is optional but might sound cool.
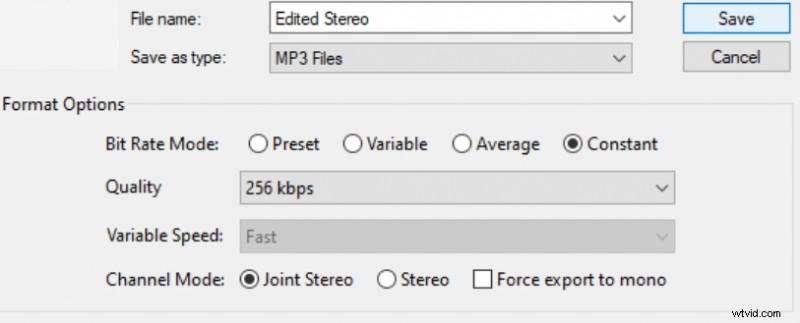
Select your first track and pan it all the way to the left and select your third track and pan it all the way to the right. If you do this, make sure you export in stereo.
Doing this will make a deep robotic voice sound in your left ear and high robotic voice in your right ear.
You can learn more about doing impressions here and if you’re interested in a home recording studio then here’s a complete guide to recording gear.