Echo is a bounce off that creates a repeated sound of the original. Echo isn’t the same as reverb, the difference is that we can distinguish each echo while the reverb is a multitude of echoes that we cannot distinguish one from another.
In Premiere Pro we’ll be using Analog Delay effect to add echo. It has control over a few parameters, which we’ll quickly go through:
- Dry Out – determines the level of the original unaltered audio
- Wet Out – determines the level of echo
- Delay – determines the distance between the original sound and echo
- Feedback – creates additional echoes which are each repeated with a percentage of the original volume. If you set it below 100% it’ll create a fading effect, if you set it above 100% then each echo will become louder (use cautiously).
- Thrash – determines the distortion of each echo
- Spread – determines the stereo sound of echoes.
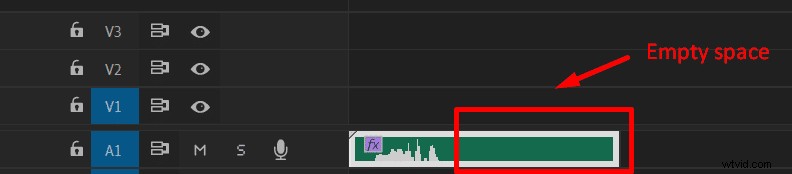
When applying echo to your track make sure you have some quiet space after the audio ends, otherwise, your echo will be truncated where the track ends. Also keep in mind that it’s best to use echo on shorter tracks or it’ll start overlapping with the original audio. Optimal echo delay will probably differ for each track as it depends on how long your track is, shorter tracks will require shorter delay and longer tracks will require longer delay.
Here’s how to add echo in Premiere Pro:
- Add your audio to a timeline
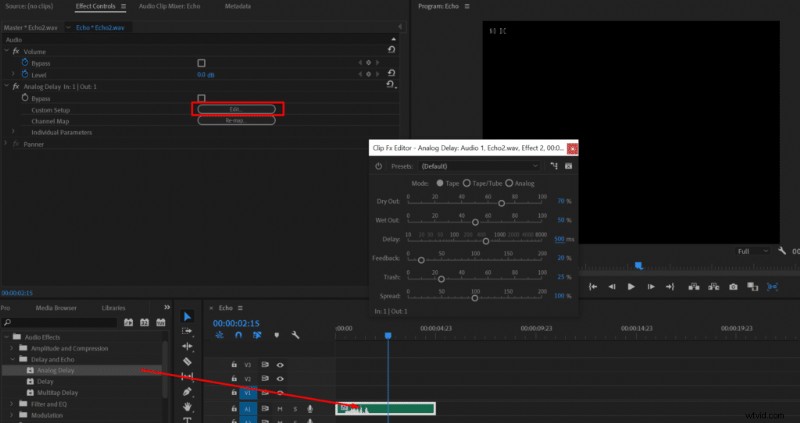
- Go to Effects -> Delay and Echo -> Analog Delay
- Drag the effect onto your audio track
- Go to Effect Controls
- Click Edit near Custom Setup
- Set your settings at:
- Dry Out 100%
- Wet out 70%
- Delay – 200ms
- Feedback 80%
- Trash 60%
- Spread 100%
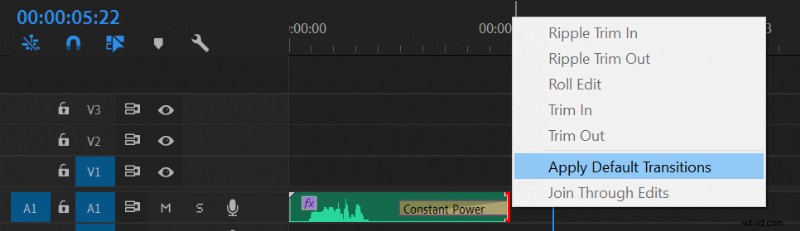
- Apply Default Transitions to fade out (right mouse click at the end of the track)
Default echo:
- Add your audio to a timeline
- Go to Effects -> Delay and Echo -> Analog Delay
- Drag the effect onto your audio track
Single echo:
- Add your audio to a timeline
- Go to Effects -> Delay and Echo -> Analog Delay
- Drag the effect onto your audio track
- Go to Effect Controls
- Click Edit near Custom Setup
- Set your settings at:
- Dry Out 100%
- Wet out 10%
- Delay 1000ms
- Feedback 30%
- Trash 50%
- Spread 100%
If you’re interested in setting up your home recording equipment then read this article.