Sometimes you may want to replace the original audio of a QuickTime video or add your own audio file. Instead of compressing the video again, Wondershare Filmora (originally Wondershare Video Editor) makes it really easy to do this in just a few steps. Now follow the detailed guide below to learn how to easily add audio to QuickTime video files. You can download this software first:
How to Add Audio to QuickTime Video Files
1 Import your QuickTime video files to the program
After you install this video editor, click the shortcut on the desktop to launch it. Then a window will pop up to let your select the aspect ratio between 16:9 and 4:3. After making your choice, click the “Import” button or drag and drop your QuickTime video & audio files to this program. Since this program supports a vast range of formats, you don't have to convert the original video format to edit it.

2 Add audio to QuickTime video files
After that, place both of the video and audio files to the corresponding tracks of the timeline. Make sure that the lengths of them are approximately the same. If not, you would need to edit the video and or audio streams (for example, deleting unnecessary fragments) in order to make their lengths equal. You can click the “Split” icon above the Timeline to split and cut the unwanted part of the files. After syncing the video and audio files perfectly, you can right click and further adjust the audio file in the editing panel, like changing the playing speed, volume, pitch, etc.
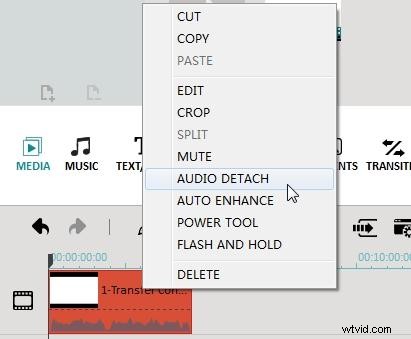
Tip: You can also replace the original soundtrack of the QuickTime video file. To do this, just right click the video file and choose “Audio Detach”. Then the audio file will appear on the audio track. Then right click the audio file and choose “Delete” to delete the audio.
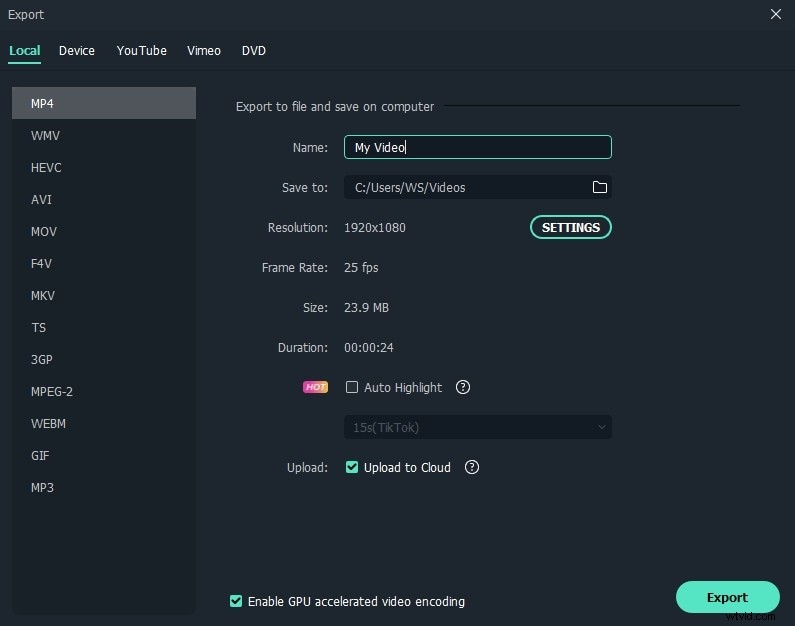
3 Export the new video file
After adding audio to the QuickTime video, hit the “Create” to export your video file. You can go to the “Format” tab to save the new video file in different formats. Or go to the “Device” tab if you want to watch the new file on your portable media device like iPod, iPhone, etc. There will be dozens of preset output profiles for converting your video file to almost every kind of media devices like iPod, iPhone, Xbox 360, mobile phones and different players. You can also directly share your video on YouTube or Facebook in the “YouTube” tab or burn to a DVD if you like.
Watch the video below to check how to edit videos with Filmora video editor.
You may also interested in: How to edit video with QuickTime