Maybe you have lots of MOV files, such as QuickTime movies and camera footages etc. Since MOV (QuickTime) file size is too large, you may want to readjust the file size to fit your mobile media device or save more space etc. To resize MOV videos, what you need is just an excellent MOV resizer for help. Here, Wondershare Filmora is highly recommended.
It lets you convert between various popular video formats, as well as customize video parameters like resolution, frame rate and bit rate etc. It means you can resize MOV to smaller size by converting to other format with high compression rate, or lowering video resolution, frame rate and bit rate. Now learn more information about Filmora and follow the tutorial to resize your MOV (QuickTime) files with three simple steps.
Powerful MOV (QuickTime) video resizer: Wondershare Filmora (originally Wondershare Video Editor)
- Easily resize your MOV video with no quality loss;
- Customize video resolution, bit rate, frame rate and other settings of your video;
- Directly upload the video to YouTube or Facebook when the editing is done;
- Supported OS: Windows (Windows 10 included) & Mac OS X (above 10.6).
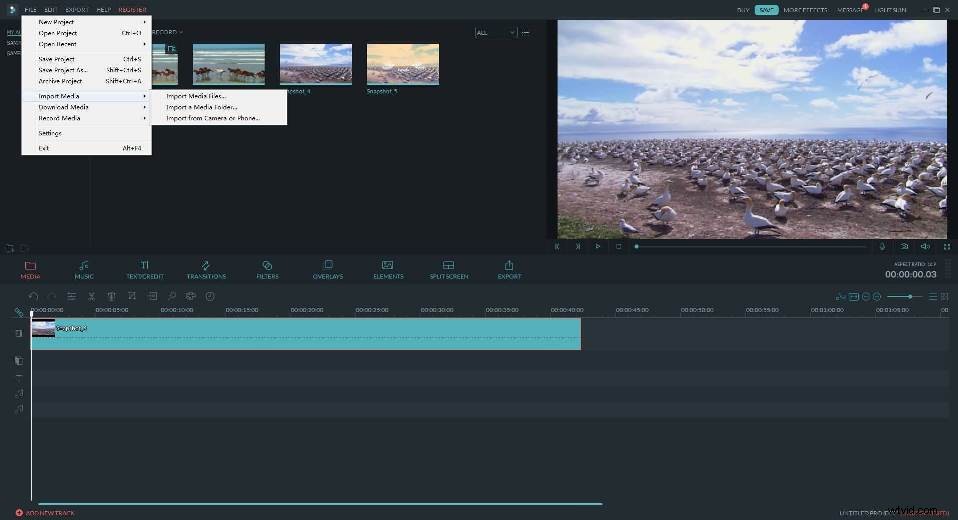
1. Import MOV (QuickTime) files to the User's Album
First, import your local MOV files by hitting the "Import" button on the top-left corner or dragging MOV files you want from the computer to this app’s Users' album. All imported files will appear as thumbnails in the left pane.
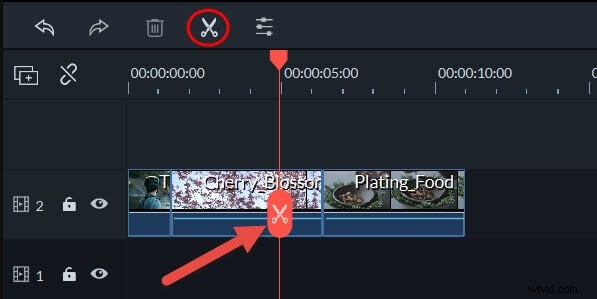
2. Cut off unwanted MOV (QuickTime) video parts
If you want to cut off some clip (actually, it’s the most direct way to resize MOV files for smaller size), just respectively drag and drop the top of the red Time Indicator to the starting point and the ending point you want, and then each time hit "scissor" button to cut off the clip.
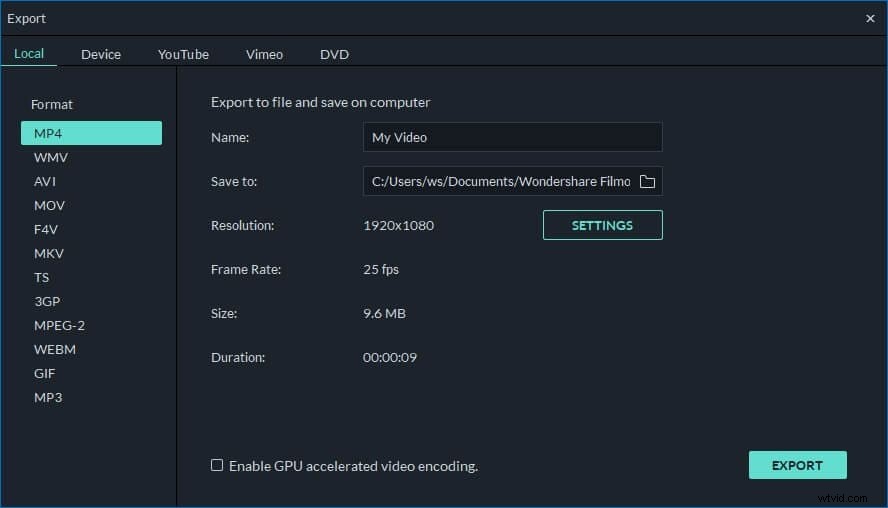
3. Set its output format and settings
Now, you need to drag one of your wanted MOV files from the album to this MOV resizer’s timeline. If you don’t want to do any editing job, just directly click the “Create” button, go to “Format” tab in the pop-up window, and then choose “MOV” as the output format. Note that if you want to resize MOV files by converting to other formats with higher compression rate like FLV, just choose FLV instead.
At the bottom of the pop-up output window, there are a triangle-shape button. Just click it to do some advanced settings. Lowering the video resolution is the best way to resize MOV files for smaller size. Not small enough? You can also reduce its video frame rate and bit rate.