Have you been taking advantage of the built-in Shortcuts app on iPhone and iPad to perform automated tasks or customize your home screen with custom app icons? In that case, you may already have an idea regarding how to create custom shortcuts, but you also may might to try out custom shortcuts that other users have created too.
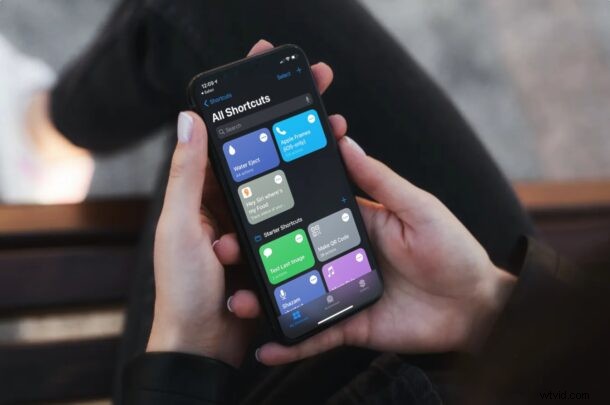
The Shortcuts app that comes pre-installed on iOS and iPadOS devices has proven to be incredibly useful especially recently with the release of iOS & iPadOS 14. There are so many things that iPhone and iPad users can do now with the Shortcuts app, from launching apps, to scheduling messages, to creating custom icons for your apps. Although users have access to a set of suggested shortcuts, they’re not limited to using those alone. In fact, third-party shortcuts created by the community can be installed on your device too.
This opens the door to a plethora of custom shortcuts and the possibilities are virtually endless. Interested in checking them out? In this article, we’ll be covering installing third-party shortcuts on your iPhone or iPad.
How to Allow Untrusted / Third-Party Shortcuts on iPhone & iPad
By default, your iPhone or iPad will not allow you to install third-party shortcuts. You’ll need to change the settings for that. Simply follow the steps below to learn how this is done.
- Head over to “Settings” from the home screen of your iPhone or iPad.
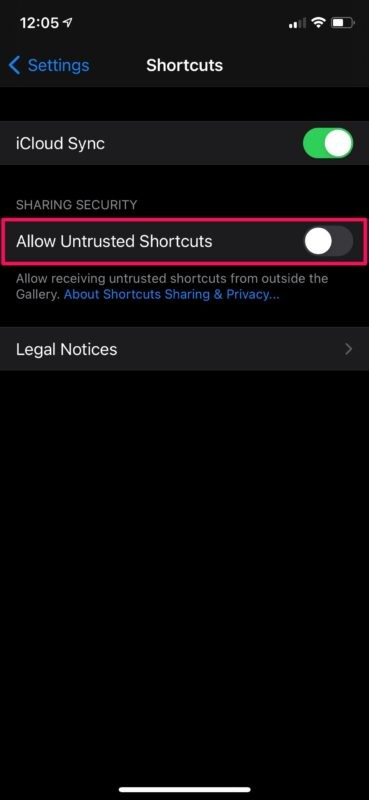
- In the settings menu, scroll down and tap on “Shortcuts” to continue.

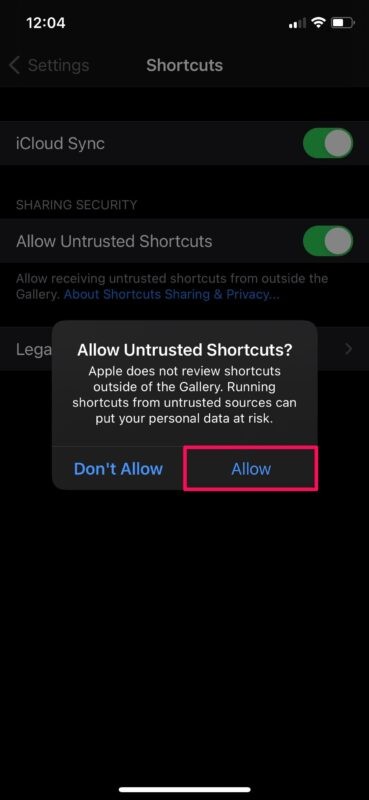
- Here, you’ll find the setting for Untrusted Shortcuts. Tap once on the toggle to enable these shortcuts.
- When you’re prompted to confirm, choose “Allow”. You may be asked to enter your device passcode.
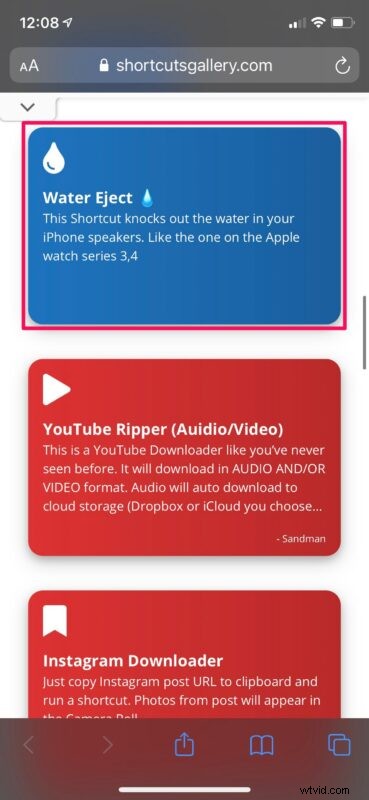
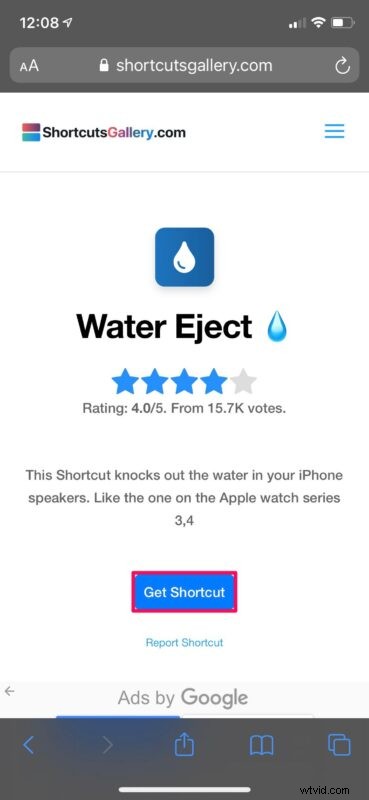
- Next, you’ll need a source to find and install third-party shortcuts. Shortcuts Gallery has a wide variety of iOS and iPadOS shortcuts. Head over to the website and tap on the shortcut you want to install.
- Next, tap on “Get Shortcut” to begin the installation process.
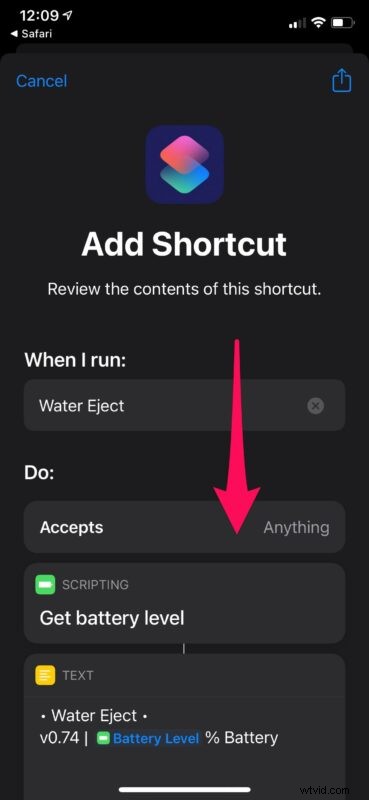
- This will launch the Shortcuts app on your device and display all the actions for that particular shortcut. Now, simply scroll down to the very bottom.
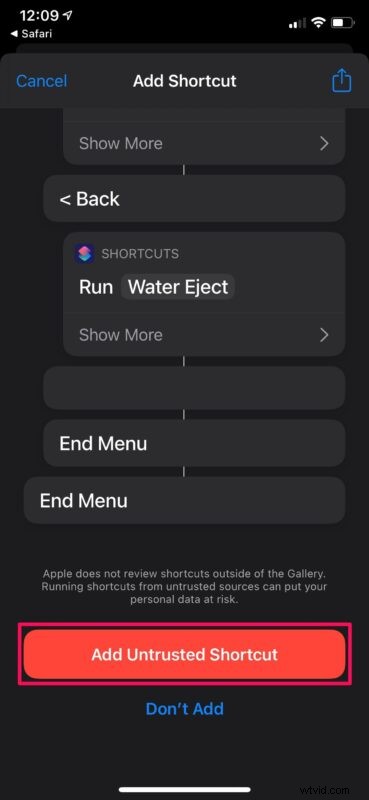
- Now, tap on “Add Untrusted Shortcut” and you’re good to go. It will now show up in the “My Shortcuts” section along with the other shortcuts.
That’s pretty much all there is to it. Now, your device is fully capable of installing untrusted shortcuts and you know where to find them too.
It’s important to note that Apple does not review shortcuts outside of the Gallery section in the Shortcuts app. If you’re running an untrusted third-party shortcut on your iPhone or iPad, don’t forget that you’re doing it at your own risk, so you’ll want to at least trust the source of the shortcut, or scan through the shortcut to make sure it’s not doing anything you don’t want it to do.
Untrusted Shortcuts from third-party sources greatly widens the selection of shortcuts that users have access to. If you’re the kind of person who doesn’t have the time to create custom shortcuts or you find the whole process too complicated, downloading shortcuts created by other users might just be the better option.
Do you have too many shortcuts installed on your iOS/iPadOS device? In that case, you may be interested in learning how you can organize all of your shortcuts and neatly sort them into different folders, which could make it easier to find a specific shortcut in the long run, particularly if you have a bunch of them.
We hope you were able to install your first third-party shortcut on your iPhone or iPad without any issues. How many untrusted shortcuts have you installed so far? Have you managed to find any other sources for third-party shortcuts? Share your thoughts, opinions, and experiences in the comments section!