Did you know you can use AirDrop to send pictures, videos, and files from a Mac to an iPhone or iPad? AirDrop between the Mac and an iOS device is fast and works very well, and it’s quite easy to use for wireless transmission of images, documents, and other data between different devices.
This tutorial will detail how to AirDrop between a Mac and an iPhone or iPad. Of course you can go the other direction as well, as we have previously discussed using AirDrop from an iPhone to a Mac and also how to AirDrop between two Macs to transfer data wirelessly, so you may be interested in reviewing those articles too for a thorough understanding of how this great feature works.
Requirements for using AirDrop from a Mac to iOS device are as follows: all of the devices must be within close proximity to one another, they must support AirDrop (all somewhat modern hardware does), and for best results you’ll probably want to update the iOS versions and Mac OS versions to the latest available. Bluetooth and wi-fi must also be enabled on all involved Mac, iPhone, and iPad too, but when you turn on AirDrop those features are enabled as well.
How to AirDrop from Mac to iPhone or iPad
Using AirDrop to send data between a Mac and an iOS device is a two step process. First you must enable AirDrop on the device that will receive the files or images, in this case that would be an iPhone or iPad. Then, from the Mac, you choose the file(s) or data that you wish to send and access AirDrop to send it over to the receiving iOS device. We’ll split the receiving and sending parts into two different sections for clarity:
Part 1: How to Ready AirDrop to Receive on iPhone or iPad
First, start with the iPhone or iPad that wishes to receive data over AirDrop.
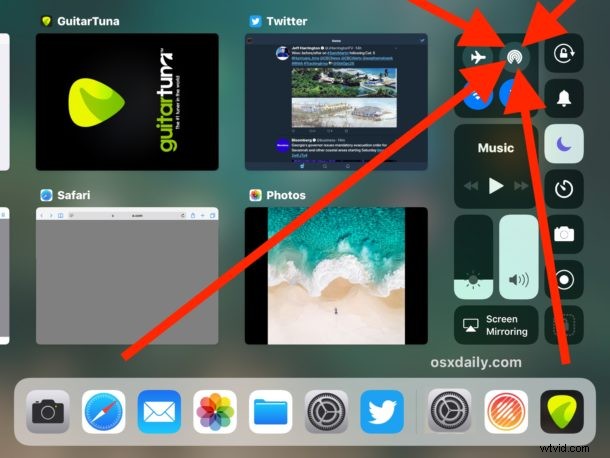
- On the iOS device, access Control Center then tap on the AirDrop icon (it looks like a set of concentric circles with the slice cut out of the bottom)
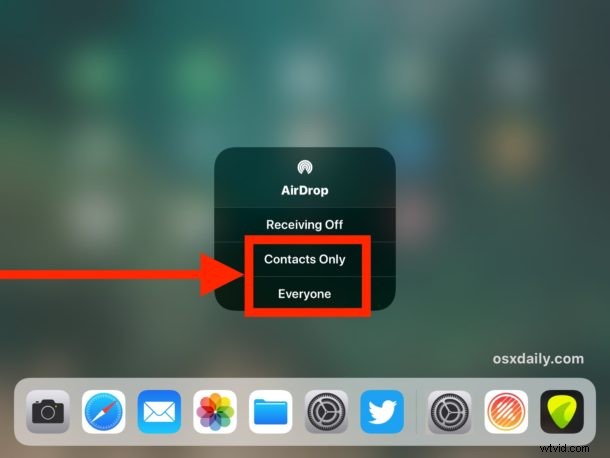
- Choose to accept AirDrop Receiving from either “Contacts Only” or “Everyone” depending on who/what Mac you plan to receive AirDrop data from
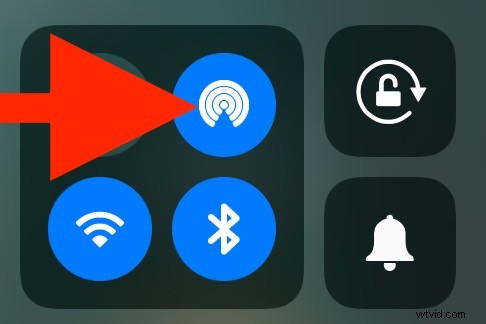
- AirDrop icon will turn blue highlighted to indicate the feature is enabled in iOS
Part 2: How to Send AirDrop Files from Mac to iPhone or iPad
Next, go to the Mac which has the data to send via AirDrop to the target receiving iPad or iPhone.
- Go to the Finder in Mac OS and choose “AirDrop” from the sidebar, in a moment the receiving iPhone or iPad will show up in the AirDrop list on the Mac
- In a new Finder window, locate the files on the Mac you wish to send over AirDrop
- Now drag and drop the file(s) you wish to send from the Mac to the receiving iPhone or iPad as seen in the AirDrop window


Part 3: Receiving and Accessing AirDropped Data in iOS
Back to the iPhone or iPad receiving the AirDropped data, you will find one of a few things happen regarding where the AirDropped files go:
- If the AirDropped data is a picture, image, video, or movie, it will appear in the Photos app in the Camera Roll, as you can see here with an amazing Windows 95 photo
- If the AirDropped data is a different file type like a PDF, text document, archive, word doc, pages file, or similar, a pop-up will appear asking what you wish to open the AirDrop data with, or alternatively you can choose “Save to iCloud Drive” to store the AirDropped data in iCloud Drive


That’s it! As you can see AirDrop is super easy to use and very convenient, it’s one of the easiest ways to get data from Mac to Mac, from a Mac to an iPhone or iPad as described here, as well as AirDropping from iPhone to Mac too.
Once you’re finished using AirDrop, remember to turn off AirDrop again so that you aren’t leaving your AirDrop receiving open to anyone else, and also to prevent any unnecessary battery drain.
* Generally speaking, using AirDrop with “Contacts Only” is safer and recommended, but you must have the sender in your contacts list of the iOS device in order for them to see your AirDrop signal. Using ‘Everyone’ can be more compatible and a bit easier, but note that literally anyone can send you AirDrop data at that point if you leave that enabled, thus it’s best to turn off AirDrop after you are finished using it.
If you’re having any difficulty getting this working, remember to update iOS and Mac OS to new versions, enable BlueTooth and Wi-Fi, and be sure the devices are close together. Beyond that you can follow some AirDrop troubleshooting tips for iPhone and iPad, use AirDrop compatibility mode on the Mac, and be sure AirDrop is enabled in iOS so that it shows up.
Do you have any other AirDrop tips or tricks? Let us know in the comments below!