There’s a misconception that adding subtitles is complicated, time-consuming, and expensive to do. This is totally true if you're using outdated and poorly designed tools or paying for the expensive time of a person who's manually transcribing your video and billing you by the minute.💰
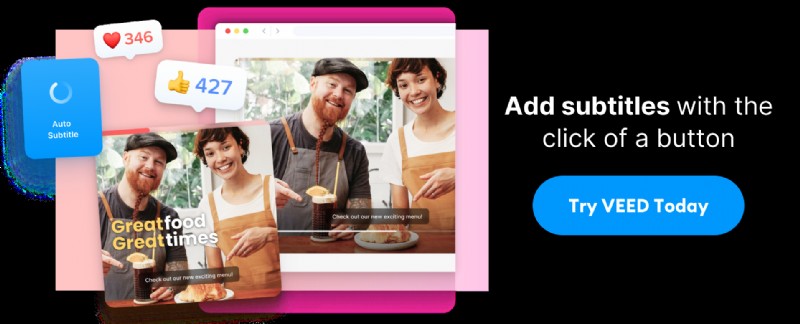
But this is 100% avoidable. With VEED's suite of video workflow tools you can automatically add subtitles to your videos with a click of a button.
Here’s how to add subtitles or captions to your video quickly and easily using VEED.
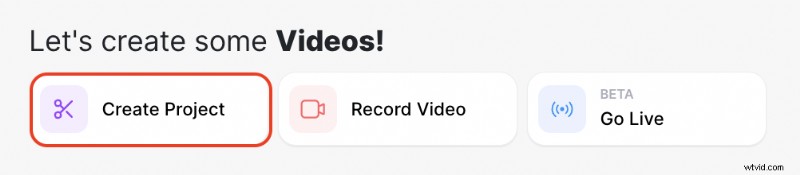
1. Go to VEED.IO and upload your video
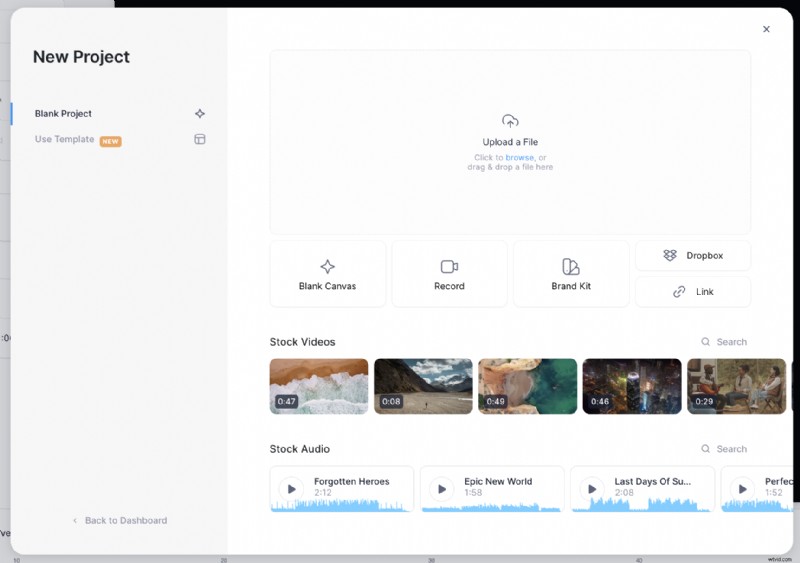
If you don't already have a VEED account, go ahead and create a free or paid account. When you login to your workspace you can click on create project to load the upload screen.
From there, you can upload your video file by clicking on browse to search your computer files. You can also upload via Dropbox or a link.
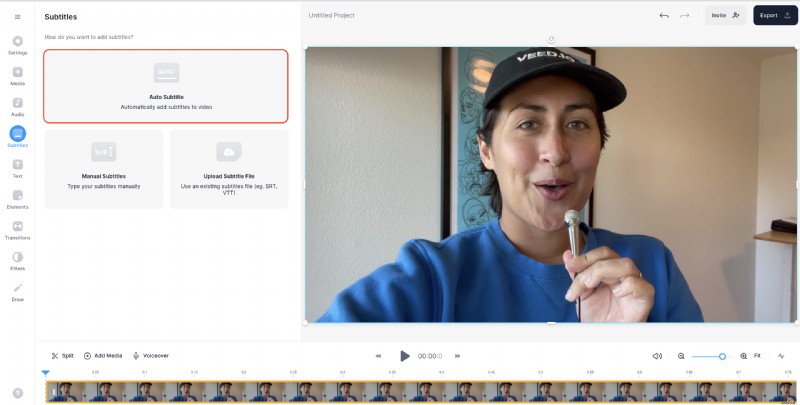
2. Click on the subtitles button to reveal subtitling options
Now that you’ve uploaded your video to the VEED editor, all you have to do is open the Subtitles tab.
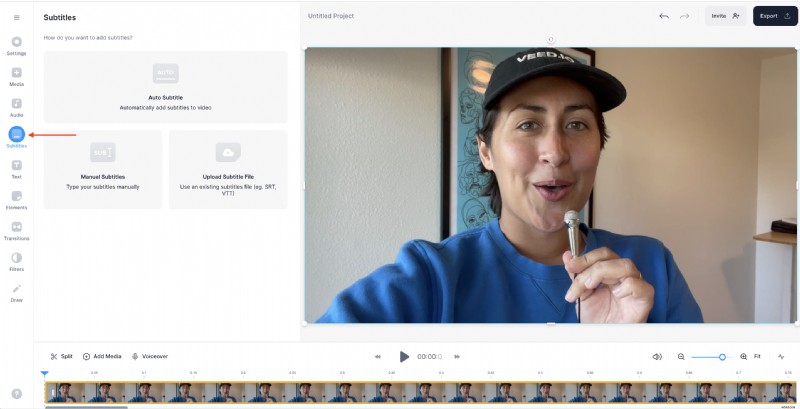
3. Click on Auto Subtitle to automatically add captions to your video
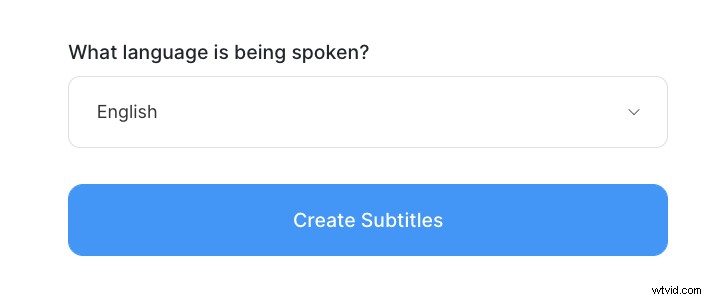
This generates subtitles automatically for your video. You can also choose to upload your own SRT subtitle file if you have a transcription made alreadyor manually type subtitles yourself.
Then, select the language spoken in your video so VEED and then click create subtitles to start the generator.
This can take a few seconds or minutes, depending on your video’s length and if you’re downloading in high-definition or not. If you want to be productive during this time, get a head start on writing killer captions for your videos and designing thumbnails.
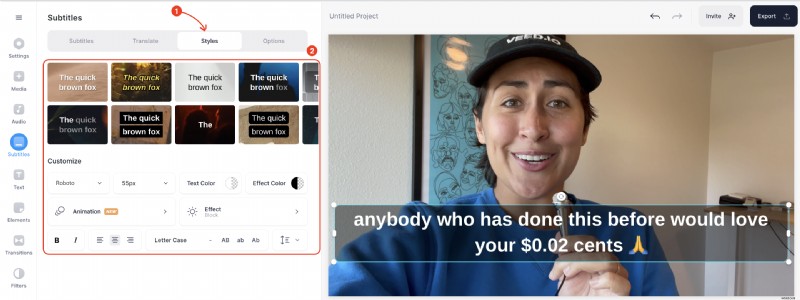
4. Edit and customize your subtitles
Your video workspace should look like this now. Regardless of whether AI or an actual human being captioned your video, it's best to do a quick run-through to check and edit any spelling or words that are wrong.
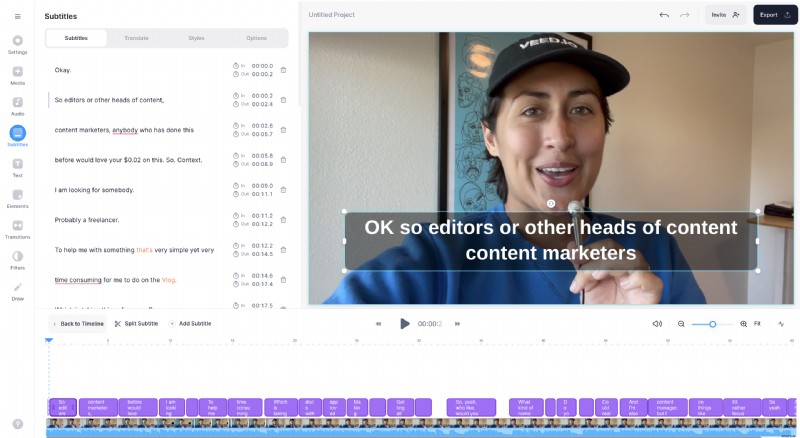
If you want to customize your subtitles, here are some things you can do easily within the subtitle editing panel.
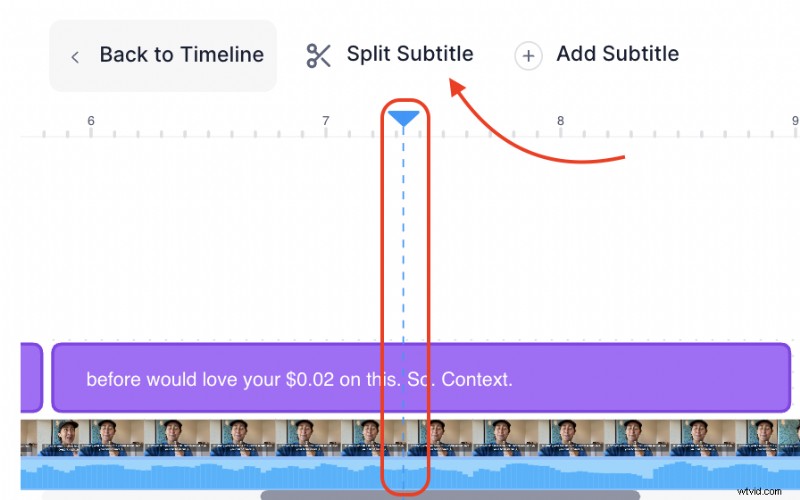
How to split subtitle lines
Split subtitles by on where you want to split a subtitle in the video timeline and either pressing S or clicking on Split. You can also click in the section of the sentence you want to split in the text editor and hit enter to split and create a new line of subtitle text.
Pro Tip: Placement of subtitles is just as crucial with formats like Reels where, depending on where a video is shown within Instagram, the vertical Reel might not always appear full-size. Avoid placing subtitles at the extremities where they can get cut off from the sides, top, or bottom. Aim to have the text a bit more close to the center. You can always reposition the video before posting.
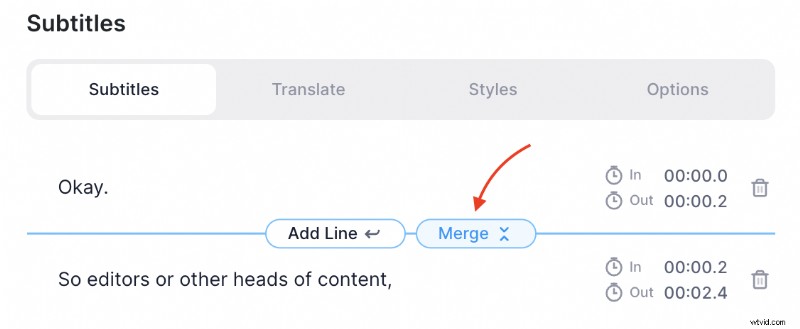
How to merge subtitle lines
Hover between the two lines you want to join. Then click merge to combine them into one subtitle line.
How to change the subtitle font, color and text animation
Choose from one of the presets in the sliders....
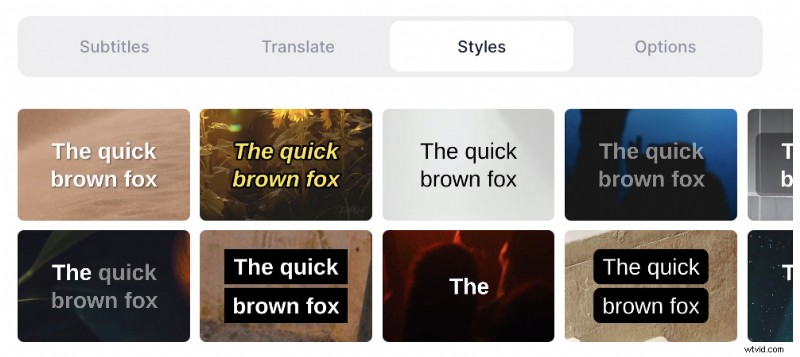
Or fine tune things yourself in the menu below by selecting your font, color, and animation
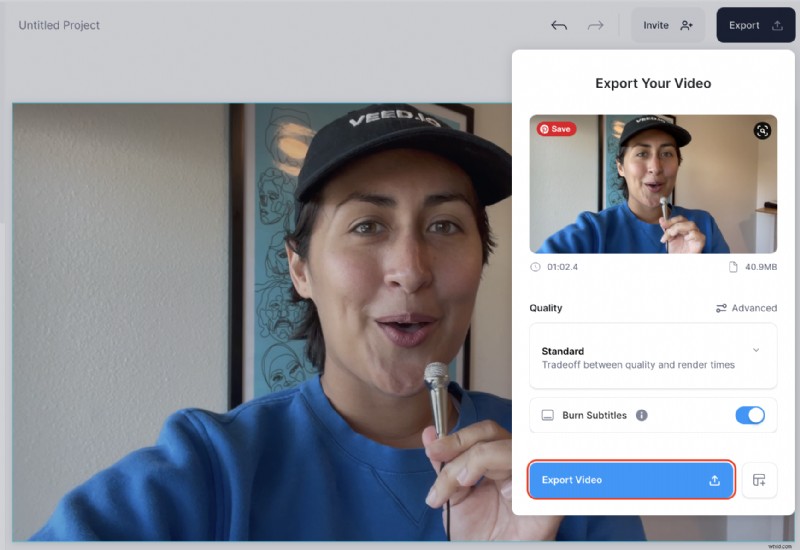
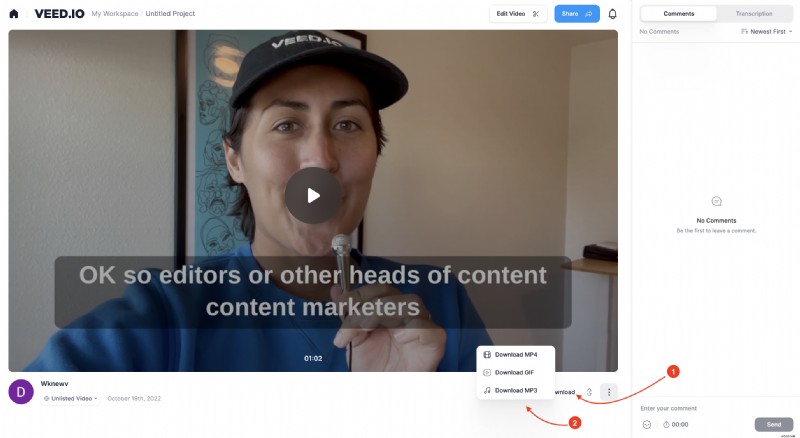
5. Download your video
To download your video, simply click on the Export button at the top-right corner of your screen.

That will open the Export Options tab. Remember to enable the Burn Subtitles option before exporting your video. If everything looks good, click on Export Video.
Once your video is done rendering, you can easily share it with your friends with the public video link.
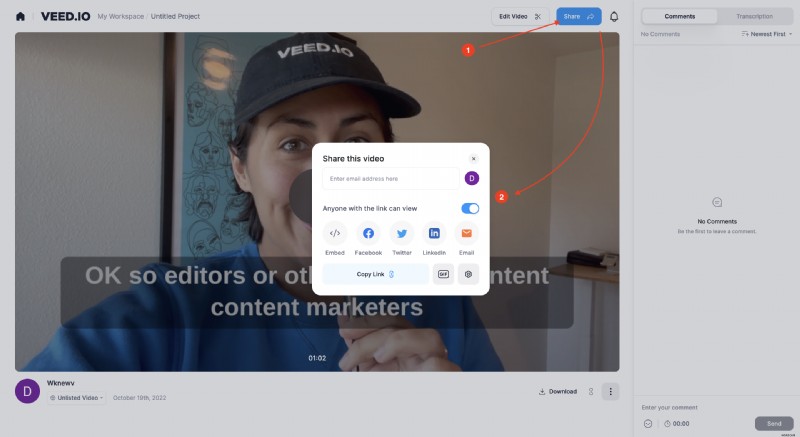
Alternatively, there’s also the option to download it as an MP4 or convert your video into a GIF.
People want know more or less what a video is about before they decide to watch the whole thing. And by adding subtitles to your videos you can increase views by up to 40 percent. Going the extra mile by adding subtitles can mean the difference between losing or gaining another viewer. Get more results out of your video content and add subtitles to your next video with VEED.