Unlike the stills options on your iPhone, the video options are somewhat limited. Even so, the small amount of adjustment that you do have will still enable you to do a great deal. Here we show you iPhone video to the next step
When I say limited, I do mean limited, as standard and without the assistance of an app, the only other options for video other than resolution and frame rate are focus and exposure.
Focus might seem pretty straightforward, just tap to focus and that’s it, right?
Essentially, but there is more. Let’s explore what you can do.
- How to get started with iPhone video
Focus on your subject
Focusing on your subject is the most obvious touch to set feature. However your iPhones a clever piece of kit, and it may have a different idea about the focus point to you.
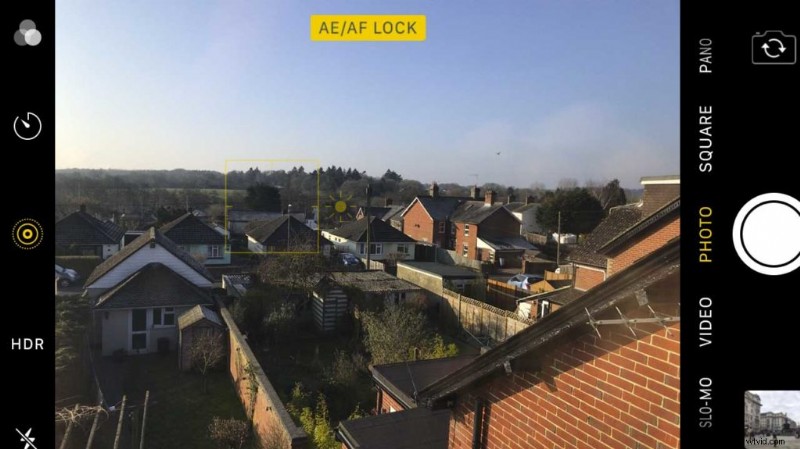
Apple, however, has pulled on the experience of countless imaging professionals and added a feature called focus lock. It’s called AE/AF lock and enables you to lock both the focus and exposure.
AE stands for Auto Exposure, and AF stands for Auto Focus.
You can’t separate the two, but don’t worry this is common and enables you to select your subject, lock the focus, and ensure that the exposure is correct.
- Apple iPhone X Camera Review
How to use iPhone Focus Lock
- Frame your subject and tap the screen to select the focus point
- Hold you finger down on the focus point for a couple of seconds and a small yellow box will start to flash with AE/AF Lock appearing also in yellow
- The focus is now locked, reframe to something else and you’ll see its out of focus
- To release focus lock tap elsewhere on the screen
How to use iPhone Exposure Lock
- Frame the scene and tap on the area of the image you wish to use as the point of exposure
- You’ll see the brightness of the image adjust to the point you touched should now be perfectly exposed
- Hold your finger down on the exposure point (This is the same as the Focus point) for a couple of seconds, and a small yellow box will start to flash with AE/AF Lock appearing also in yellow.
- Now reframe the shot and you’ll see if you point the camera somewhere bright the exposure will be too bright as the exposure has locked to the point you set
- To release exposure lock tap elsewhere on the screen
Brighten and darken the image
Using focus and exposure lock is extremely handy especially if you’re filming someone who is moving from light to dark.
Locking the focus and exposure will stop the camera searching for the subject or auto-correcting the exposure as you move from light to dark.
However, if your subject has moved from an outdoor space inside then while you may want to avoid the exposure fluctuations, you will need to increase that exposure at some point.
A handy feature on the iPhone is the exposure compensation.
- Huawei Mate 10 Pro Camera Review
How to use iPhone exposure compensation
- Tap on the iPhone screen on the point of focus
- You’ll see the yellow box appear with a small sun icon
- Move your finger up the screen to brighten the exposure
- Move your finger down the screen to darken the exposure
- HTC U11 Camera Review