
Looking forward to meet up with your friends, family, colleagues, or an appointment? If you use Apple Maps as your preferred navigation tool, you will be able to share your routes estimated time of arrival with any of your contacts right from your iPhone. Not only is ETA sharing convenient, but it also offers a way to give the recipient an idea of how long it’ll take to get to a destination, but without using the using the location sharing feature directly.
We’ve all been in a situation where we had to tell people how long it’s going to take before we reach the destination. Most of the time, the ETA that we provide is a guess and not really accurate. This is often due to traffic and other events going on with the road or route itself. However, by sharing ETA within Apple Maps, you’re sending an accurate arrival time to your contact that automatically updates as you navigate.
If you’re interested in learning how this handy ETA sharing Maps feature works with iPhone, read on.
How to Share Arrival Time with Maps on iPhone
Before you get started, make sure your iPhone is running iOS 13.1 or later, since the ETA feature isn’t available on older iOS versions. Assuming you’re on a modern iOS release, here’s what to do:
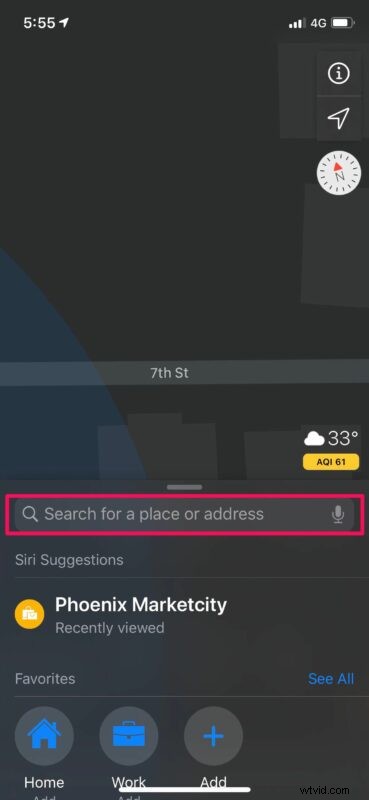
- Open the default “Maps” app on your iPhone.

- Use the search bar to find the place you want to navigate to.
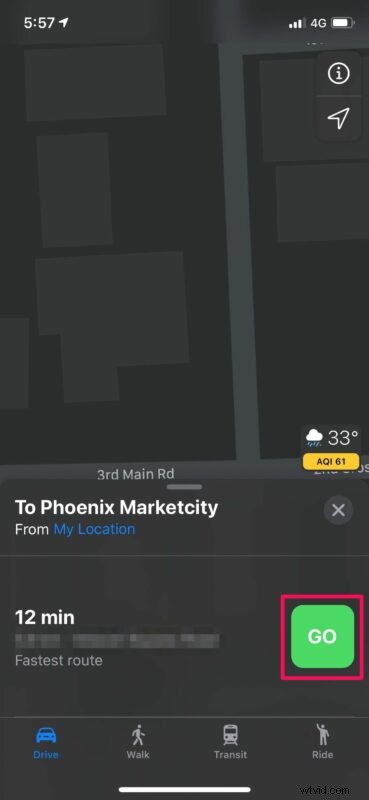
- Now, tap on “Directions” to view your route.
- Next, tap on “Go” to enter navigation mode within Maps.
- Once you’ve entered the navigation mode, tap on “Share ETA” located at the bottom of your screen, as shown below.

- Now, simply choose the contact you want to share the arrival time with.

There you have it, you’ve learned to share arrival time with Maps on your iPhone.
By doing this, you’re basically sharing your live location with the contact you chose. Apple Maps continues to share your location and the route you’re taking until you arrive at the destination. However, if you want to stop sharing your ETA at any point of time, simply tap on the contact name once again.
Of course you can also always share your location with someone too, which is a really handy feature for family, partners, spouses, friends, and many other situations too, but that approach is constant whereas ETA sharing is specific to the destination travel.
Thanks to this new Share ETA feature, you don’t have to call your friend or colleague every few minutes to update them while you’re driving, (which puts your life at risk anyway as it takes your attention away from the road, if you’re driving). It’s also a great way to make sure your parents, family, or partner aren’t too worried when you’re traveling to and from somewhere.
If you’re regulating sharing your ETA with one of your contacts, you can assign them to favorited addresses. This allows Apple Maps to automatically share your ETA with the particular contact, as soon as you start navigation.
There are other similar features available too using the Find My service, including directly sharing your location from iPhone and notifications for when someone leaves or arrives at a destination, and of course finding someones location using the Find My app too if you want to see where they are exactly on a map.
So there you have it, you’ve now learned how to share arrival time using Apple Maps on your iPhone. Is this a feature you’ll be using on a regular basis? Let us know your thoughts and opinions in the comments!