Whether it’s the filter you use or the frame rate you choose, something’s slowing you down. We can fix that! Here’s how . . .
Nothing can replace filming done with intentionality and good planning. However, there are a few tricks to quickly improve your footage while you’re out shooting, or once you’ve brought your footage into the post-production process.
Here’s how to make videos look better in under thirty seconds, more or less.
Choosing the Correct Frame Rate
Shooting and editing at 24fps will make your video look more cinematic and immersive. If you’ve already shot in 30fps or higher, you can still edit and export in 24fps. There are many different routes you can take once you’ve actually shot your footage.
However, having an understanding of what your final image needs to look and feel like, before you actually start rolling, will help you immensely in the post-production process.
Here are a few things you should consider when choosing to change up the frame rate, via Lewis McGregor.
Learn Color Grading Basics
There are several color correction effect options in any of the big editing programs. While each of these programs does have a significant learning curve, there are hundreds of videos and resources for you to master the basics of color grading.
Whether you want to learn how to apply a LUT, how to make a LUT, or just curious what another NLE’s color grading interface looks like, here’s where to start:
Premiere Pro
Final Cut Pro X
DaVinci Resolve
If you find yourself working with footage that’s been shot with two different cameras—for example, your phone and a mirrorless or DSLR camera—your footage will look significantly different from each other.
In this tutorial from Todd Blankenship, you can learn how to approach grading the two shots with the intention of getting the look and colors as close to each other as possible.
Use ND Filters
These “neutral density” filters are a way for you to manage the overall exposure for your shot, controlling the light that is hitting the sensor. Because you’ll have to set your shutter according to whatever frame rate you need to shoot at (24, 30, 60, 120), your aperture and ISO are the two factors you’ll have to control.
And, if you’re wanting shallow depth of field for any daytime shoot, you’re going to overexpose/blow-out the image if you open up the aperture, without anything controlling the light as it comes in. This is where these filters come in handy. So, usually you’ll need an ND filter if you’re shooting during the daytime, or towards the end of the day.
In this video from Moment, you can see the difference between a shot that’s using an ND filter, and one without.
If you really want to get the most out of your camera’s sensor and the lens you’re using, make sure you grab an ND filter to attach to your lens.
- Some of the Best and Most Affordable ND Filters Available
Stabilize Your Footage in Post
Whether you shot your video handheld or exclusively on a tripod, it’s highly unlikely your camera moves were 100% smooth. I know my BMPCC6K doesn’t have any type of in-body stabilization. So, when I bring some of the handheld footage into post, I’m like, Ok, wow, this is terrible, I need to find a new career.
Then, I remember that these programs do a lot of the heavy lifting for us. These shaky shots can be a stylistic choice, but more often than not, they’ll leave your viewer either not enjoying the video, or thinking you’re a little unprofessional.
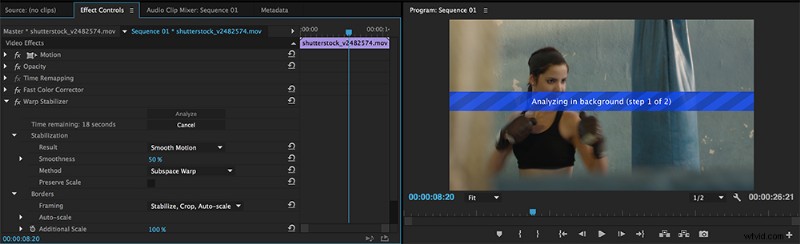
Just like color grading, each editing program offers different tools and built-in plugins for stabilizing your footage in post-production. Most of these generally function in the same way—they take your image, push in (crop in), and try to reduce the amount of shake by keeping a still frame within your moving frame, if that makes sense.
Here are a few tutorials for how to approach this within each of the major NLEs:
- Premiere Pro
- Final Cut Pro X
- DaVinci Resolve
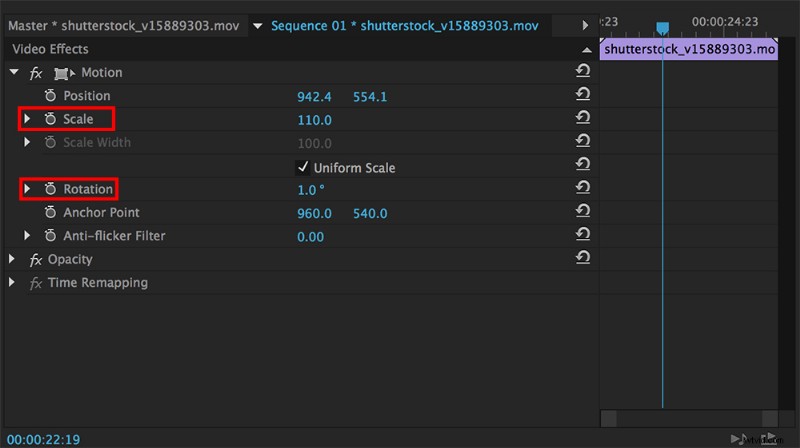
When to Crop
Based on the same principles as stabilization, cropping your shots can help you change the composition to your liking. Depending on the camera you shot with (and the resolution you plan to export at), you’ll have at least a small window to zoom in on shots. This will leave you with up to 15% (or so) of room to move your shot up, down, left, or right. You can also rotate across both axes to adjust for a crooked tripod or angle.
Another way to think about this technique—to crop in and reframe your image—is to think about these things while you’re out shooting. Composition is just as important as learning how to expose an image.
If you’d like some helpful tips on how to think about subjects in the frame, Jason Boone recently covered this topic for Shutterstock Tutorials. Check it out:
Again, while these tricks will help your footage on the fly, it’s always easier to spend some extra time preparing for a shoot than covering your mistakes in post. If you’re looking to save more time during your next video production, check out these video hacks!
A few more filming tips, tricks, and advice for you:
- From Filming to Editing: Should You Still Be Shooting in 1080?
- Tips for Low-Budget Filming in the Rain
- From Composition to Dehaze: Professional Tips for Filming at the Coast
- Which Aperture Should You Use For Filming Establishing Shots?
- Three Quick Tips for Filming in the Midday Sun Without Diffusion Tools
Cover image via Andrey Armyagov.