
Did you know that you don’t always have to keep your credit card linked to your Apple account for transactions? Instead, you can use your Apple ID balance for purchasing apps and subscribing to Apple services, such as iCloud and Apple Music. This is accomplished by making sure your Apple ID has sufficient funds attached to it.
Although a valid payment method is necessary to make purchases from Apple, you can transfer some money to your Apple ID balance and remove the linked credit card or PayPal account if necessary. This could be quite useful if you want to let your kids download paid apps or subscribe to services without giving them access to your credit card. By adding funds to their accounts, you’re also limiting how much money they can spend on the App Store.
Interested in learning how you can do this on your iOS or iPadOS device? Let’s check it out.
How to Add Funds to an Apple Account on iPhone & iPad
In order to add funds to an Apple ID, you’ll need to add a valid payment method first. Once you’ve done that, simply follow the steps below to get started.
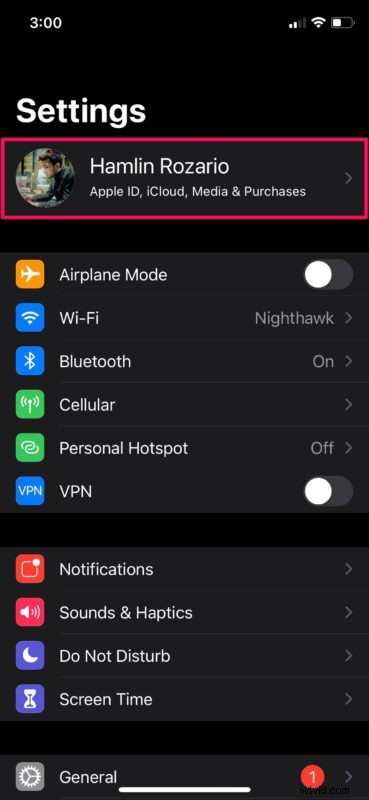
- Head over to “Settings” from the home screen of your iPhone or iPad.

- In the settings menu, tap on your Apple ID name which is located right at the top.
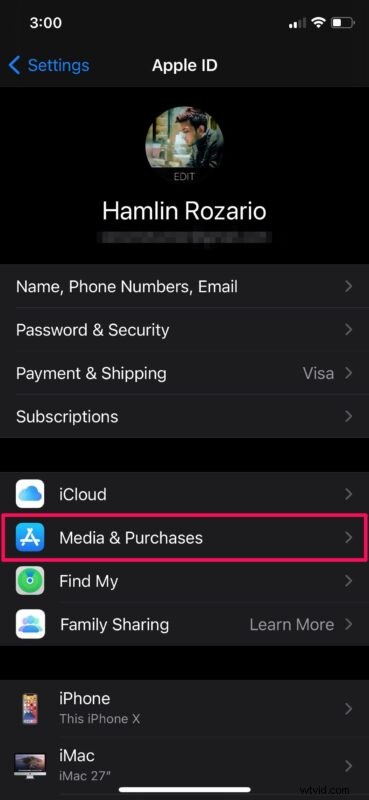
- Next, tap on “Media & Purchases” located right below the iCloud option, as shown below.
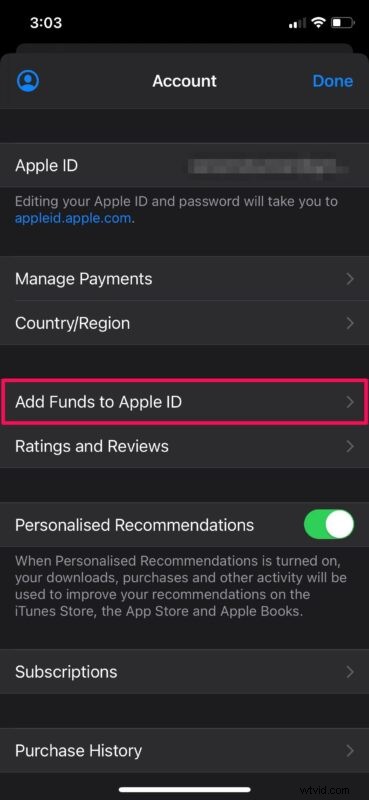
- You’ll be asked to authenticate with Face ID or Touch ID depending on your device. In this menu, tap on “Add Funds to Apple ID” to proceed.
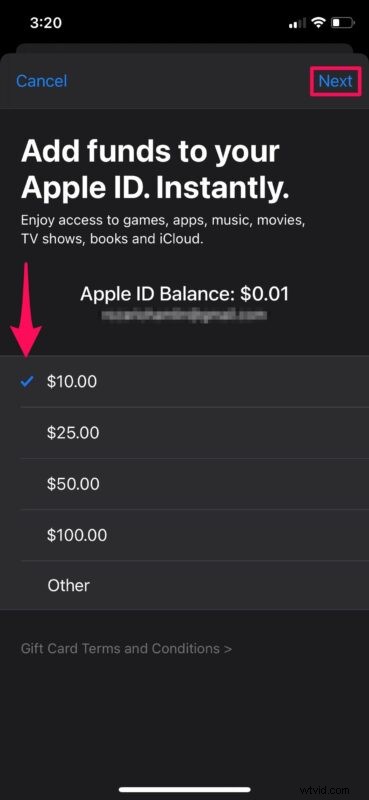
- Now, simply select the amount you want to add. You can use the “Other” option to add a custom amount. Once you’re done, tap on “Next” located at the bottom-right corner of the menu.
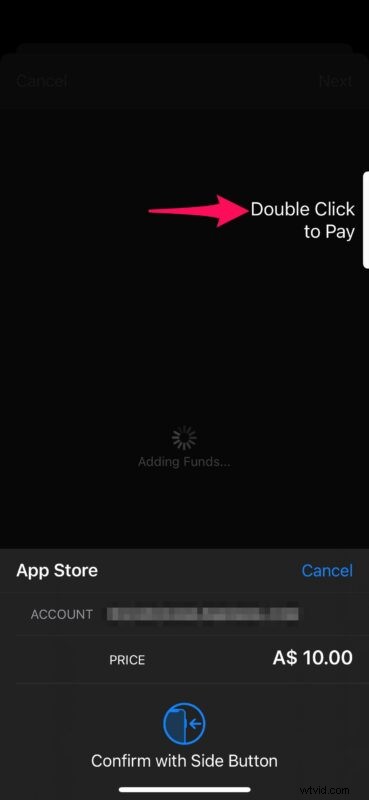
- You’ll now be prompted to verify and confirm your purchase with Face ID or Touch ID.
And that’s how you add funds directly to an Apple ID account.
Now that you’ve added some money to your Apple ID balance, you can remove your linked payment method from the Apple account and still continue making purchases from the App Store and subscribe to services until you run out of balance.
This is just one way to add funds to an Apple account. If you don’t want to add your credit card details to your kid’s Apple account even temporarily for transferring funds, you can always purchase an Apple gift card and send it to your kid’s email after which they can redeem it for Apple ID balance. This would be a more convenient option for parents.
Are you setting up a new Apple account for one of your kids? In that case, we’d like to inform you that you can create an Apple ID without even adding a credit card by simply trying to download a free app from the App Store.
Were you able to add funds as Apple ID balance from your iPhone and iPad? What’s your take on using Apple ID balance for downloading paid apps and paying for subscriptions? Share your thoughts and opinions in the comments.