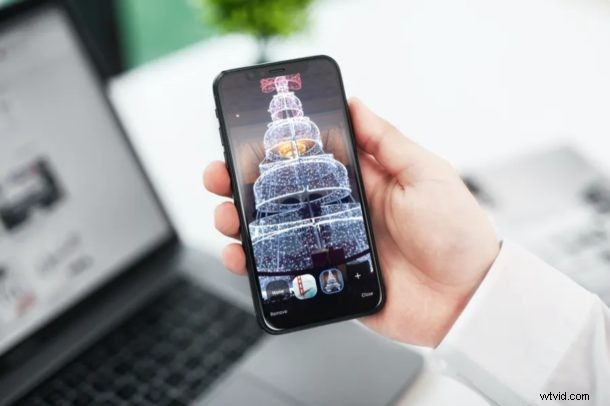
Zoom is a popular video conferencing solution that allows people to participate in remote meetings, online classes, or even just social events. One of the fun ways it stands out from the rest of the video chat competition is by letting users change their backgrounds while they’re in a video call.
The virtual background feature that Zoom has to offer allows you to display an image as your background during a Zoom meeting. This is extremely helpful in cases where your room is just a mess or if you’re having privacy concerns and don’t want other people in the meeting to figure out where you are. Masking the actual background using Zoom is a fairly straightforward procedure on an iOS device.
Interested in trying this feature out during your next Zoom meeting? Consider yourself lucky, because in this article, we’ll be discussing exactly how you can use Zoom virtual backgrounds on both the iPhone & iPad.
How to Use Zoom Virtual Backgrounds on iPhone & iPad
It’s important to note that in order to use virtual backgrounds, you have to be in a video call within Zoom. So, make sure you either host or join a Zoom meeting before going ahead with the procedure. If you don’t have the app, download it from the App Store. Now, let’s take a look at the necessary steps.
- Open the Zoom app on your iPhone or iPad and join/host a meeting.

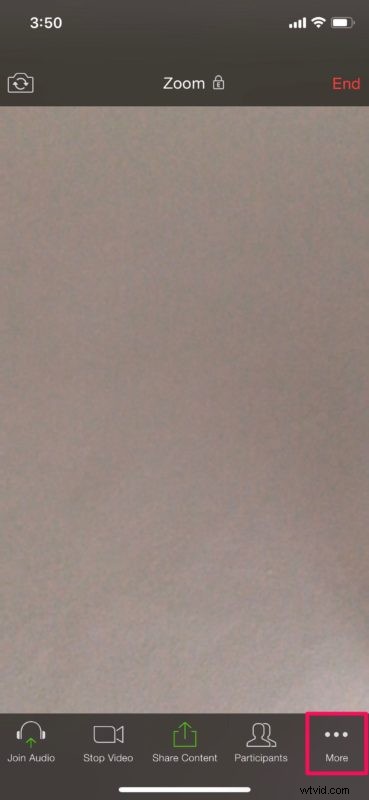
- Once you’re in an video call, tap on the “triple-dot” icon at the bottom-right corner of your screen to access more options.
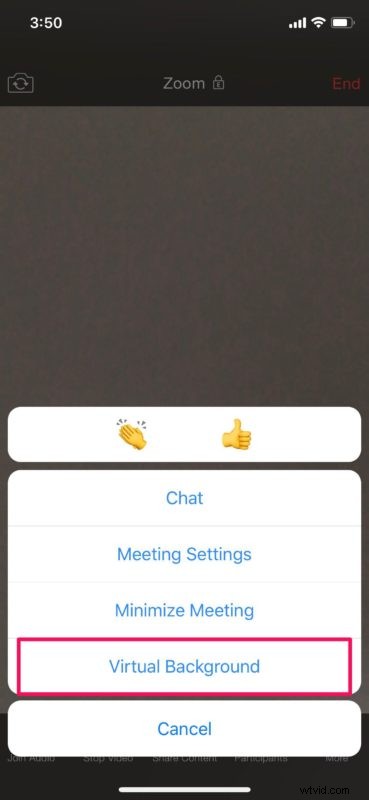
- Now, select “Virtual Background” as shown in the screenshot below.
- Here, you’ll see a pre-existing background that you can immediately use as your virtual background. However, you’re not limited to just that. Tap on the “+” icon right next to it.

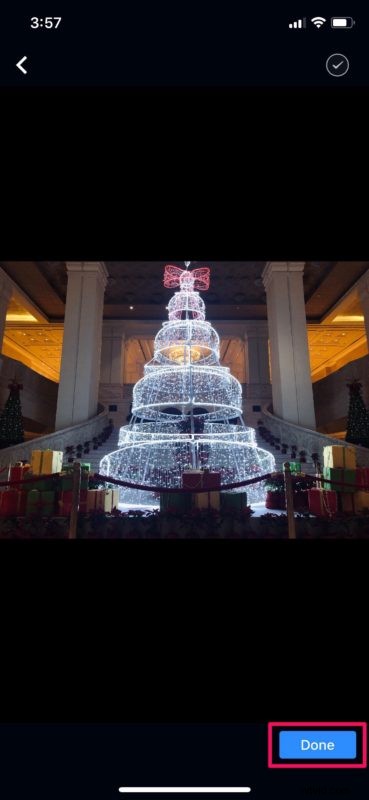
- This will open up your photos library. You can select any photo in your library to use as your virtual background.

- Once you’ve selected a preferred picture, tap on “Done” at the bottom-right corner to add it to the list of virtual backgrounds within Zoom.
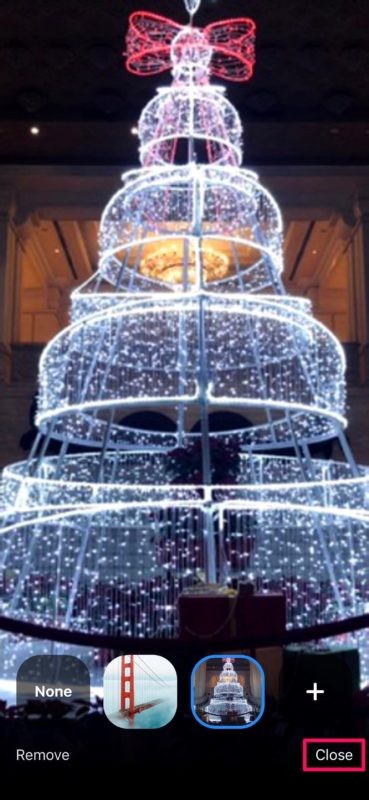
- Now, select the custom background you just added and tap on “Close” to go back to the live meeting. You’ll notice that your virtual background has already masked your actual background.
There you go. Now you know how to use virtual backgrounds during a Zoom meeting right from your iPhone or iPad.
Zoom’s virtual background feature works best with a green screen and uniform lighting. It’s similar to how streamers mask their backgrounds. The green screen helps Zoom to easily detect the difference between you and your actual background. Regardless, the feature works fine as long as you’re not moving around too much.
If you use Zoom on a PC or Mac, you can use videos as virtual backgrounds too. However, maximum video resolution that can be used as a background is limited to 1080p. We hope this feature gets added to the iOS version as well at some point down the line.
Apart from all these, Zoom also lets you use your favorite Snapchat filters with the help of Snap Camera. You can also share your iPhone or iPad screen with other participants in the Zoom meeting in a matter of seconds. This is pretty useful if you’re doing presentations online.
We hope you managed to mask your room with a virtual background during your Zoom meeting. What do you think about this handy feature and how well did it work for you? Do share your thoughts and experience in the comments section down below.