Camera filters can offer a fun way to quickly enhance the appearance of a photo, and Apple’s newest iPhone 11, iPhone 11 Pro and iPhone 11 Pro Max arguably pack the best cameras in any smartphone at the moment. With powerful video recording capabilities and advanced features like Deep Fusion computational photography, it’s hard to beat what the Cupertino-based tech giant brings to the table. That being said, no matter what kind of photos we take, sometimes you’ll want to use the added filters feature of Camera app to further enhance your photography work.
If you’re one of those iPhone users who recently upgraded to the new iPhone 11 and iPhone 11 Pro, you might notice that the filters option seems to be missing from the Camera app. Previously it was located at the top-right corner within the camera app, but Apple has redesigned the UI to squeeze in more features like Night mode, QuickTake video and more. Don’t fret, Apple didn’t give up on filters feature like they did with 3D Touch. Instead, they just moved it to a different location within the Camera app.
In this article, we’ll be discussing exactly where you can find the filters section in the stock Camera app on the latest iPhone models, and how to use them if you’re interested. So, without further ado, let’s take a look at the necessary procedures.
How to Use Camera Filters on iPhone 11 & iPhone 11 Pro
The iPhone 11, iPhone 11 Pro and iPhone 11 Pro Max, all feature the same redesigned Camera app, so regardless of what variant you own, the following steps remain the same.
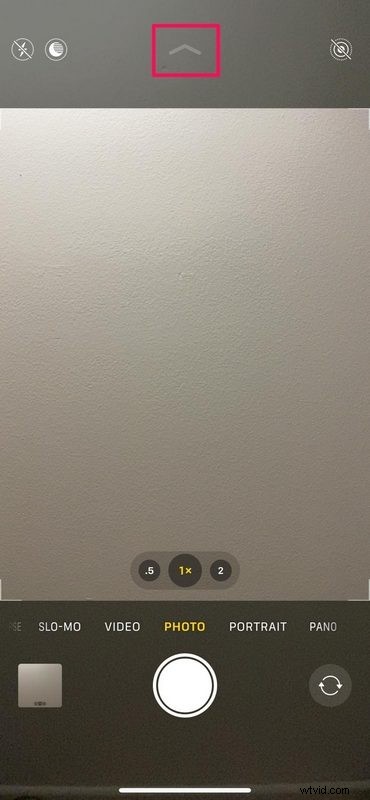
- Open the Camera app and tap on the “chevron” arrow-looking icon located at the top of the screen. This action would bring up additional options at the bottom, right above the shutter icon.
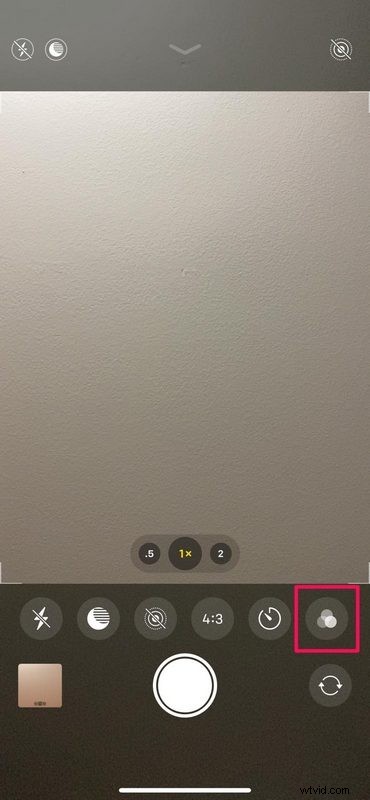
- As you can see in the screenshot below, you’ll notice a row of various camera functions including the filter icon at the extreme right, next to the timer mode option. Simply tap on the “circles” icon to continue.
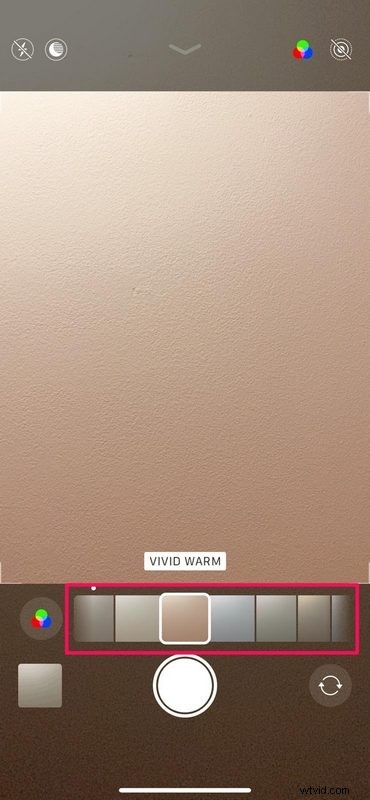
- Now you’ll have access to the same set of filters you had on your older iPhones. Simply choose the one you prefer and take the picture as you wish.
That’s really all there is to it. The filters you’ve always known and loved are here to stay, except for the fact that it now takes a couple of extra steps to access them.
Adding filters to your photos is quick and easy way to enhance them, but there are several other tips and tricks that you could use to improve your iPhone photography skills.
This change to accessing filters could be confusing or even a tad annoying, especially if you’re coming from any of the older iPhones or iPads. However, this isn’t the only feature that’s been moved to a different section within the camera app. Multiple existing functions like Live Photo, Timer mode, ability to switch aspect ratio and more, have been moved around within the Camera app too, and they’re all now tucked behind that little arrow icon at the Camera app screen.
Depending on the features you constantly use with the iPhone Camera app, the redesigned UI might be something you either love or hate. That being said, Apple has done a pretty good job at accommodating a bunch of new camera features without cluttering the user interface, so there are more features than ever before while still having an element of simplicity to Camera app. Considering how often Apple makes changes to their camera application, we wouldn’t be totally surprised if they made changes down the road again and moved some of these camera options to other places or even where they used to be, perhaps even depending on iPhone user response.
By the way, you can also now add filters to videos on iPhone and iPad too, so if you’re a filter fanatic then you might enjoy that capability too.
We really hope all of you have managed to access your favorite camera filters on your shiny new iPhone 11 and iPhone 11 Pro. So, what’s your favorite filter and how do you feel about the redesigned camera interface? Do let us know your thoughts and opinions in the comments section down below.