Red, hot, and earry. Let’s fix those pesky ears with these quick tips in DaVinci Resolve. Video tutorial included!
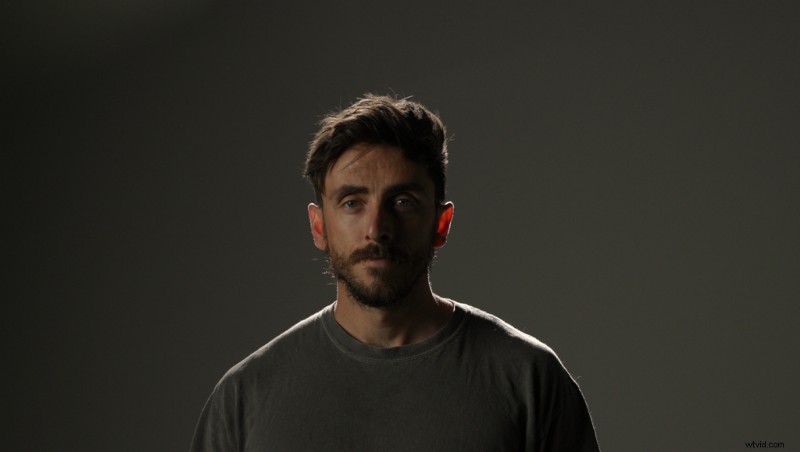
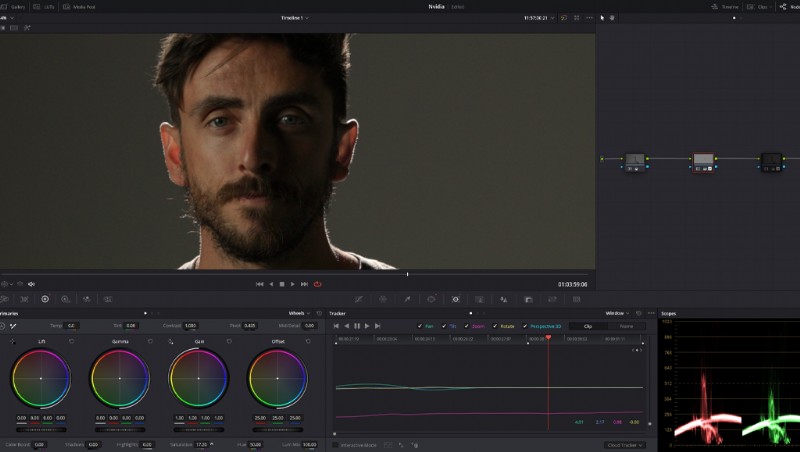
Several weeks back, I was working in the studio as a two-man band. While I was setting up the lights used to illuminate my presentational spot, I asked my colleague to act as my step-in so I could visually see the end result.

Notice anything wrong with the image? Well, there isn’t anything wrong, to be honest. Everything looks great.
However, I didn’t account that my colleague has long hair, and I do not. As a result, in my shot, I have bright red ears from the rim light.
Of course, this would be something you’d want to correct on set as there’s only so much we can do digitally, and you’d do such a thing by adjusting the light position.
If that isn’t an option, you can use a flag to cut the area of the light that’s hitting the ears. As there’s just skin and blood in the outer part of the ear, it becomes somewhat translucent when hit by bright lights.
It can look natural in some circumstances, but here, it doesn’t look great.
Let’s have a look at how to fix this.
Quick Fix in DaVinci Resolve
I’m in Resolve, and the first thing we’re going to do is isolate the ear. You could use the qualifier if your ears are overly red.
However, because part of my cheeks and lips are reddish, too, I’m going to hold off using the qualifier and, instead, use a power window.
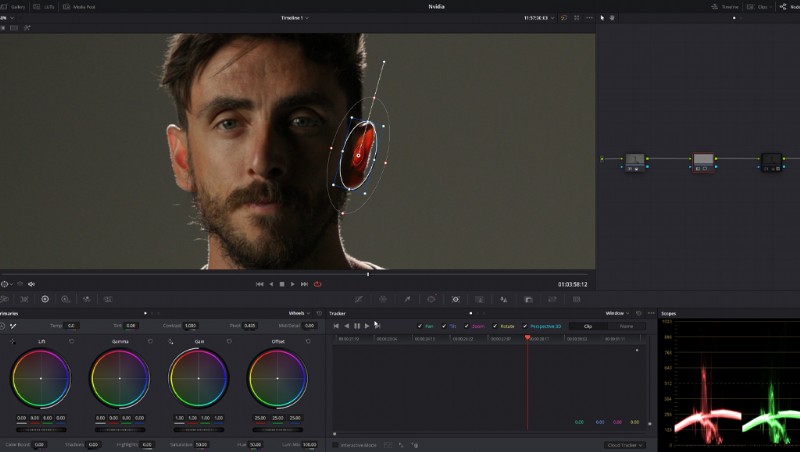
Because we’ll be making color adjustments, you want to set this power window properly around the ear with no heavy feathering. With the power window positioned, I’ll track the power window as I move throughout this shot.
With that done, we can start making adjustments to the ear.
Now, you may initially gravitate towards lowering the brightness of this area. After all, we have this issue because the light that’s hitting my ear is too bright.
But unfortunately, as noted, we’re limited in how we can fix this problem. And, in this case, lowering the highlights or the overall offset doesn’t give us the desired results. It just looks like a blacked-out area.
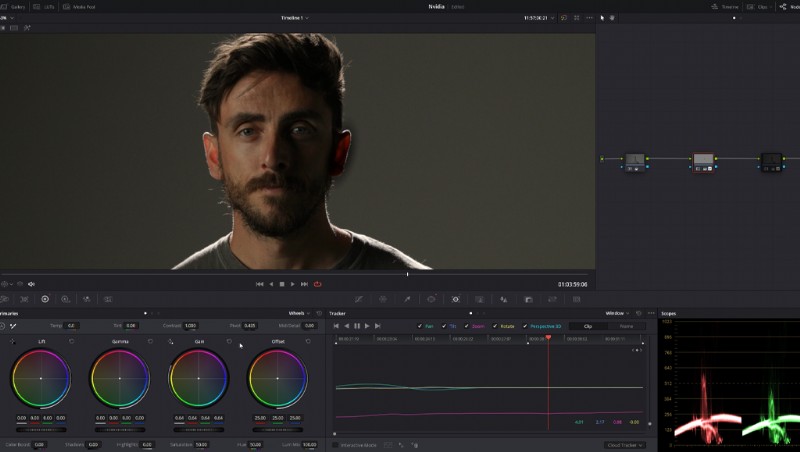
But, here’s something to consider. The brighter an object, the more saturated it becomes. Of course, there’s a limit until the object’s color washes out but, in general, more light correlates to more saturation.
So, we can instead look at lowering the saturation and. In doing so, it starts to look a lot more flattering and less of an ear sore . . . I mean eye sore.
However, we can still go that extra mile to make it look better. Now, as we’ve sucked a lot of the color out of the ear, we’re going to use the offset wheel to slightly push in some yellows as it moves the ear color near the color of my skin.
Of course, depending on the color of the skin for the talent, how you push the offset wheel will differ. You could also use the hue slider if you don’t feel comfortable using the color wheels.
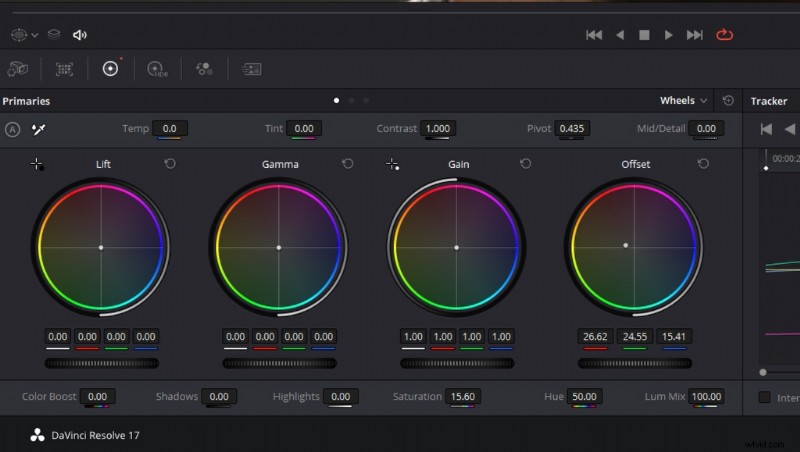
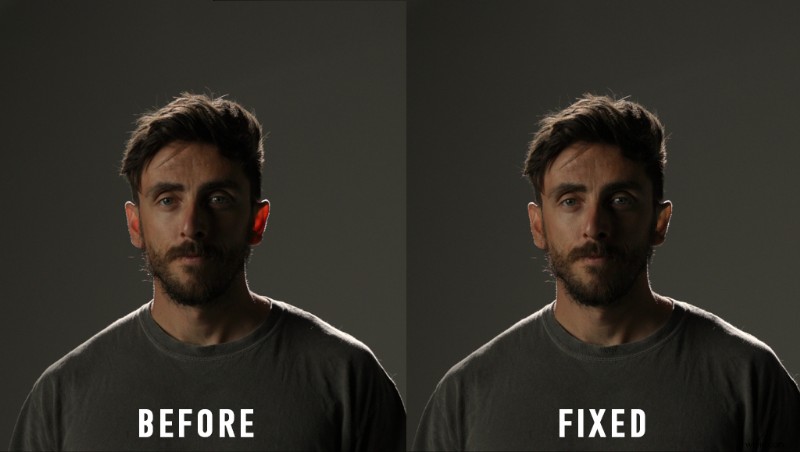
With saturation lowered and the hue adjusted, we have a more presentable image that doesn’t immediately draw the audience’s eye to two overly red ears.
Fixing photos can be a task. Let’s make it easier for you with these helpful gems:
- Fix It In Post: Correcting Footage and Audio in Final Cut Pro
- How to Transform Black-and-White Photography into Color
- The Designer’s Toolbox: How To Use Color to Evoke Emotion in Design
- The Best Techniques for Incorporating Photos into a Video
- Tips for Creating Mesmerizing Shadow Photography