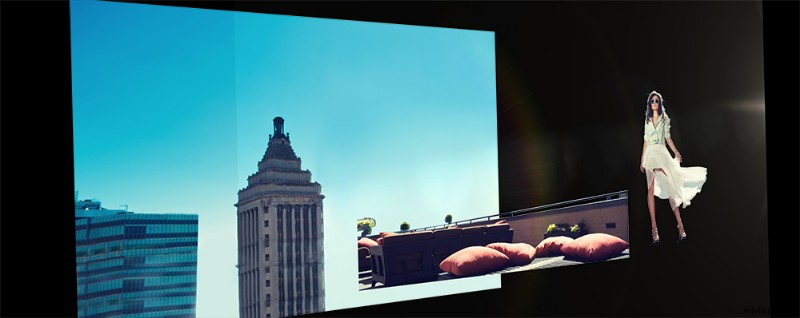
An effective way to make your 2D images pop is to convert them into 3D videos. Let’s take a look at how to convert a 2D image into a 3D video using common video and photo software. Here’s what we’ll be creating in our tutorial:
How 2D to 3D Conversion Is Done
The best way to take a 2D image into a 3D world is with a technique called layer stacking. This technique essentially breaks your entire scene into separate layers, which can then be separated in 3D space.
This technique simplifies the natural parallaxing effect that happens when watching moving video footage.
The Two Tools Needed to Convert 2D Images Into 3D Video
1. Photoshop
To convert your 2D photo into a 3D video, you’ll need to create plates for each section of your photo. Practically speaking, this means you’ll need to use Photoshop to separate elements within your scene. Features like the Content-Aware filter and the Clone Stamp tool are indispensable for perfecting individual layers.
2. After Effects
After Effects is a motion graphics compositing software that allows users to keyframe and stack 2D layers in 3D space. While you may be able to simulate a 3D photo effect in a professional video editing software like Final Cut Pro or Premiere Pro, After Effects is the best tool for the job.
Step-By-Step Tutorial: Converting 2D Images to 3D
Step 1: Find an Image
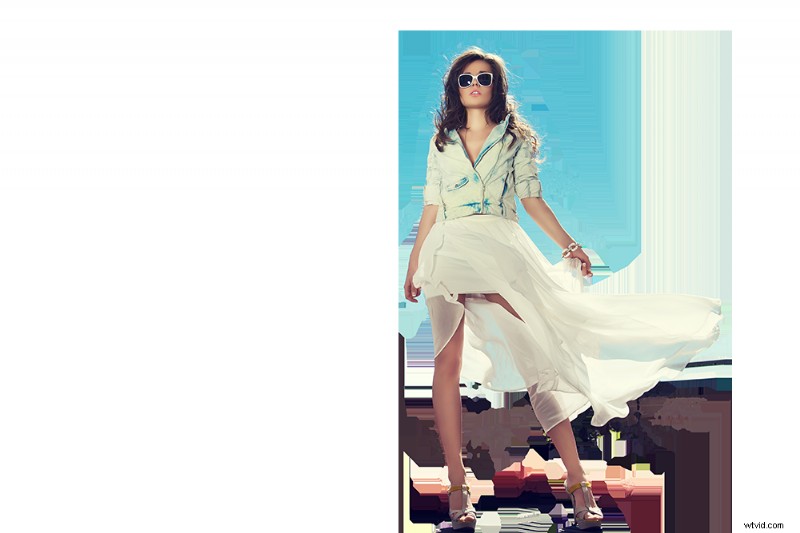
The first step when creating a 2D-to-3D photo is picking the right image for 3D conversion. To create the most believable parallaxing effect possible, it’s important to use an image with a clearly defined foreground, mid-ground, and background. For our example, we’re going to use the following image:
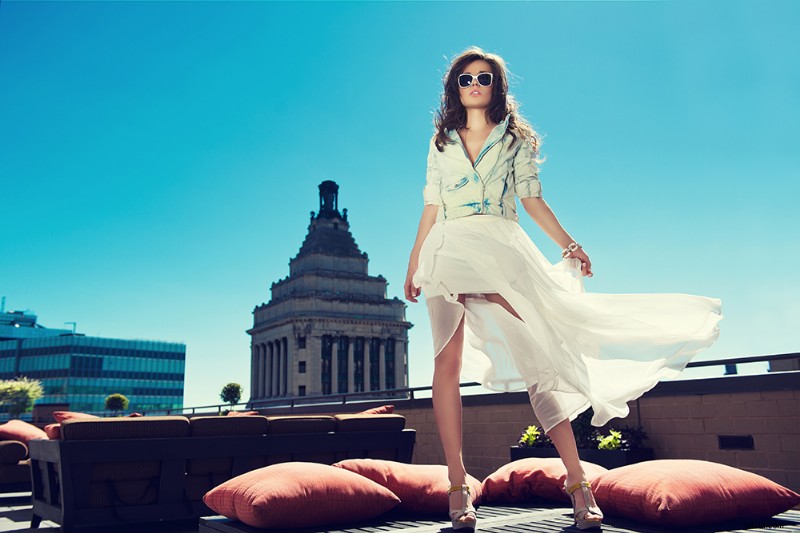
This image is a good candidate for 3D conversion because its layers can be clearly defined. If you’re looking for more images to use, we’ve created a Lightbox here on Shutterstock full of images that could work for 2D-to-3D conversion.
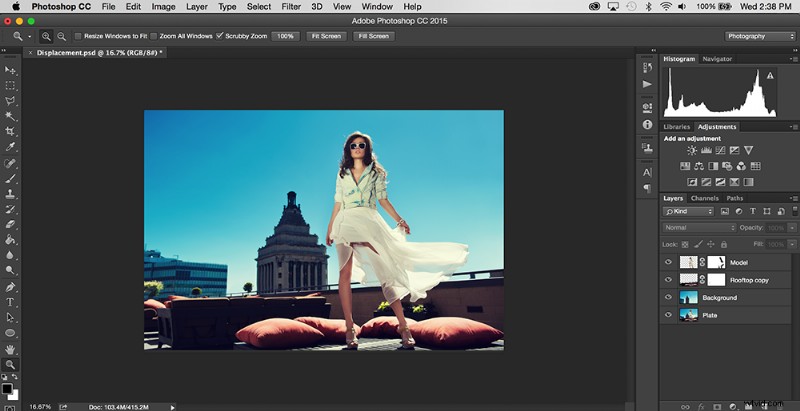
Step 2: Layer Your Image in Photoshop
After you’ve chosen your image, it’s time to separate it into layers based on their relative distance to each other. For our example, we’ll separate our image into three layers: Model, Rooftop, and Background.
To create the effect, completely cut out any extra elements from each layer. For example, we’ll use the Clone Stamp tool and Brush tool on our background layer to fill in a full-sized plate of the buildings and sky. Here’s an example of our background plate:

It doesn’t have to be perfect; you just want to cover any extra overlapping that may occur.
Our mid-ground is the most tricky layer in the series. As you can see in the original image, the model is significantly covering important parts of the rooftop, like the planter, rail, pillows, and wall. To fill in the missing details, use a combination of the Content-Aware filter and Clone Stamp to cut the model out.
This process can get tedious, but if you want your video to look convincing, it’s definitely worth it. You’ll also want to remove the spacing between the rails that reveals the background. Here’s what our mid-ground layer should look like:

The foreground model layer is actually surprisingly easy to cut out. Using the Magic Wand tool and feathering found in the Refine Edge menu, you can cut the model out while including soft edges. In our example, you can see a little bit of the background bar through the model’s dress. Use the Clone Stamp tool to erase the bar.
We can take this effect one step further by setting the opacity of the dress to 50% so we can see the background behind it. Because our model’s head will be contrasted against a blue sky, we don’t have to cut out the hair perfectly. Here’s what our cut-out model layer should look like:
After you’ve cut out each layer, it’s time to save the Photoshop document. It’s important to save your image as a .PSD file; this will retain your editing capabilities once your file is imported into After Effects. (For example, if you want to change the way a layer looks after you’ve brought it into After Effects, you can easily change it in Photoshop, save it, and reload the footage in After Effects.)
Step 3: Import Into After Effects
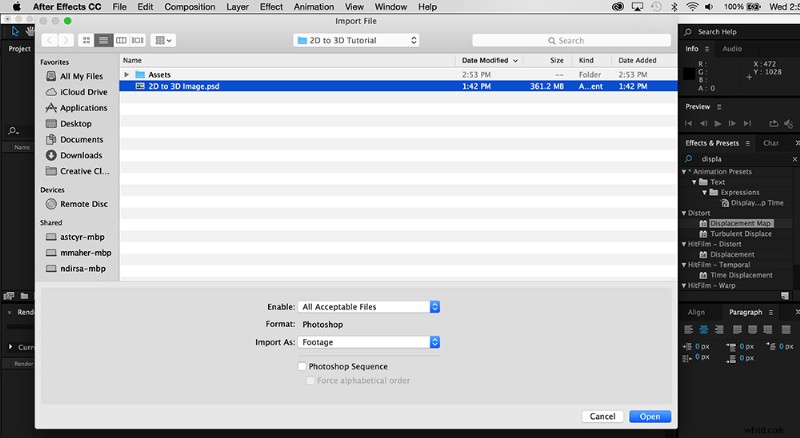
After you’ve saved your Photoshop document, it’s time to import the file into After Effects. To import a Photoshop document simply hit Command+I (Ctrl+I on a PC) and select your document. Upon import, you will be prompted with a dialogue box. Under Import Kind, select Composition and make sure the Editable Layer Styles button is selected.
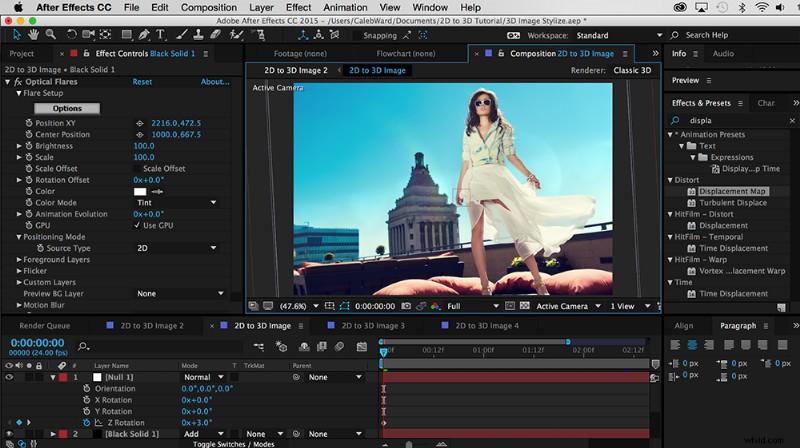
Step 4: Animate the Movement
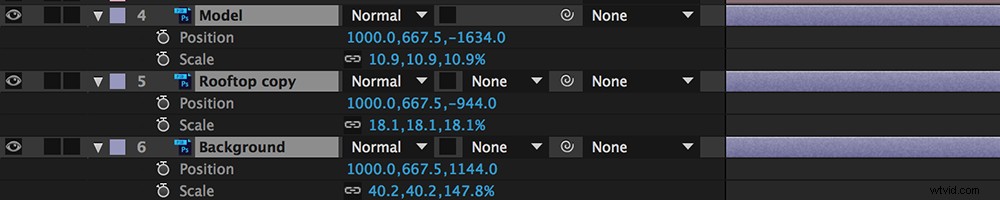
The next thing to do is separate your layers into 3D space. Do this by clicking into your composition. In the timeline, you’ll see all three of your layers, along with a small Photoshop logo next to them. Select the small checkbox that looks like a 3D cube for each layer. This will convert your 2D layers into 3D space. You won’t see anything immediately, but that’s OK.

Select each layer and hit the P key. This will activate the position transform options. By adjusting the third number, you can push each layer backward or forward in Z-space.
Next, scale down each layer so that it still looks relatively the same as the 2D image you started with. You can scale down layers by selecting each layer and hitting the S key. This will pop up your scaling options.
After you’ve placed your objects into 3D space, it’s time to create a new camera so you can create your 3D camera effect. Navigate to Layer > New > Camera. Select a 50mm camera and click OK. You probably won’t see anything happen at first — that’s because we need to move our camera.
While you can certainly keyframe the camera’s position, I personally prefer to parent my camera to a null 3D object. To do this, navigate to Layer > New > Null Object and drag the small swirly icon from your camera layer to the new null object.

By moving the null object’s position, you’ll now be able to see your 3D image come to life. You can set keyframes by hitting the small stopwatch icon next to the position transform property. For our example, we even added some keyframes to the Z-rotation to add to the effect.
Step 5: Stylize
There are a lot of other things you can do to make your project look even more believable. In our example, we used the Optical Flares plugin from Video Copilot. However, the creative possibilities are endless. You can use depth of field to slowly blur the background. You can zoom in while pushing out to simulate a Hitchcock-like trombone shot.
You could even use the Puppet tool with a Wiggle Expression to simulate 3D movements. Some artists have even taken this entire effect one step further by projecting images onto 3D models to create an even more believable 3D effect. Here’s what our final effect with stylization looks like:
2D Images to 3D Video Tutorials
This interesting tutorial from Jack Woodhams explains how to do a basic 2D-to-3D conversion using the technique talked about in this post.
One alternate way to create a 3D photo effect is to use a displacement map in After Effects. While you won’t be able to do any major parallaxing, this effect can generate some eye-catching results. This tutorial from PremiumBeat shows us how it’s done.
What’s your favorite way to convert 2D images into 3D images? Share your thoughts in the comments below.