If you’re looking to elevate the quality of your next audio project, Audacity offers a powerful, free solution. This open‑source editor lets you mix tracks, add effects, and edit with precision using cut, copy, and paste tools—plus unlimited undo.
Audacity’s built‑in amplitude envelope editor, customizable spectrogram mode, and frequency‑analysis window make it a go‑to choice for audio professionals and hobbyists alike. Created by a volunteer community, it empowers users to trim files, remove background noise, cut silence, adjust volume, and more. A convenient drop‑down menu beneath the sound level meters lets you switch between audio sources quickly.
In this article
- What a Crossfade Is
- Using Crossfade in Audacity
- Alternative Fade Methods
- FAQs
Part 1. What is a Crossfade?
A crossfade is an audio effect that blends two tracks together, preventing abrupt silences. It fades one track out while simultaneously fading another in, creating a seamless transition. Digital editors have made this technique straightforward, allowing you to control the fade duration based on your source volumes.
Part 2. How to Use Crossfade in Audacity
Don’t be intimidated by Audacity’s many features. Crossfading in Audacity is simple: you overlay the tracks at the transition point so both are audible at the same time.
Step‑by‑Step Guide:
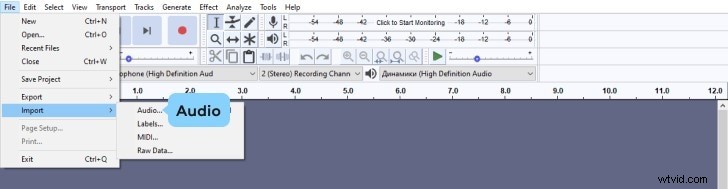
Step 1: Import your audio files. From the File menu, choose Import > Audio and select one or more files. Audacity will load them into the current project.
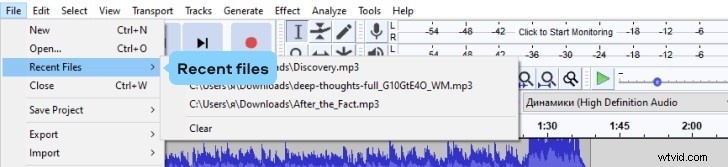
Step 2: Use Recent Files for quick access. Select File > Recent Files to import the first of the 12 most recent items.
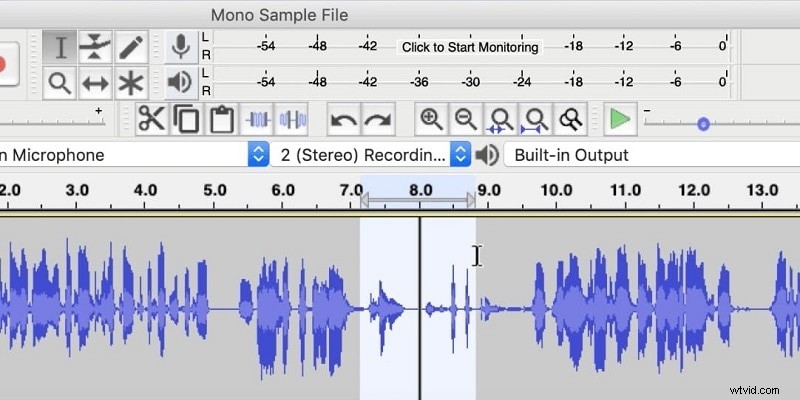
Step 3: Align the clips for a track‑to‑track crossfade. Use the Selection Tool to place the cursor where the fade should begin, then drag across the tracks you wish to blend. Go to Effect > Crossfade Songs.
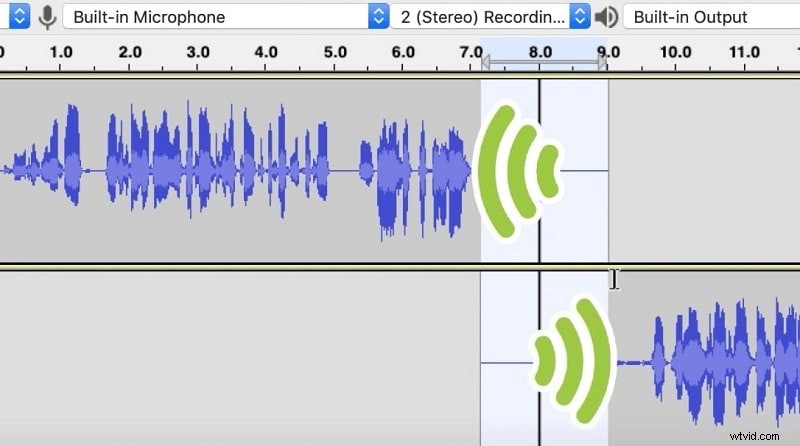
Step 4: For a single‑track crossfade, use the Time‑Shift Tool to position the two clips adjacent. Select the overlap area and choose Effect > Crossfade Clips.
Step 5: Export your project as MP3. From File > Export > Export as MP3, configure the output settings in the pop‑up window.
Part 3. Alternative Fade Methods
Filmora offers an intuitive, user‑friendly audio editor integrated into its video editing suite. It’s ideal for beginners who need powerful yet simple tools.
Below is a quick overview of how to achieve crossfades in Filmora:
Step 1: Install & Import
Download the latest version from the official website, install it, and launch the program. Use the Import button to bring your audio files into the project.
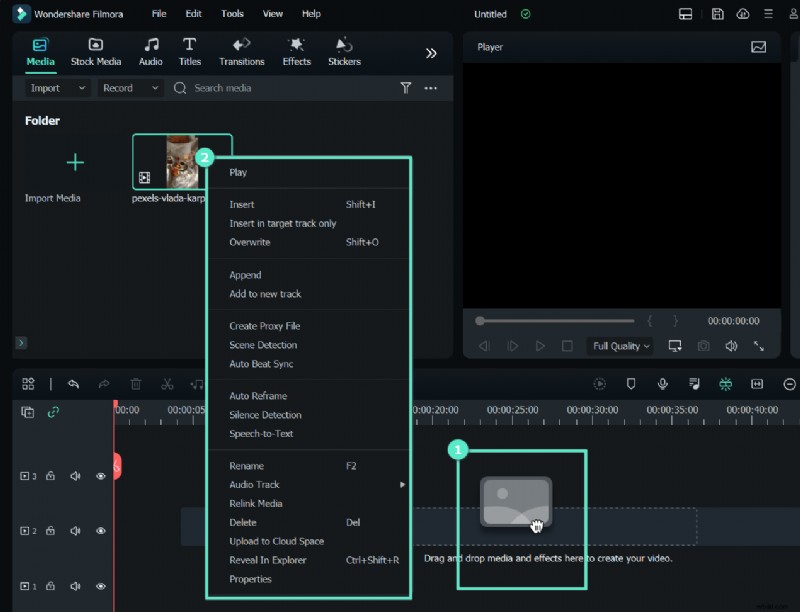
Step 2: Open the Audio Editor
Drag the files onto the timeline. Right‑click the audio clip and select Edit Audio to open Filmora’s editor.
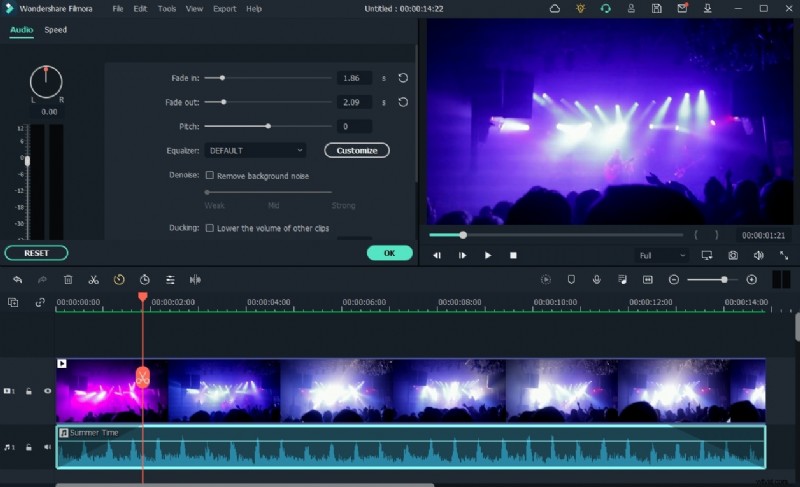
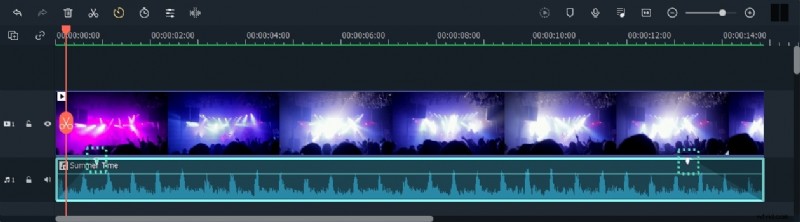
Step 3: Apply Fade‑In/Fade‑Out
In the timeline, click the audio clip. Two icons appear above it—drag the first to set the fade‑in length, and the second to set the fade‑out length.
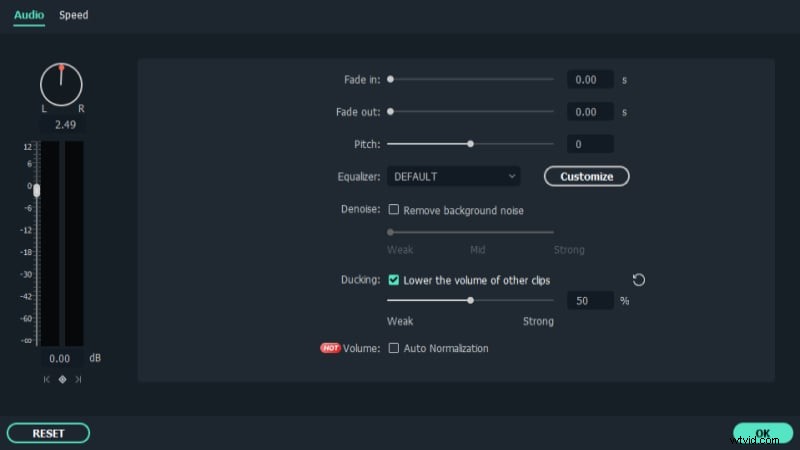
Step 4: Polish Your Audio
Filmora’s built‑in video toolbox allows further refinement. Select the video file in the timeline to access basic editing features.
Step 5: Export
Click Export, choose your desired format (MP3, MP4, etc.), and set the destination folder.
Part 4. FAQs
1. What is a crossfade between tracks?
It’s the process where one track fades out as another fades in, creating a smooth transition without silence.
2. How can I crossfade audio online?
Online tools like the Audio Combiner allow you to merge tracks and apply a crossfade for a seamless blend.
3. How do I smooth audio in Audacity?
Use the Normalize effect to equalize stereo channels, setting peak amplitudes to match across tracks.
Conclusion
Audacity is a free, versatile audio editor that, with its graphic equalizer and crossfade capabilities, can significantly improve your audio productions. Following this guide will help you achieve professional‑quality results efficiently.