Adobe Audition, developed by Adobe Inc., is a professional digital audio workstation (DAW) that empowers sound designers, podcasters, and video editors to record, edit, and mix audio with precision.
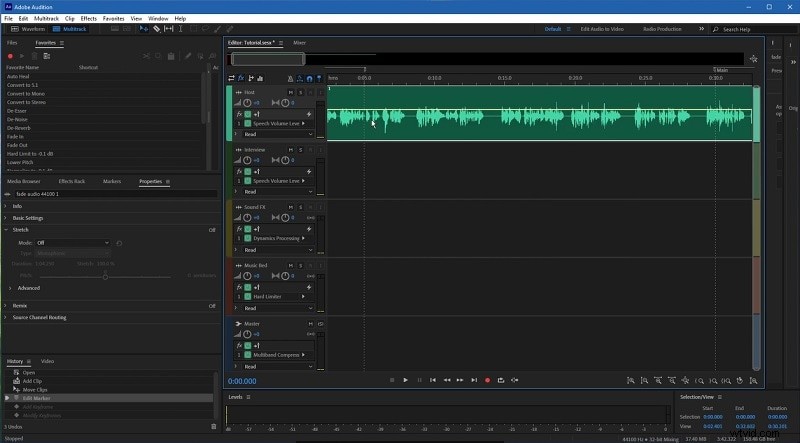
The interface offers two primary workspaces: the Waveform view for detailed waveform editing and the Multitrack view for arranging and mixing multiple clips. You can switch between them via the top toolbar or by opening a file directly.
Each panel—such as the Effects Rack, Favorites, and History—provides specialized tools. Audition’s Effects menu houses a wide array of processors. You can apply them instantly, preview combinations, and fine‑tune parameters. Presets give you a quick start, while the full control panels let you sculpt sound to your exact specifications.
You can also batch‑process files to remove hum, match loudness to broadcast standards, or apply any custom effect chain.
In this article
- Part 1. Steps to Adobe Audition Fade In
- Part 2. Audition Alternative to Fade Audio
- Part 3. Related FAQs
Part 1. Steps to Adobe Audition Fade In
The Multitrack view is a non‑destructive workspace: any edits you make do not alter your original audio files. This makes it easy to experiment with fades, volume adjustments, and other effects without risking your source material.
Fades are essential for smoothing the start or end of a clip. A fade‑in ramps the volume from silence to full level, while a fade‑out does the opposite.
To add a fade‑in:
- Open Audition and load the audio file you wish to edit.
- In the Multitrack view, locate the clip. Hover over its left edge and you’ll see a tooltip labeled Fade‑In; the right edge is labeled Fade‑Out.
- Click and drag the left fade handle to the right. The longer the drag, the slower the rise in volume.
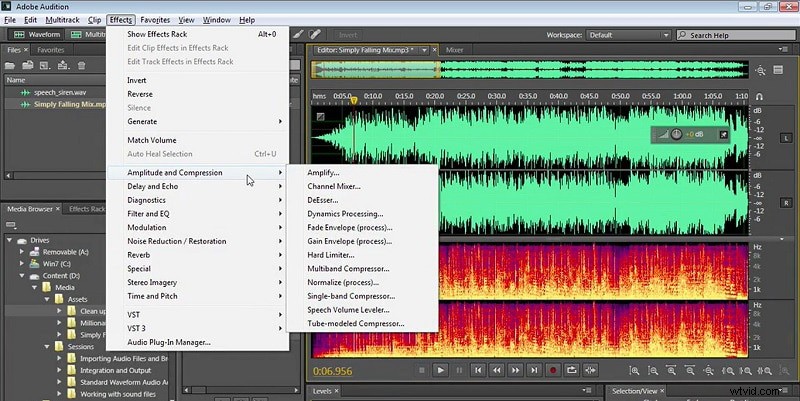
- For finer control, choose Effects > Amplitude & Compression > Fade Envelope. This opens the Fade Envelope panel where you can set a smooth fade curve, or edit the yellow envelope line directly.
- Alternatively, use Gain Envelope from the same menu to shape volume manually. The envelope line appears in yellow and can be dragged or reshaped to create stepped or custom fades.
- When you apply the Fade Envelope effect, a smooth fade‑in will be applied automatically across the entire clip.
- To apply a fade‑out, select the same effect and choose Smooth Fade‑Out. Zoom in to see the yellow line and drag it to adjust the fade length.
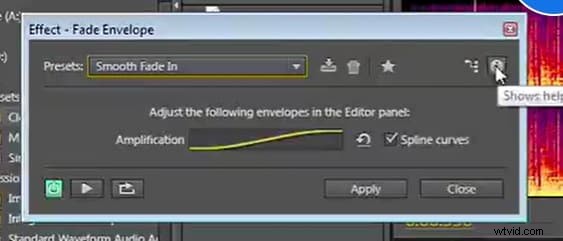
- All adjustments made via the envelope are non‑destructive and can be modified or removed at any time.

Part 2. Audition Alternative to Fade Audio
If you prefer a lighter or free alternative, Wondershare Filmora offers a visual audio editing workflow that includes fade‑in/out controls.
Steps to use Filmora to fade audio:
- Install Filmora and open a new project.
- Add your audio file to the timeline and double‑click it to open the audio editor.
- Use the fade sliders to set the desired fade‑in and fade‑out lengths.
- Alternatively, click the fade icons on the left or right side of the waveform and drag to adjust the fade duration.

Part 3. Related FAQs
1. How do you fade in multitrack in Audition?
You can apply fades to one or multiple tracks simultaneously. Simply select the clip(s) in the Multitrack view and drag the fade handles at the clip edges.
2. How do you do a master fade in Audition?
Open the Effects > Amplitude & Compression menu, choose Mastering, and then apply a Fade Envelope or Gain Envelope to the entire mix.
3. Adobe Audition fade‑out greyed out?
When the fade handles are greyed out, the clip is likely locked or the track is muted. Unlock the track or ensure it’s selected in the timeline before attempting to adjust the fade.
Conclusion
Adobe Audition remains a powerful, industry‑grade platform for audio editing. While its subscription cost may be a consideration for some, the depth of features—especially for precise fade control, batch processing, and non‑destructive editing—makes it worth the investment for professionals, podcasters, and video creators who already work within the Adobe ecosystem.