Ableton Live’s loop‑based workflow has made it the go‑to DAW for hip‑hop and electronic producers alike. Whether you’re just starting out or integrating Live into live performances, mastering its fade tools can elevate your tracks to studio quality.
With clear, step‑by‑step instructions, this guide shows you how to create smooth fade‑ins and fade‑outs using both the Warp/Fades feature and MIDI‑driven utilities. You’ll also discover an alternative method for fading audio in non‑Ableton environments.
In this article
- Part 1. 2 Ways to Fade audio in Ableton
- Way 1. Use Warp/Fades
- Way 2. Using the MIDI Track
- Part 2. Alternative way to Fade Audio without Ableton
- Part 3. Related FAQs
Part 1. 2 Ways to Fade audio in Ableton
Understanding "audio fade‑in" and "audio fade‑out" is essential for creating polished mixes. Cross‑fading clips on a single track is quick, but applying fades on separate tracks lets you add independent effects and offers greater control over the fade curves.
Way 1. Use Warp/Fades
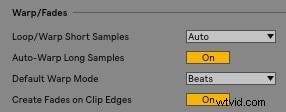
To eliminate clicks, enable Create Fades on Clip Edges in the Record/Warp/Launch section of Live’s Preferences. Each clip’s start and end will then automatically receive a small fade.
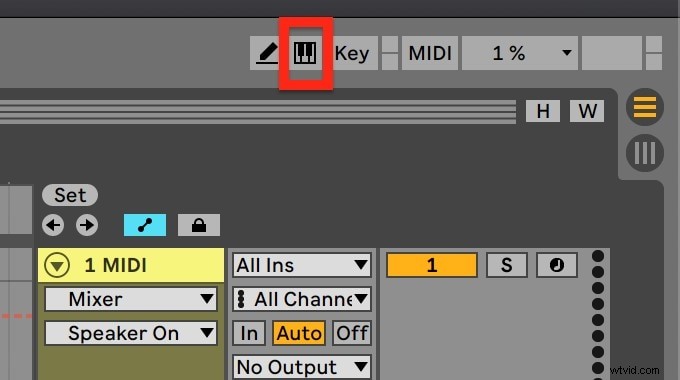
Because fades are disabled by default in automated mode, you’ll need to turn that off before editing:
Hover over the clip to reveal the fade handles, or press the A key to toggle them. Drag the handle toward the clip’s center to shorten the fade or toward the edge to lengthen it.
Way 2. Using the MIDI Track
Another efficient method is to place a Utility effect on a MIDI track. The Utility’s gain control acts as a fade tool for any audio clip routed through that track.
Load the Utility effect onto the desired MIDI track, then click the small box in the lower‑right corner of Live to view its parameters:

With A pressed to keep Automation Mode off, two handles appear on each side of the clip. Drag them to shape the fade curve, and use the curve adjusters to refine the slope.
Part 2. Alternative way to Fade Audio without Ableton
If you prefer a non‑DAW solution, Wondershare Filmora offers a user‑friendly interface for applying fade‑ins and fade‑outs to audio tracks. The platform is ideal for beginners and seasoned creators alike.
Step 1: Download and Install Wondershare Filmora
Filmora is free to try. Download the latest version for Windows, then follow the on‑screen installer to complete the setup.
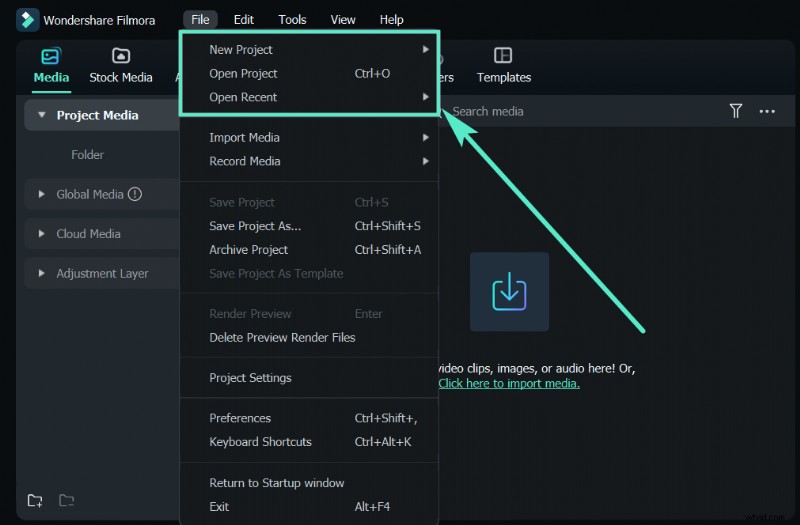
Step 2: Launch and Import Audios
Open Filmora, choose the Video Editor, and click Import to bring your audio files into the project.
Step 3: Open the Audio Editor
Drag the audio file to the timeline, right‑click it, and select Edit Audio to launch Filmora’s audio editor.
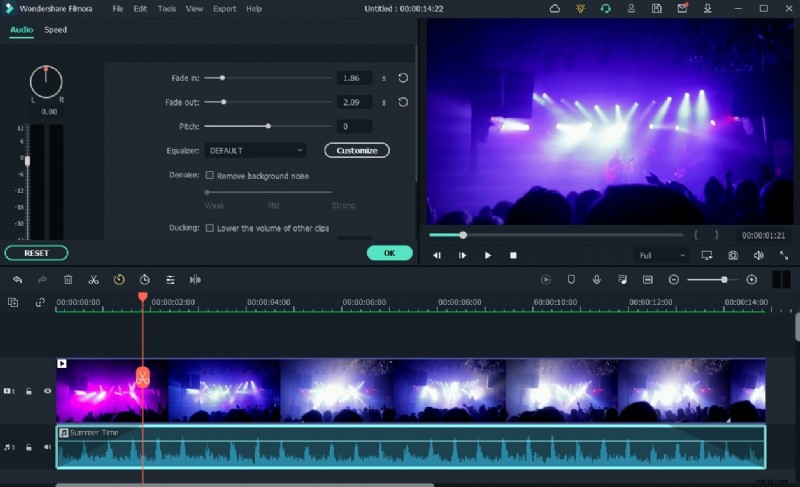
Step 4: Apply Fade‑in/Fade‑out
In the timeline, select the audio clip. Two icons appear above it; drag the left icon to create a fade‑in, and the right icon to create a fade‑out.
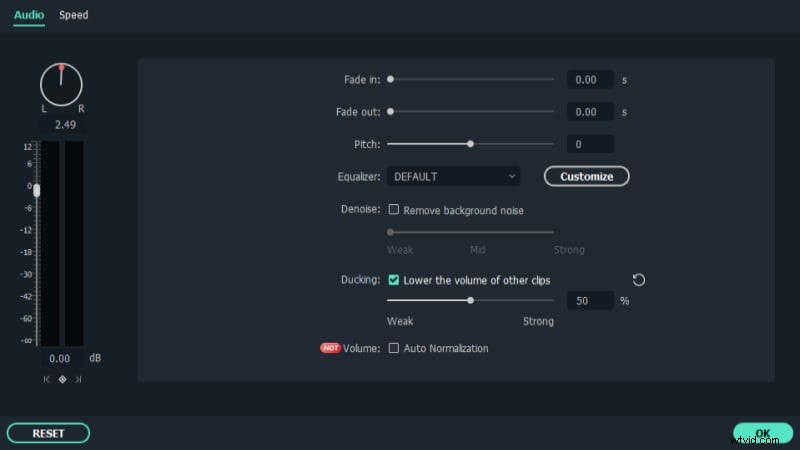
Step 5: Edit and Export
Use Filmora’s built‑in editor to refine the mix. When satisfied, click Export, choose your desired format (e.g., MP3), and save the file to your computer.
Part 3. Related FAQs
1. Can you fade in Ableton Live Lite?
Live Lite includes a suite of free instruments and controllers, making it an excellent entry point for new producers. Fades can be triggered by clicking the Clip Fade button or dragging the fade handles on the clip’s corners.
2. How to Fade in Ableton?
Creating a fade is straightforward: locate the white squares at each corner of an audio clip and drag them inward or outward to adjust the fade length. For cross‑fades, place one clip next to another and tweak the handles accordingly.
3. Why can’t I fade in Ableton?
Fades are hidden when Automation Mode is active. Disable Automation Mode (press A) to reveal and edit fade handles on any audio clip. Fades are enabled by default, so you should see them unless the setting has been turned off.