In this article
- Step‑by‑Step: Normalizing Volume in VLC
- How to Normalize Audio in Wondershare Filmora
Step‑by‑Step: Normalizing Volume in VLC
Audio normalization is the process of applying a uniform gain across an entire recording so that its peak or perceived loudness reaches a target level. This technique preserves the original dynamic range while ensuring consistent listening volume, which is essential for podcasts, videos, and any media shared with an audience.
Why normalize? Unbalanced audio can leave listeners constantly adjusting their volume or, worse, cause ear fatigue. Consistent loudness improves user experience, increases engagement, and encourages viewers to return for more content.
There are two main reasons to normalize audio:
- Maximize overall loudness – raise a quiet recording without clipping.
- Match multiple tracks – bring several files to a common volume level for seamless playback.
VLC Media Player offers three normalization modes:
- Peak Normalization – scales the audio so the loudest sample reaches the set peak level.
- Loudness Normalization – adjusts according to perceived loudness (ITU‑R BS.1770‑1).
- RMS Normalization – targets the average power of the signal.
Using these modes, you can make your audio comfortable to listen to without the listener having to tweak their own volume controls.
VLC is a free, cross‑platform media player that also offers basic audio and video editing capabilities, including volume normalization. Below is the straightforward way to enable this feature.
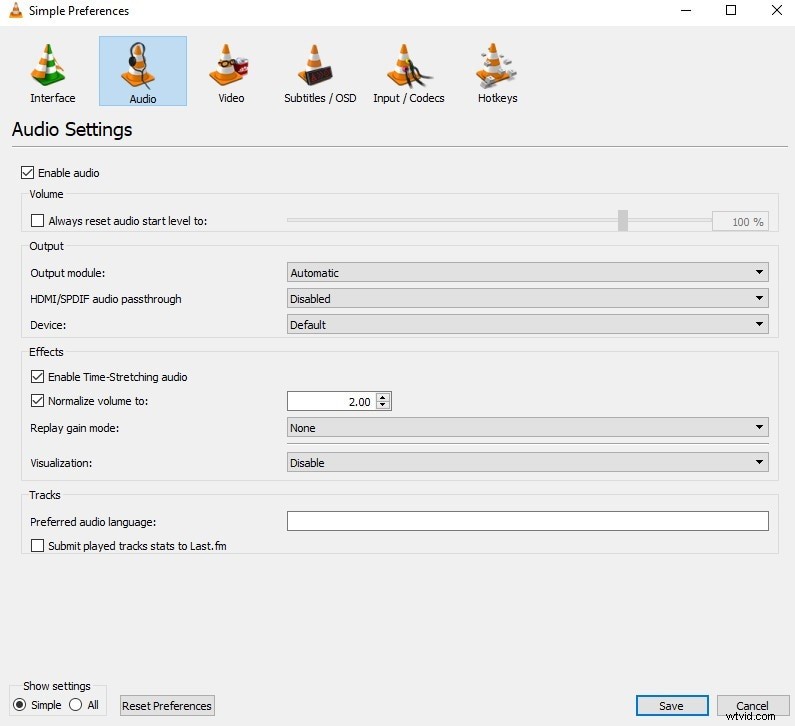
1. Open VLC and go to Tools > Preferences (or press Ctrl+P).
2. Under Audio, check the box next to Normalize volume in the Effects section.
3. Set the desired level (typically between –10 dB and 0 dB).
4. Click Save and restart VLC if prompted.
For users who want more granular control, VLC’s audio filters provide dynamic range compression and other adjustments.
Advanced steps:
- Open Tools > Preferences and switch the view to All in the bottom left.
- Navigate to Audio > Filters and enable Dynamic Range Compressor.
- Click on Compressor in the left panel to adjust settings such as Makeup gain, Threshold, Ratio, Attack time, and Release time.
- Makeup gain boosts quiet passages.
- Threshold determines when compression starts.
- Ratio controls the degree of compression.
- Attack & Release time smooth the transitions.
Experiment with these settings until the audio sounds balanced and natural. Once satisfied, export or save your project to preserve the changes.
How to Normalize Audio in Wondershare Filmora
Filmora is a beginner‑friendly video editor that now includes a built‑in audio normalization tool. While it is primarily a video editor, the normalization feature works exactly the same as in VLC but within the context of a full video project.
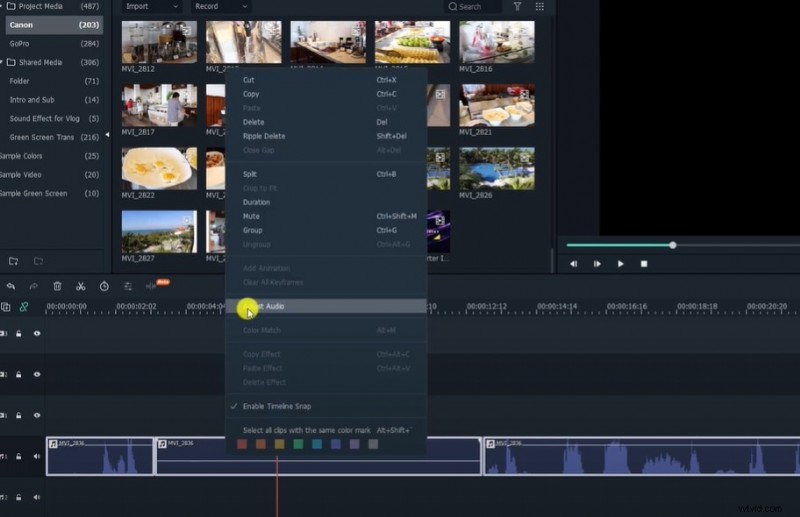
1. Launch Filmora and drag your video(s) into the timeline. 2. If you need to work on the audio separately, right‑click the clip and select Detach Audio. 3. Highlight the detached audio tracks, right‑click, and choose Adjust Audio. 4. In the left panel, check the Audio Normalization box. 5. Click Apply and wait for Filmora to process the tracks. 6. Once the operation completes, the waveform should display a uniform level across all clips.

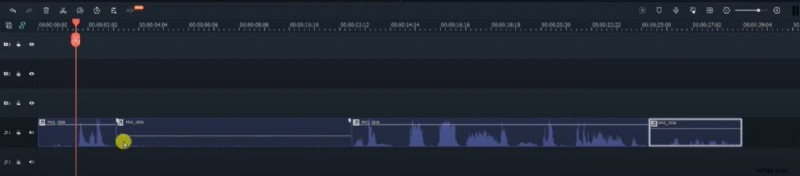
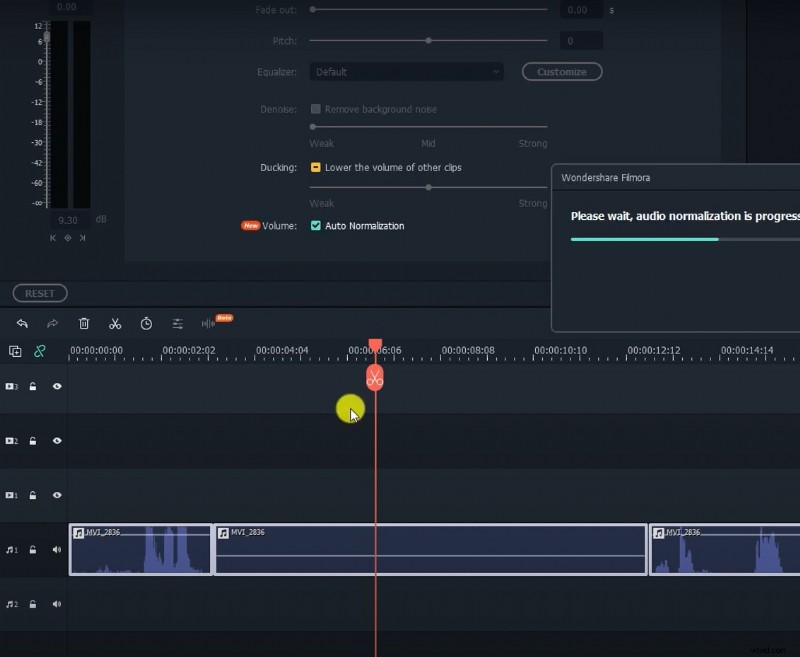
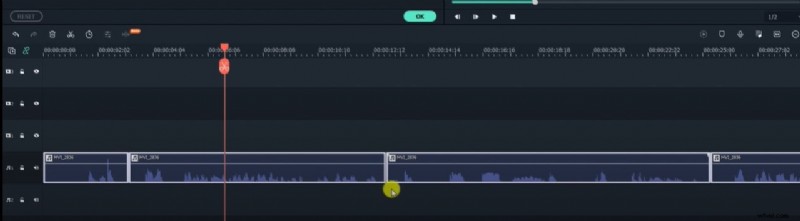
After normalization, export your project. The audio will play at a consistent volume level, eliminating abrupt changes in loudness and providing a smoother listening experience.
By mastering audio normalization in both VLC and Filmora, you can ensure that every clip you produce delivers clear, balanced sound that keeps your audience engaged.