Slow‑motion footage turns ordinary moments into cinematic highlights. Whether you filmed a quick clip on your phone or a longer scene with a DSLR, you can now transform it into a dramatic slow‑motion video with just a few clicks.
In this article
Part 1: How to Turn Videos Into Slow Motion on Windows for Free
The built‑in Photos app in Windows 10 and 11 offers a simple, no‑cost way to apply a slow‑motion effect to any video. No expensive software or command‑line tools required.
Step 1: Right‑click the video file and choose Open with → Photos. If the clip was recorded on an iPhone or Android and synced to OneDrive, it will appear automatically in the Photos library.
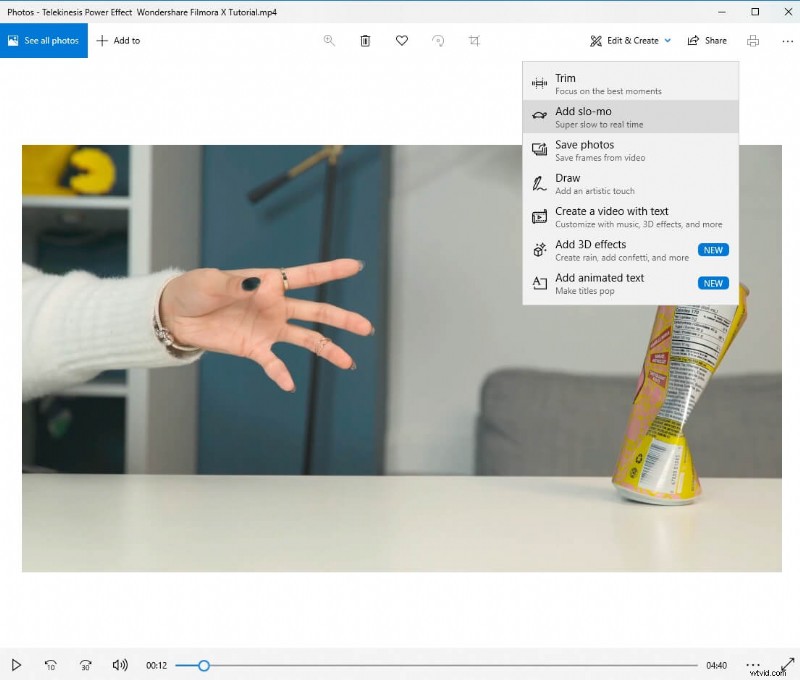
Step 2: Click the Edit & Create button in the upper‑right corner, then select Add slo‑mo from the dropdown.
Step 3: Use the slider to choose the speed level. The app offers Slow and Super‑Slow presets; drag the slider all the way to the right for the most dramatic effect.
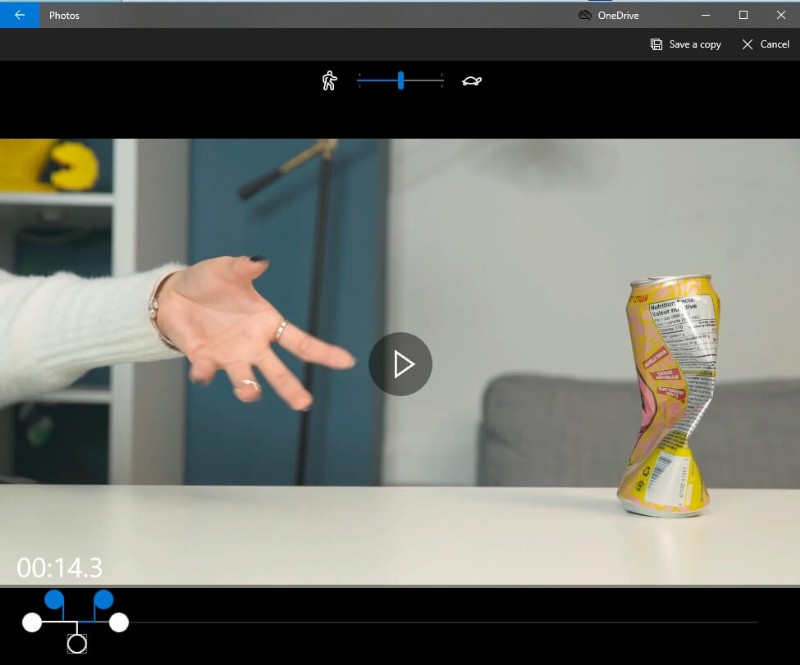
Step 4: Drag the playhead on the bottom timeline to mark the segment you want to slow. When satisfied, click Save a copy to export the new slow‑motion video.
If you don’t see the Add slo‑mo option, ensure your Windows 10 or 11 is up to date. Go to Settings → Update & Security → Windows Update and install any pending updates; the latest Photos app will include the slow‑motion feature.
Part 2: How to Convert a Normal Video to Slow Motion for Free on Mac
macOS users can leverage iMovie, a free and powerful editor that ships with every Mac. Follow these steps to slow down any clip, even those shot on non‑Apple devices.
Step 1: Launch iMovie and click Import Media to bring your video into the library.
Step 2: Select the clip and click Import Selected.
Step 3: Create a new project by clicking Projects → New Project and giving it a name.
Step 4: Drag the clip onto the timeline.
Step 5: Click the clip in the timeline, then click Speed and choose Slow from the dropdown. The duration will double, and you can further adjust with the speed slider.
Step 6: To export, go to File → Share → File, set your desired resolution and quality, then click Next, name the file, and hit Save.
Part 3: How to Turn a Normal Video to Slow Motion With VLC on Linux
VLC Media Player offers both menu‑based and hotkey controls for adjusting playback speed. The following method is quick and works on any platform.
Step 1: While a video is playing, open the Playback → Speed menu and choose Slower or Slower (fine) for gradual slowdown.
Step 2: Right‑click on the video to access the same Playback → Speed options.
Step 3: Alternatively, use the + and - keys to increase or decrease speed. The display will show values such as 0.80× or 1.50×.
For Windows or macOS users, VLC’s slow‑motion controls are identical—see our dedicated VLC Slow‑Motion Guide for platform‑specific details.
Part 4: How to Use Wondershare Filmora to Turn Normal Videos to Slow Motion
Filmora provides an intuitive drag‑and‑drop interface with professional‑grade tools, including motion tracking and keyframe animation. Below is a quick workflow for Windows and macOS.
Step 1: Open Filmora and click New Project (default 16:9 aspect). 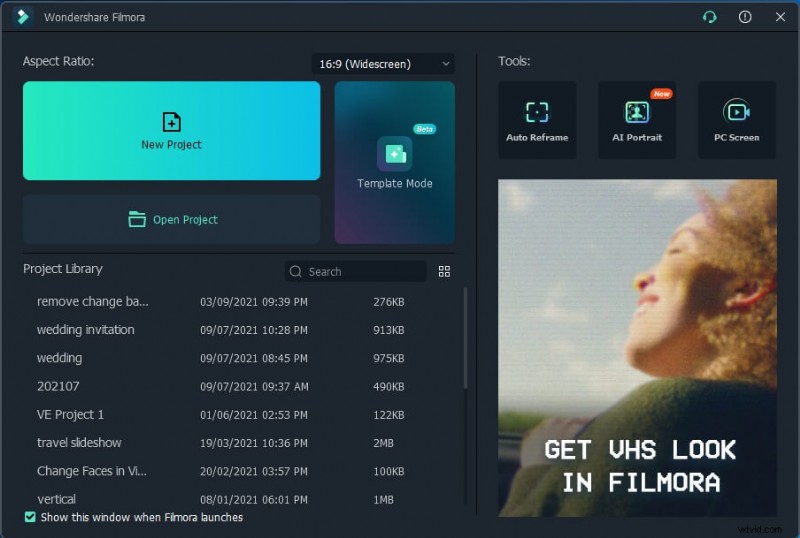
Step 2: Import your clip into the media library, then drag it onto the timeline. 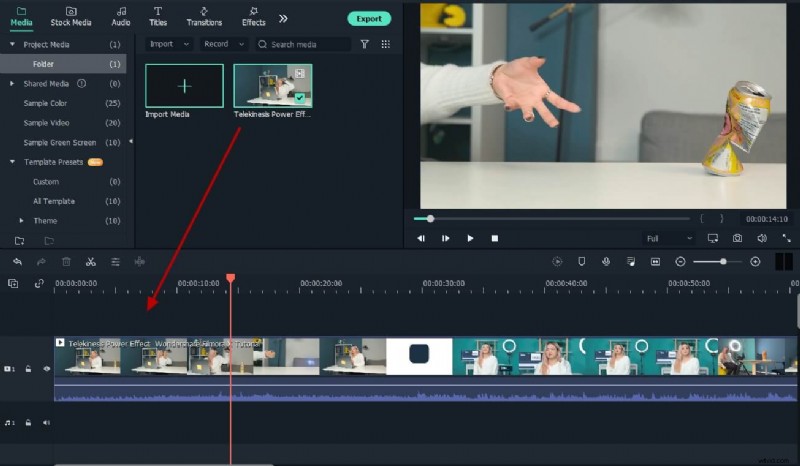
Step 3: Split the clip where you want the slow‑motion effect. Right‑click the segment, choose Speed → Duration, and set the speed value. 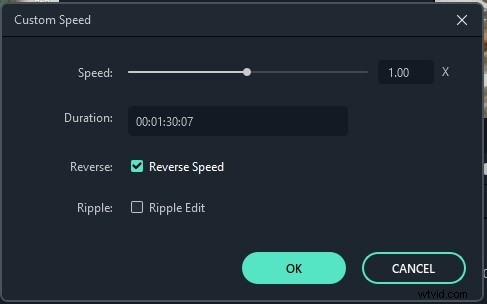
Step 4: If audio pitch changes, first Detach Audio (right‑click → Detach Audio), then adjust the video speed while keeping audio unchanged. 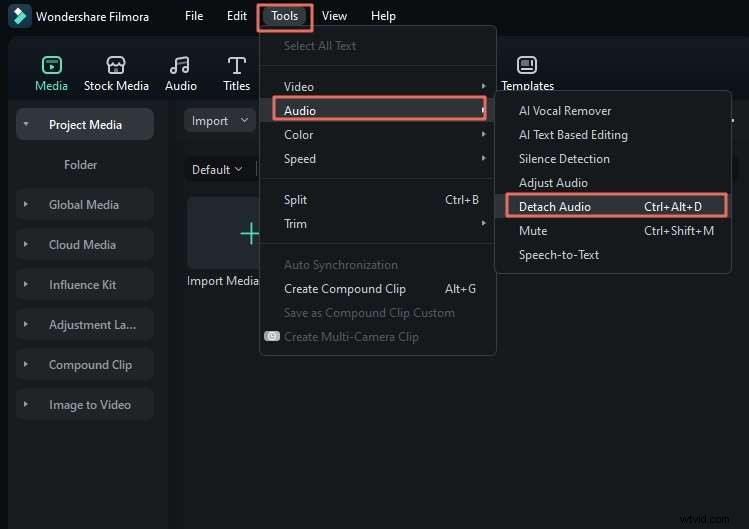
Step 5: Export by clicking Export, choosing a format, and clicking Export again.
Part 5: Best Slow‑Motion Converters to Convert Video to Slow Motion Online (Free)
1. Online Converter
This web tool supports MP4, AVI, FLV, MOV, 3GP, MKV, WMV, M4V, and more. It lets you speed up or slow down any clip, automatically adjusting audio pitch.
Step 1: Click Choose File on the site (max 200 MB upload). Step 2: Set the Speed to 0.5× or 0.8× for a classic slow‑motion look. 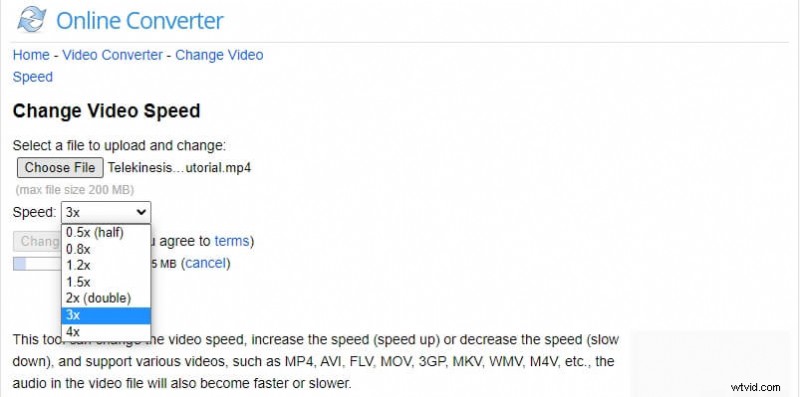
Step 3: Click Confirm and download the finished video.
Part 6: How to Convert a Normal Video to Smooth Slow Motion on iPhone and Android Phones
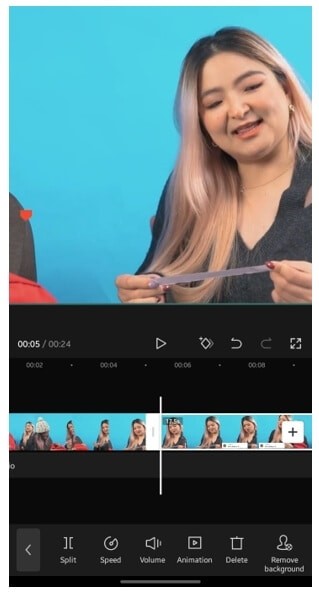
Mobile editors like CapCut bring powerful slow‑motion tools to your fingertips. Below is a streamlined workflow.
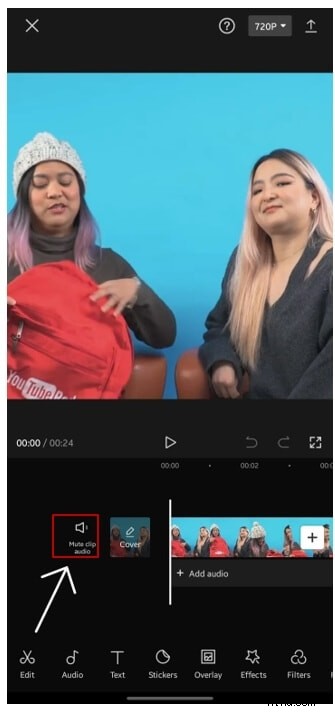
Step 1: Open CapCut, tap Create New Project, and import the clip you wish to slow.
Step 2: Mute the clip’s audio first (tap Mute Clip Audio) to avoid unwanted noise when the speed changes.
Step 3: To apply slow motion to a portion, split the clip (tap Split), then select the segment and open the Speed menu.
Step 4: Choose Normal speed mode, slide the speed bar left to 0.3× (or as desired), and confirm.
CapCut also offers text overlays, transitions, and other creative tools to polish your slow‑motion video.
For a deeper dive, see our guide on Slo‑Mo in CapCut.
Conclusion
Whether you’re editing on Windows, macOS, Linux, or a mobile device, turning any video into a captivating slow‑motion clip is easier than ever. Follow the step‑by‑step instructions above, choose the tool that best fits your workflow, and start creating cinematic moments today.