As a professional compositing video editor, Adobe After Effects can also help you make some basic editing effects like slow motion or timelapse video. It is useful to fast motion and freeze frame. Read on to get the two easiest way to speed up or slow down a video in After Effects.
How to Create Slow Motion/Timelapse Video in Adobe After Effects:
- Method 1: Using Time Stretch
- Method 2: Using Time Remapping
Here is a video tutorial on how to speed up video in after effects.
Method 1: Using Time Stretch:
One of the most simple and easy to follow technique to generate slow motion videos is Time Stretch in After Effects. Here are simple to follow steps:
Step 1: Launch your program and then move to new project.
Step 2: Now you need to import your desired video clip to this recently opened project panel.
Step 3: Make adjustments for layers as per your need.
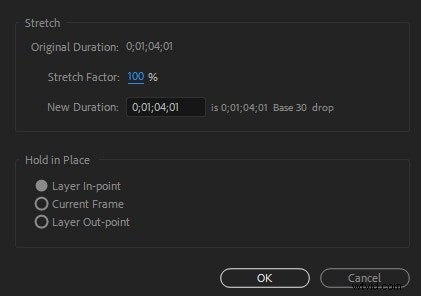
Step 4: Simply right click on layer and then go to Time, hit Time Stretch option from the list. Now enter your suitable Stretch Factor. It is possible to adjust percentage value of this stretch factor to any suitable position.
Step 5: Never forget to use time wrap effect and frame blending tools to achieve smooth results for timelapse.
Step 6: Once everything becomes fine then simply hit the Save button.
Watch this video tutorial to know how to slow down a video with time stretch
Method 2: Using Time Remapping:
Although, time stretch option is much easier to use but it do not allow users to add slow motion to specific portions of the clip. Thus, it is good to shift to Time Remapping option where it is possible to speed up as well as slow down any specific portion of the video clip.
Here are few simple to follow steps:
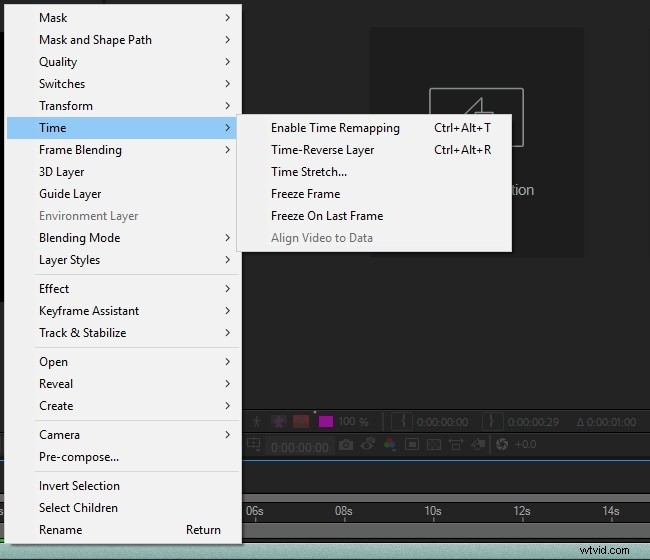
Step 1: Simply right click on the video clip and then hit Time option. Further you need to choose "Time Remapping".
Step 2: Your project must be containing two keyframes; one at the beginning portion and another by the end of layer. These keyframes provide details about time at particular position of your video; you simply need to edit time values on these keyframes to add effects to your video.
Step 3: Let, if you wish to alter speed between two points in a clip as represented by point A and B in the image below. You simply need to drag your B keyframe to the right side and it will naturally create timelapse effect between points A and B.
An Easier Way to Speed up and down the clips
Wondershare FilmoraPro is a famous tool for editing videos. It is suitable for users who are working on making and editing high-quality videos. This software supports the editing of videos for up to 4K. The Wondershare FilmoraPro is also popular due to its affordability in terms of audio and video and their ara e number of options available for styling, customization of the videos and addition of the effects. You can also add voiceovers to your videos.
Features:
- Splitting of the screen
- Removal of the noise
- Controls for the audio, sound and video
- Separation for the audio
Changing the speed of the video in Wondershare FilmoraPro:
In case if you find After Effects platform little complicated then it is advised to shift to FilmoraPro, which is a powerful but easy-to-use tool for users to make effects easily. You can speed up or slow down your videos easily with it. Download the FilmoraPro to have a try.
- Importing the file in the Wondershare FimoraPro and dragging it into the timeline
- In the effects tab, search speed.
- Drag the effect of the speed on the video clip present in the timeline. Adjust the slider for changing the speed.
You can also change the playback video speed in Wondershare Filmora (for beginners, different from FilmoraPro):
- First method: Simply right-click on the video clip present on the timeline and select the option of Speed and Duration. Keep dragging the speed slider for the adjustment of the speed of the video
- Second method: In the toolbar, click on the speed icon and the number of options visible. It includes slowing, reversing and speeding the video.
- Third method: Dragging the video manually just by pressing the Ctrl key on the keyboard. Take the hover at the last of the clip. An icon will be visible of round speed change. The purple strip is visible to confirm the change of speed.