When you learn how to highlight a moving object in a video, you can use the trick in various situations. For instance, the tweak lets the viewers locate the object of interest, you can drag the audience’s attention toward a particular element in the video, and much more. The best thing about the feature is, it is extremely simple to learn and implement in your video projects.
Keeping this in mind, the following sections explain how to highlight a person in a video in Wondershare Filmora. It is worth mentioning here that a person is taken merely as a sample for the illustration, and you can pick any other moving object to highlight while editing your video footage.
Part 1: How to Highlight a Moving Object in a Video in Wondershare Filmora? [Step-by-Step Tutorial]
Filmora is one of the most commonly used highlight video makers on desktop. Highlighting a moving object or a person in Filmora X is comparatively simpler than it was in its earlier versions, or in any other similar third-party post-production tool available in the market today. You can learn how to highlight a person in a video in Filmora X by following the instructions given below:
Step 1: Import and Add the Source Video to Timeline
Launch Wondershare Filmora X on your Windows or Mac computer (a Windows 10 PC is used here), click anywhere inside the Media window, select and import the source video from your computer’s local hard drive to the application.
Next, hover the mouse over the thumbnail of the video, and click + that appears at the lower-right area of the icon. If your video footage has a different frame rate or resolution which didn’t match the project settings, you can choose to keep the original video parameters with Match to Media button, or click the Keep Project Settings button to match the settings in the project.
Step 2: Add Inverted Mask to the Clip
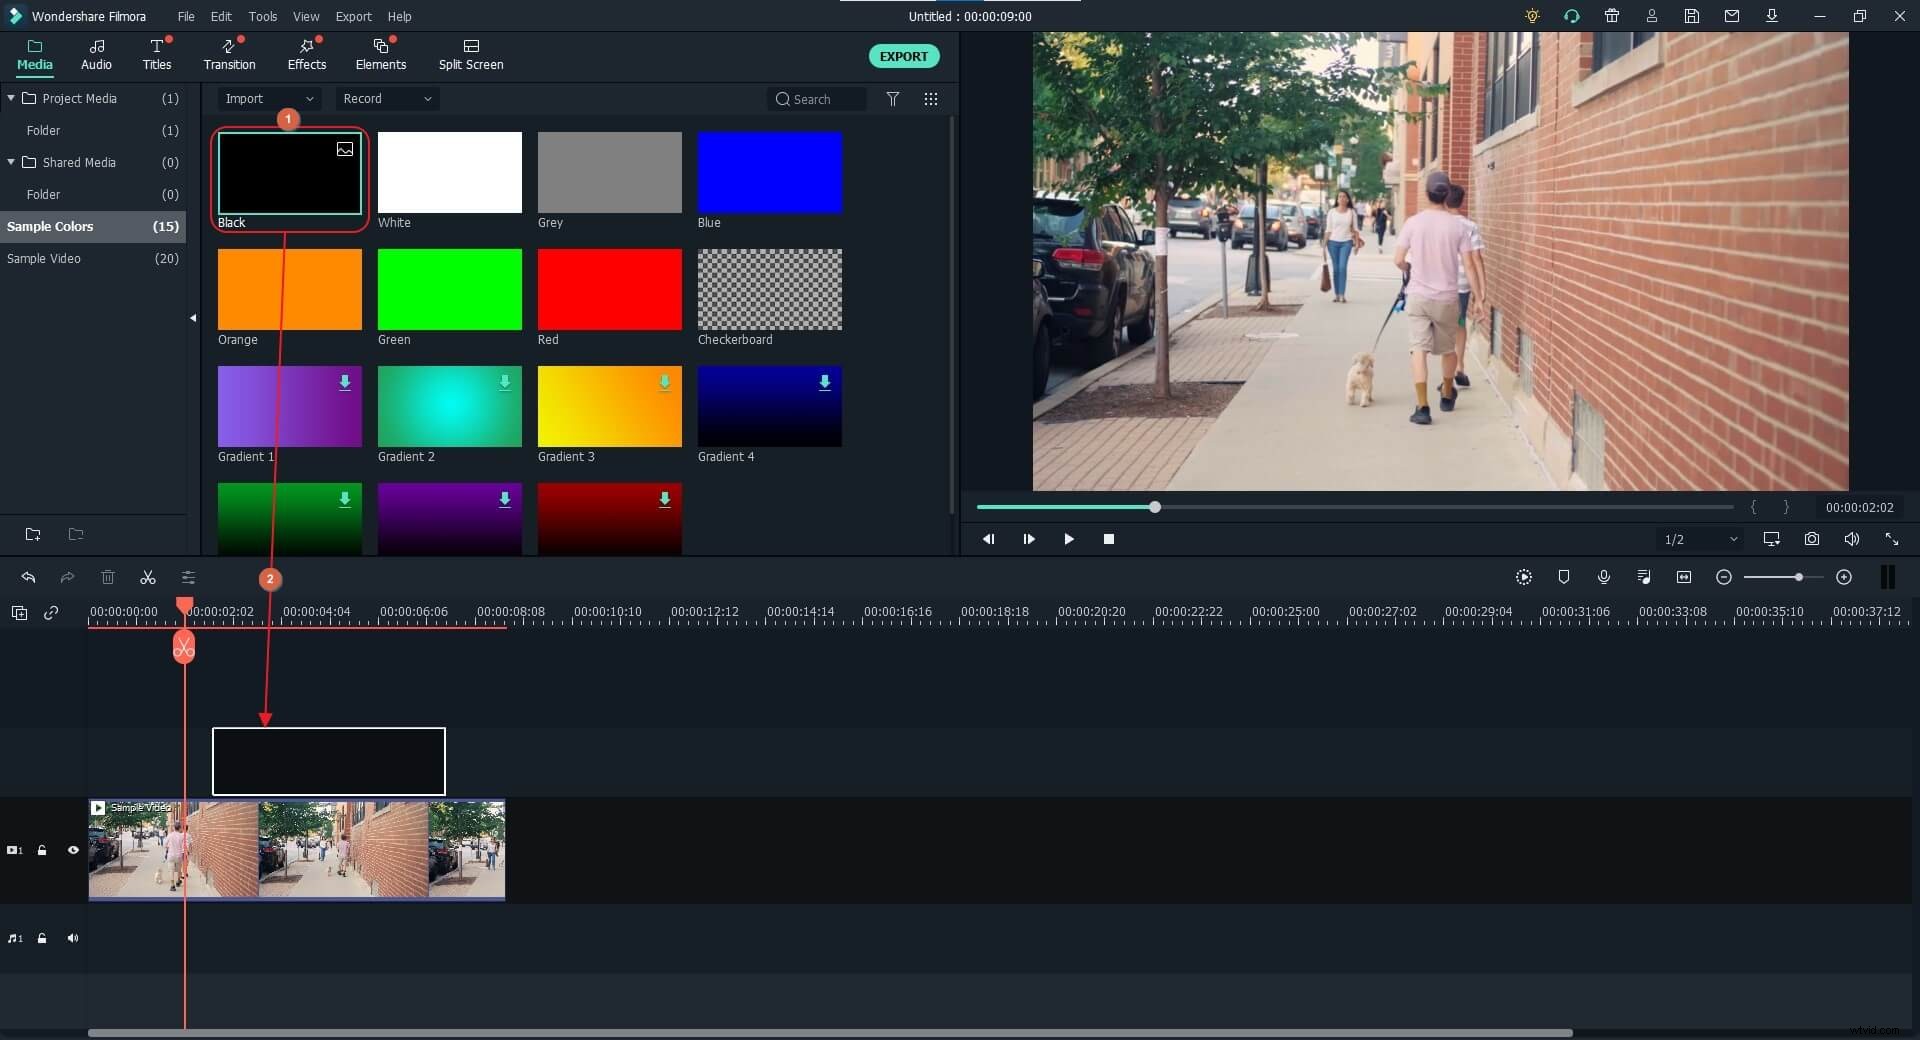
Position the play header on the frame you want to start highlighting the object from. Go to the Media tab at the top, click Sample Colors from the pane on the left, locate the Black color from the available shades, and drag and place it above the video track on the Timeline.
Note: Make sure to place the sample color on a new track above the video and the duration of the sample color. You can stretch the length of the color layer to the desired duration that you can track the object in the video.
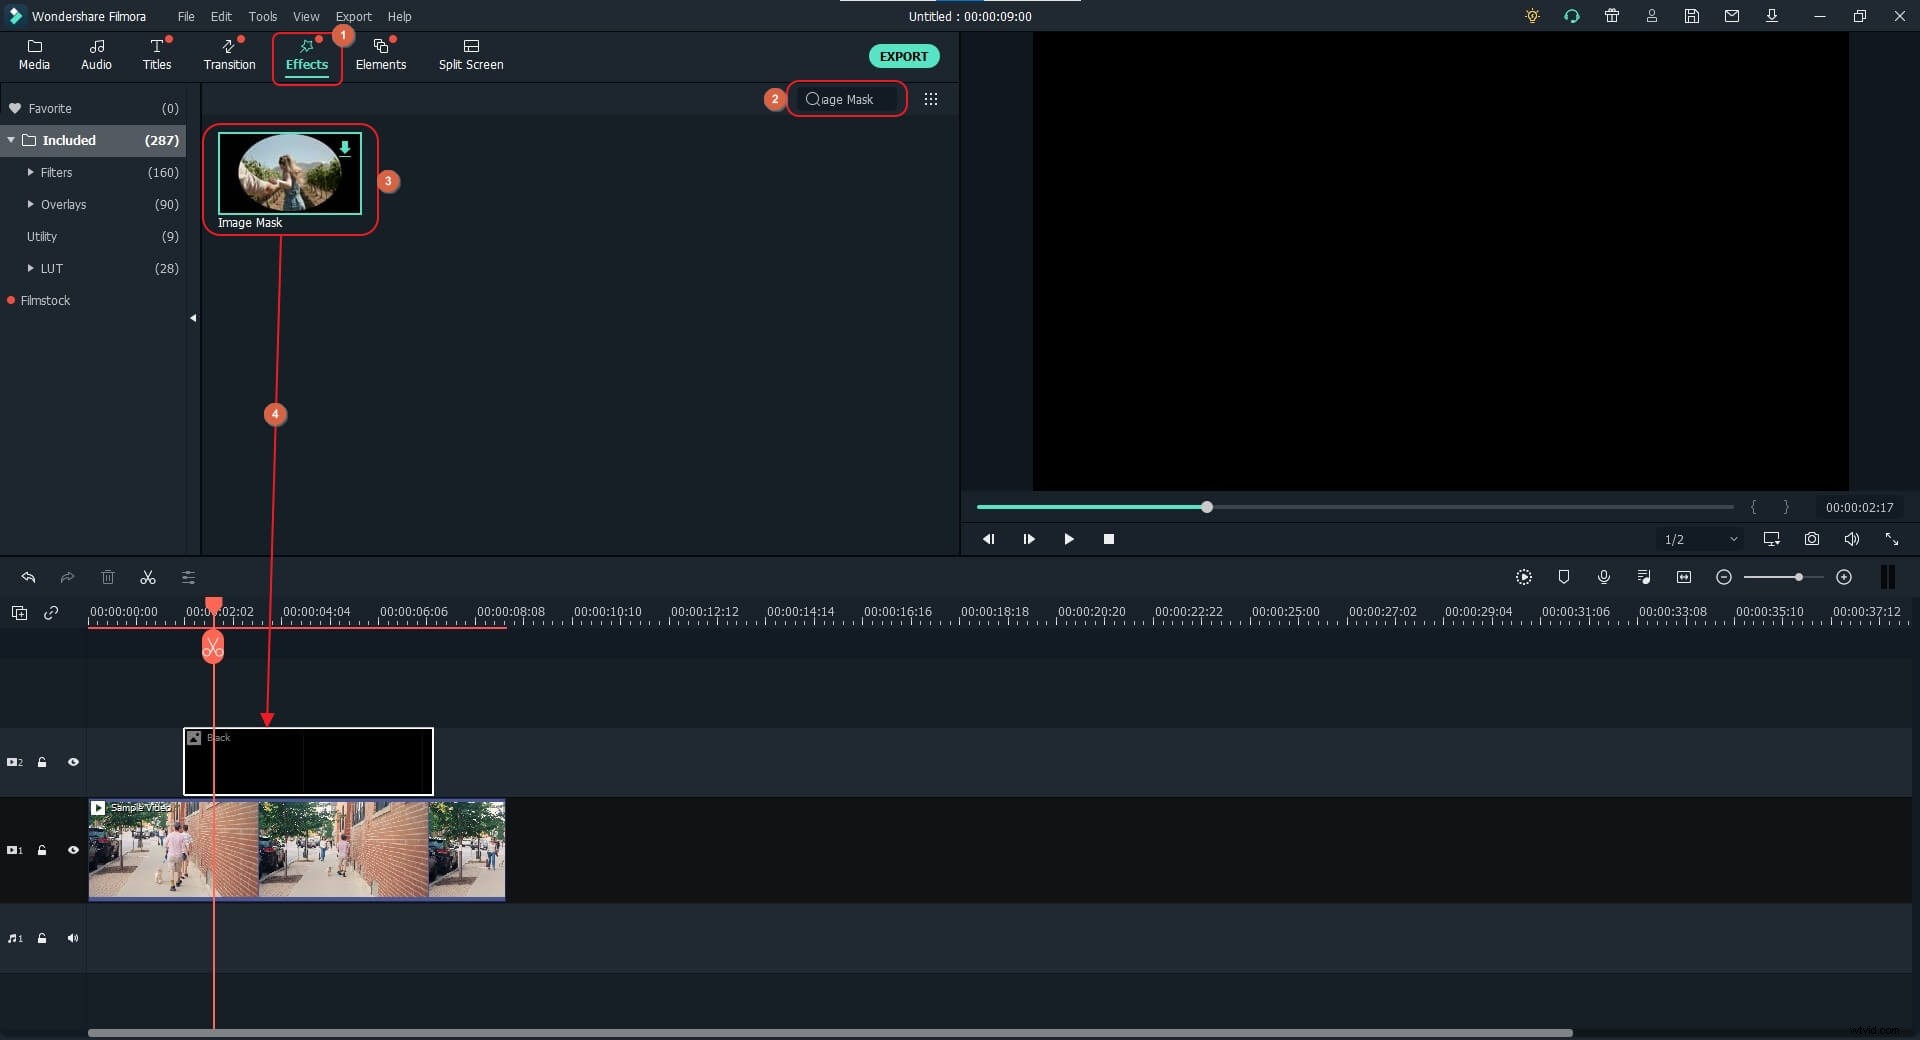
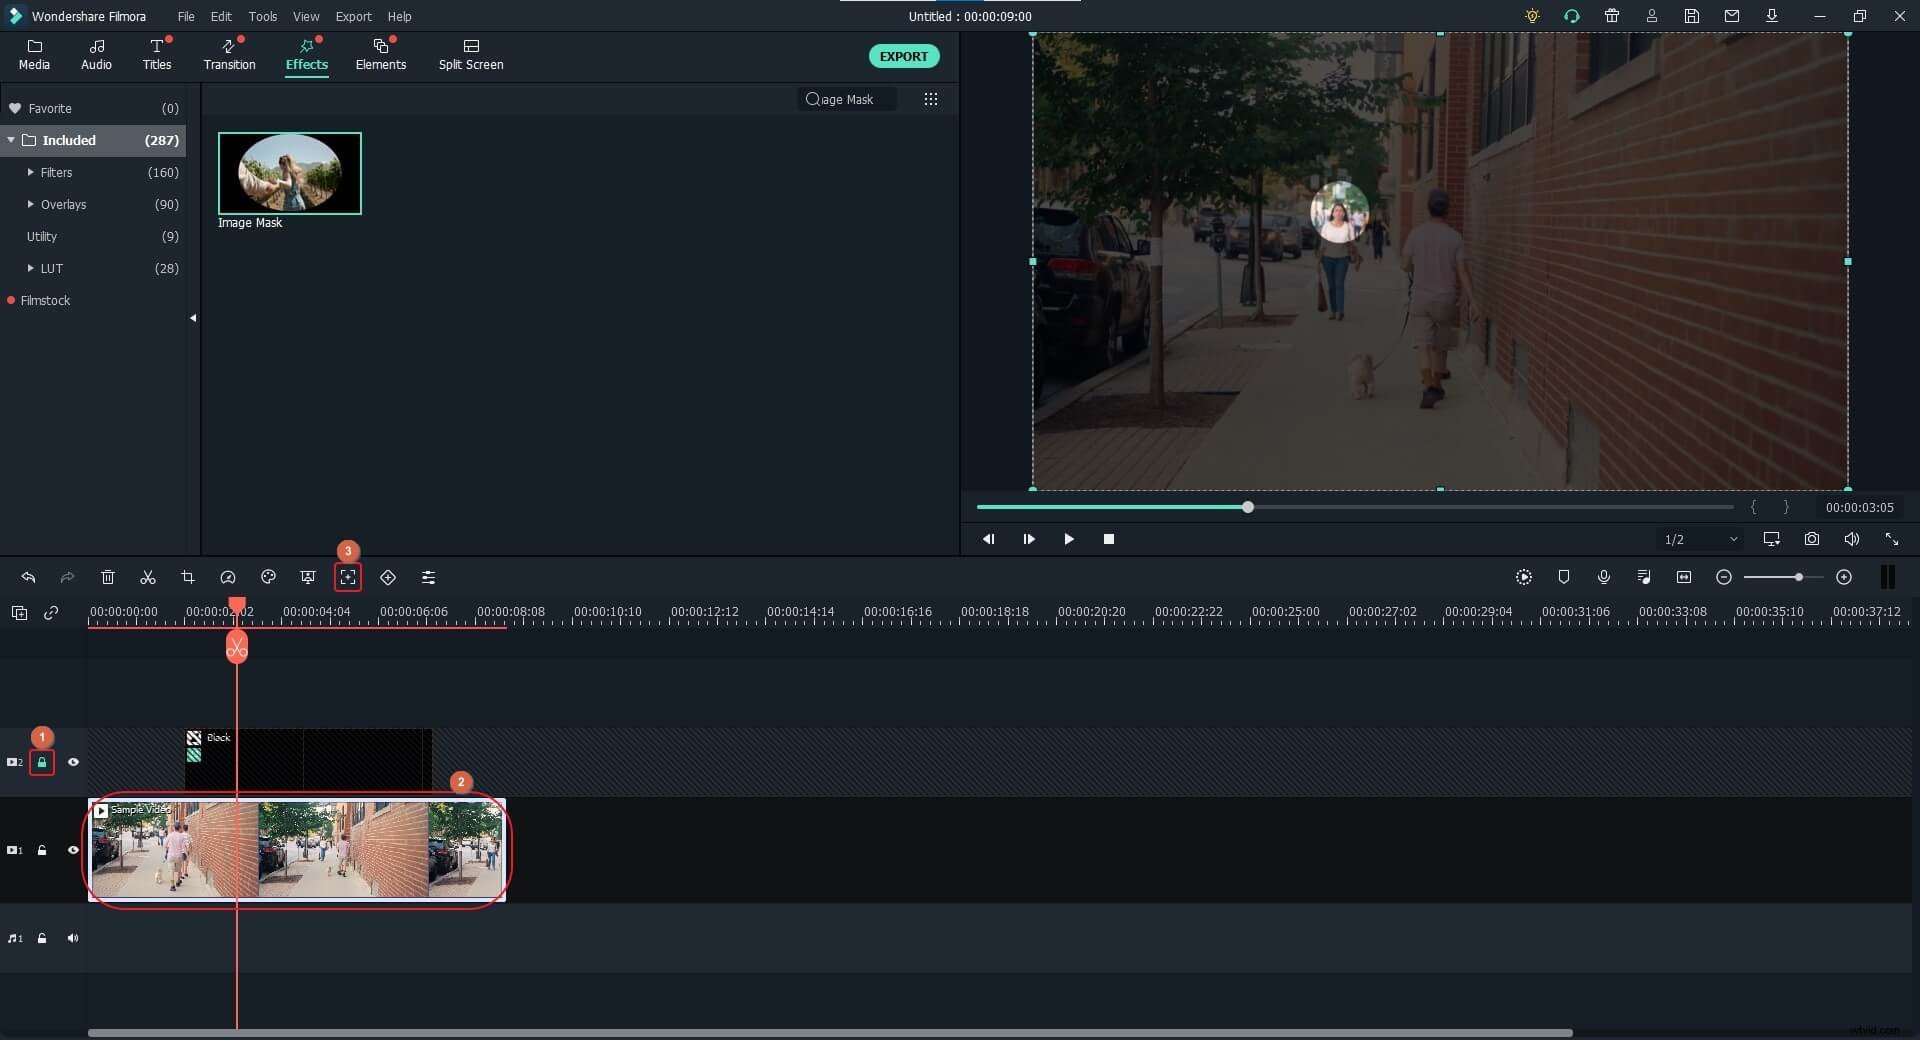
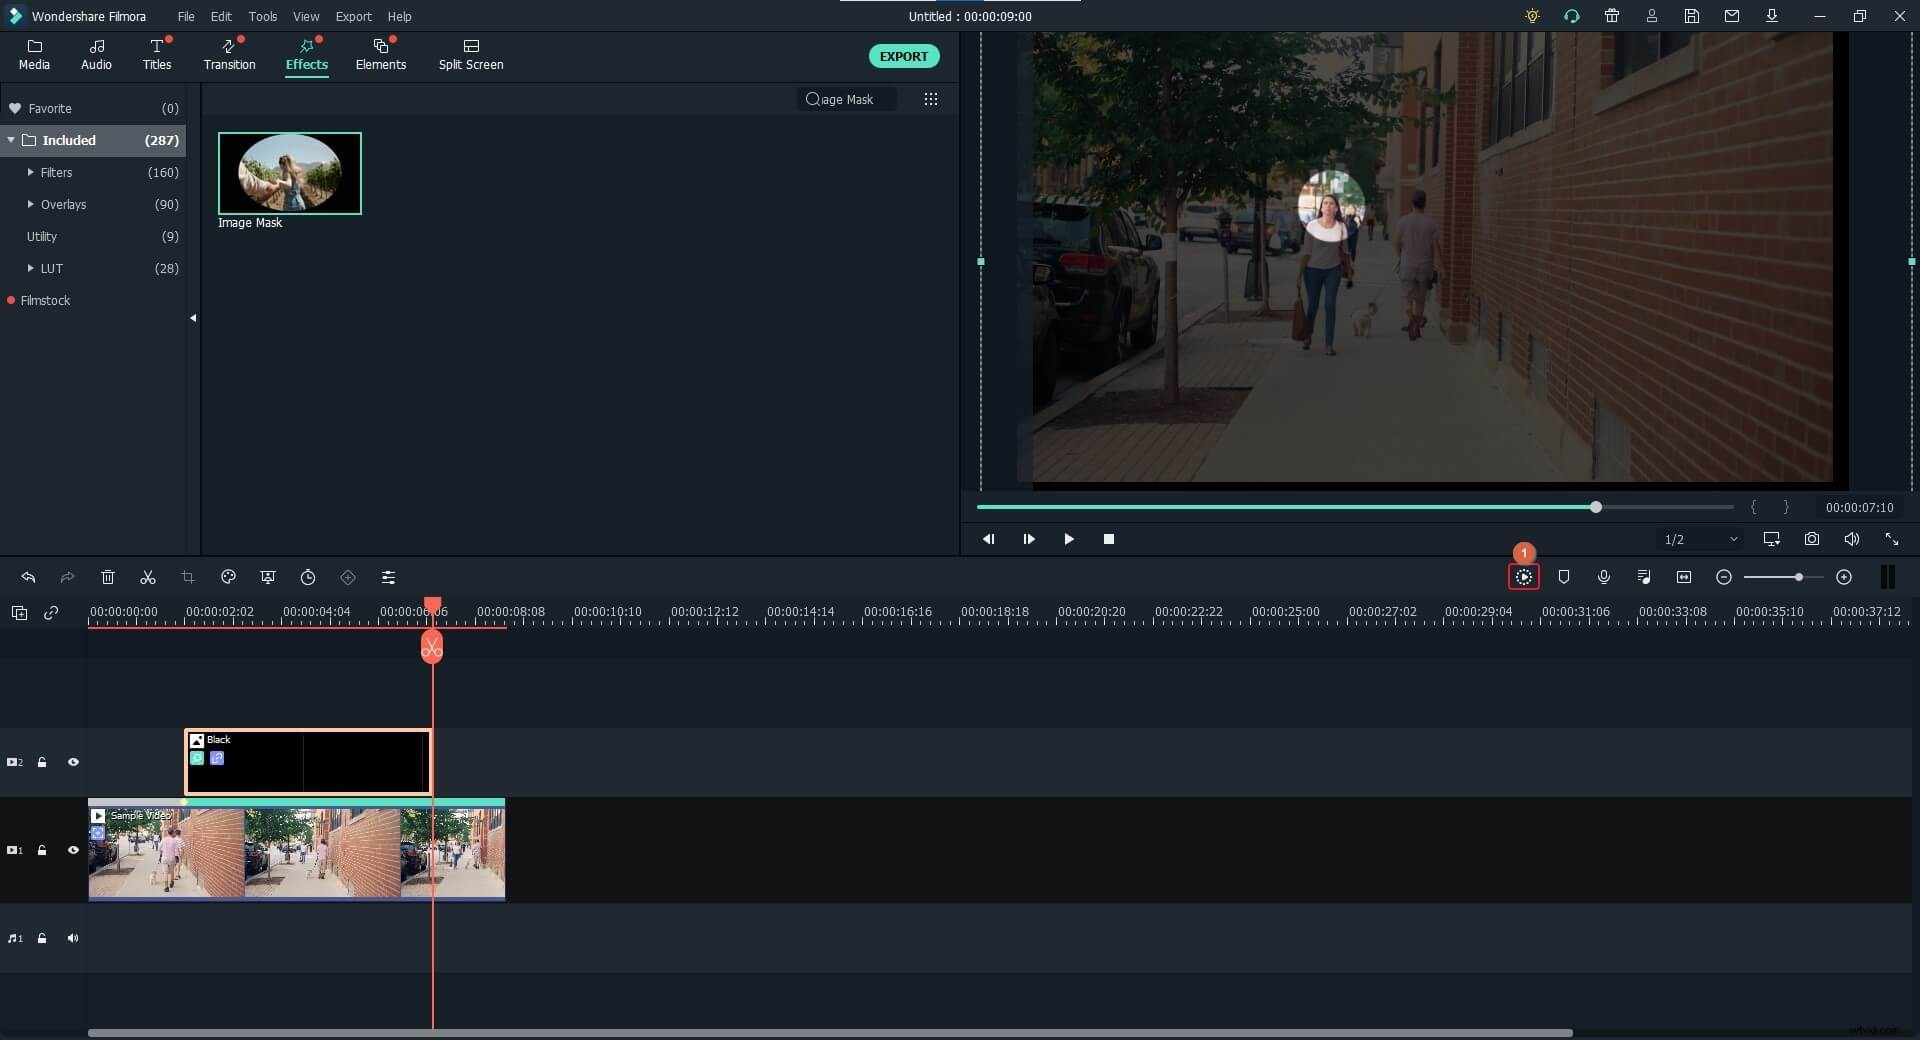
After this, go to the Effects tab, use the Search box on the right of the Effects window to search for Image Mask, drag the Image Mask icon and place it right to the sample color track in the timeline. Or, you can go to the Utility directory under the Effects tab and find the Image Mask effect.
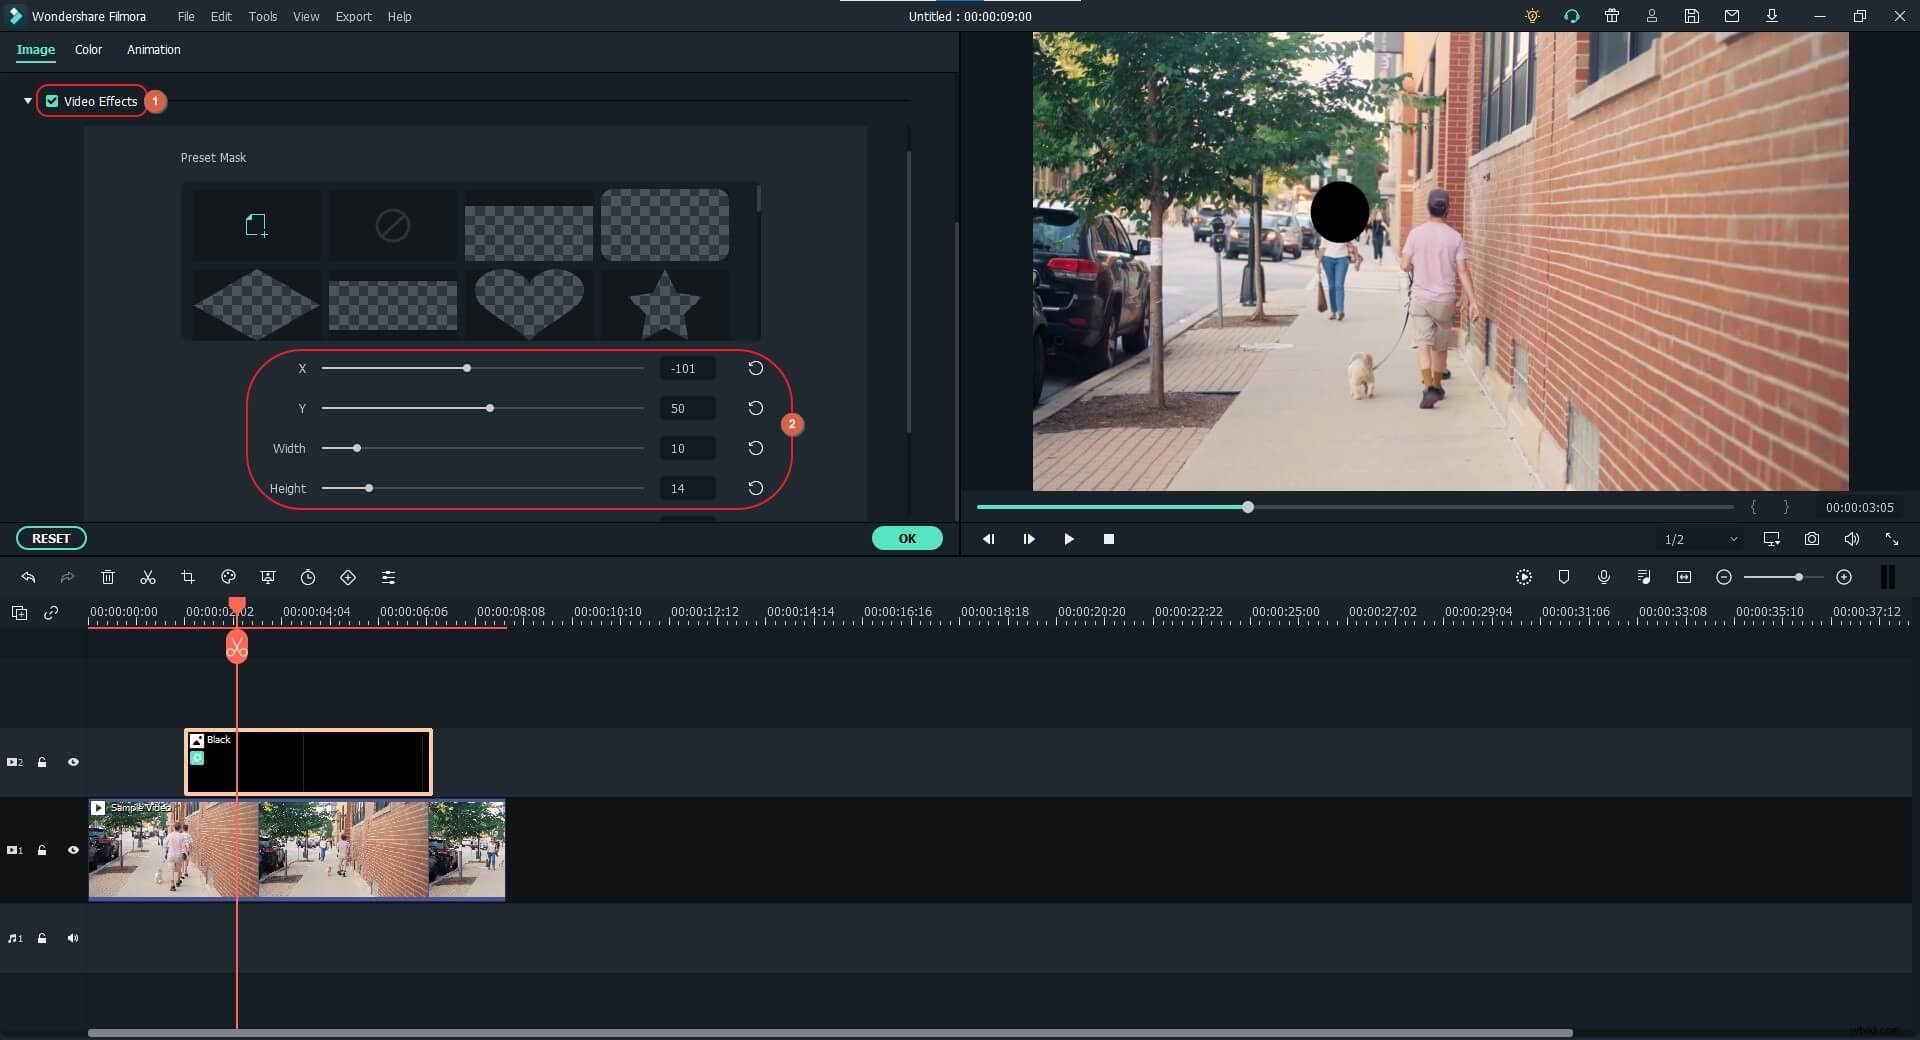
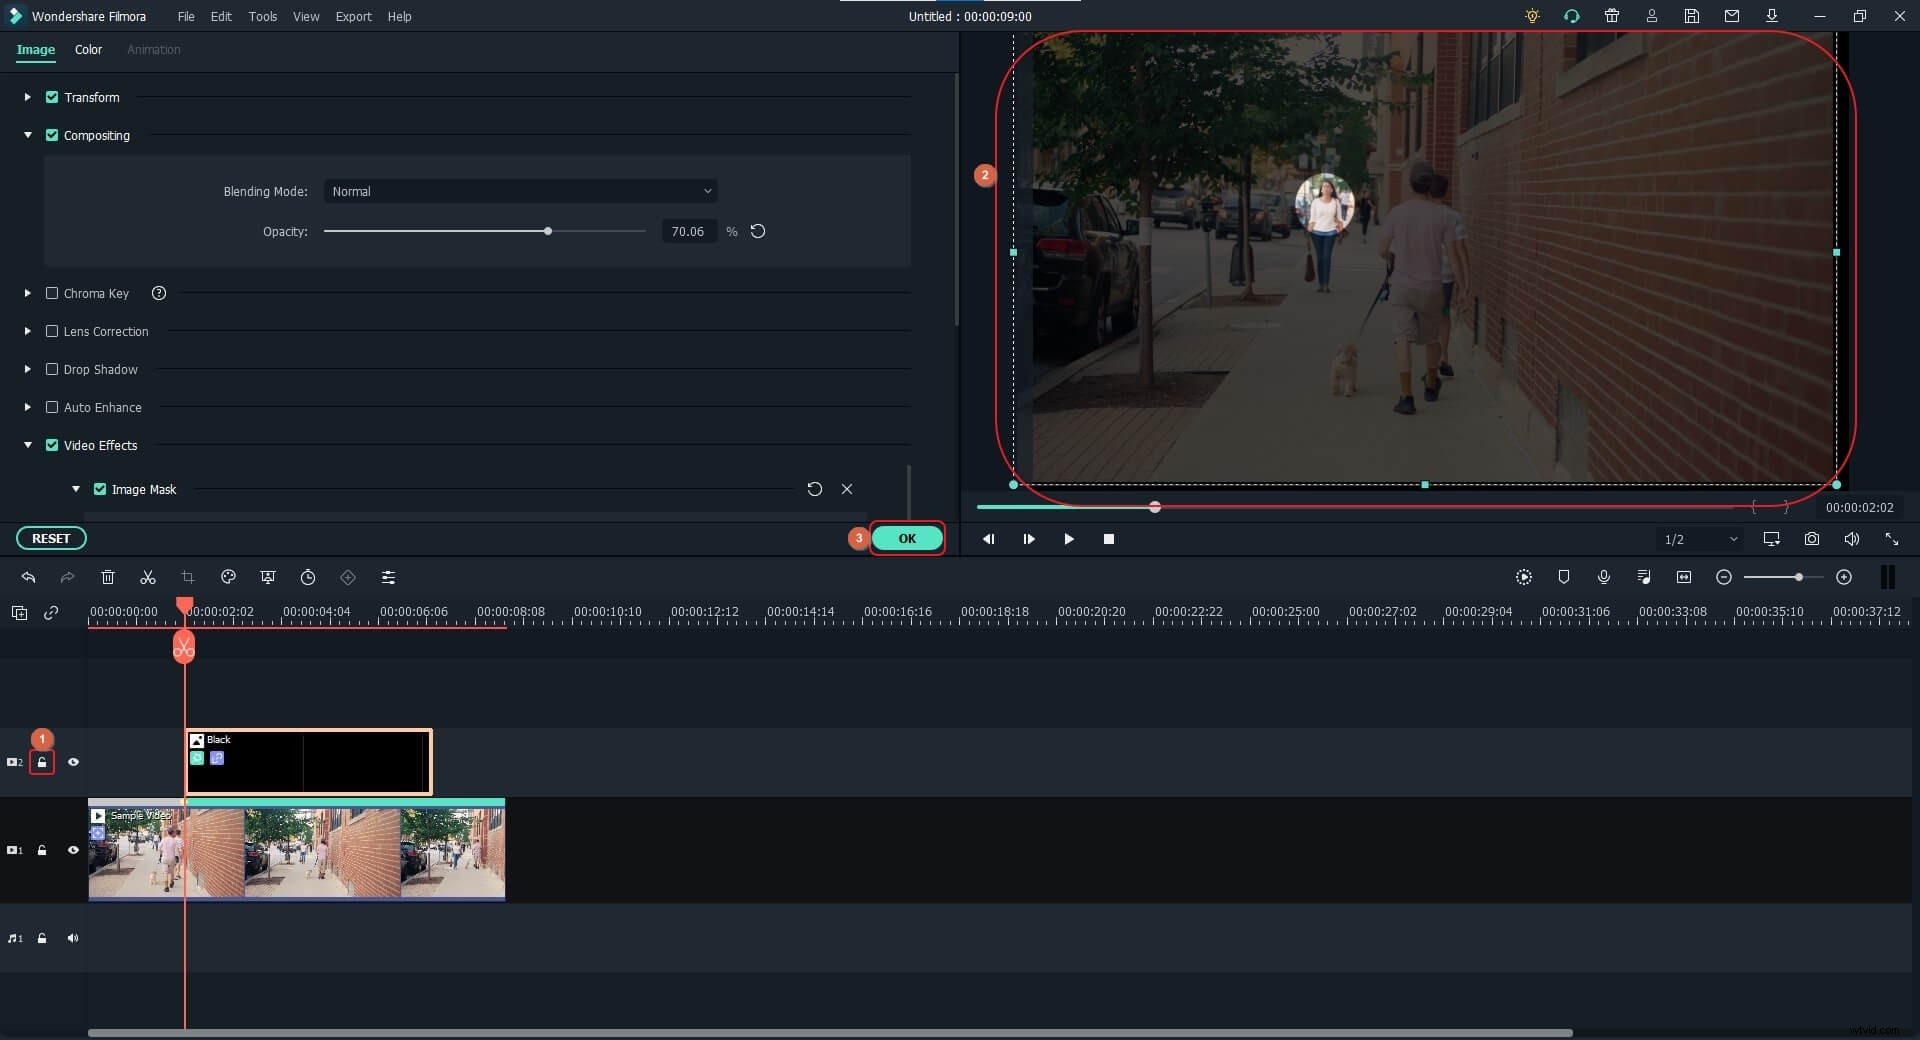
Now, right-click the sample color track with the image mask, and click Show Properties from the context menu. Expand the Video Effects tree from the left pane, and use the X, Y, Width, and Height sliders to resize the image mask and place it over the moving object that you want to highlight.
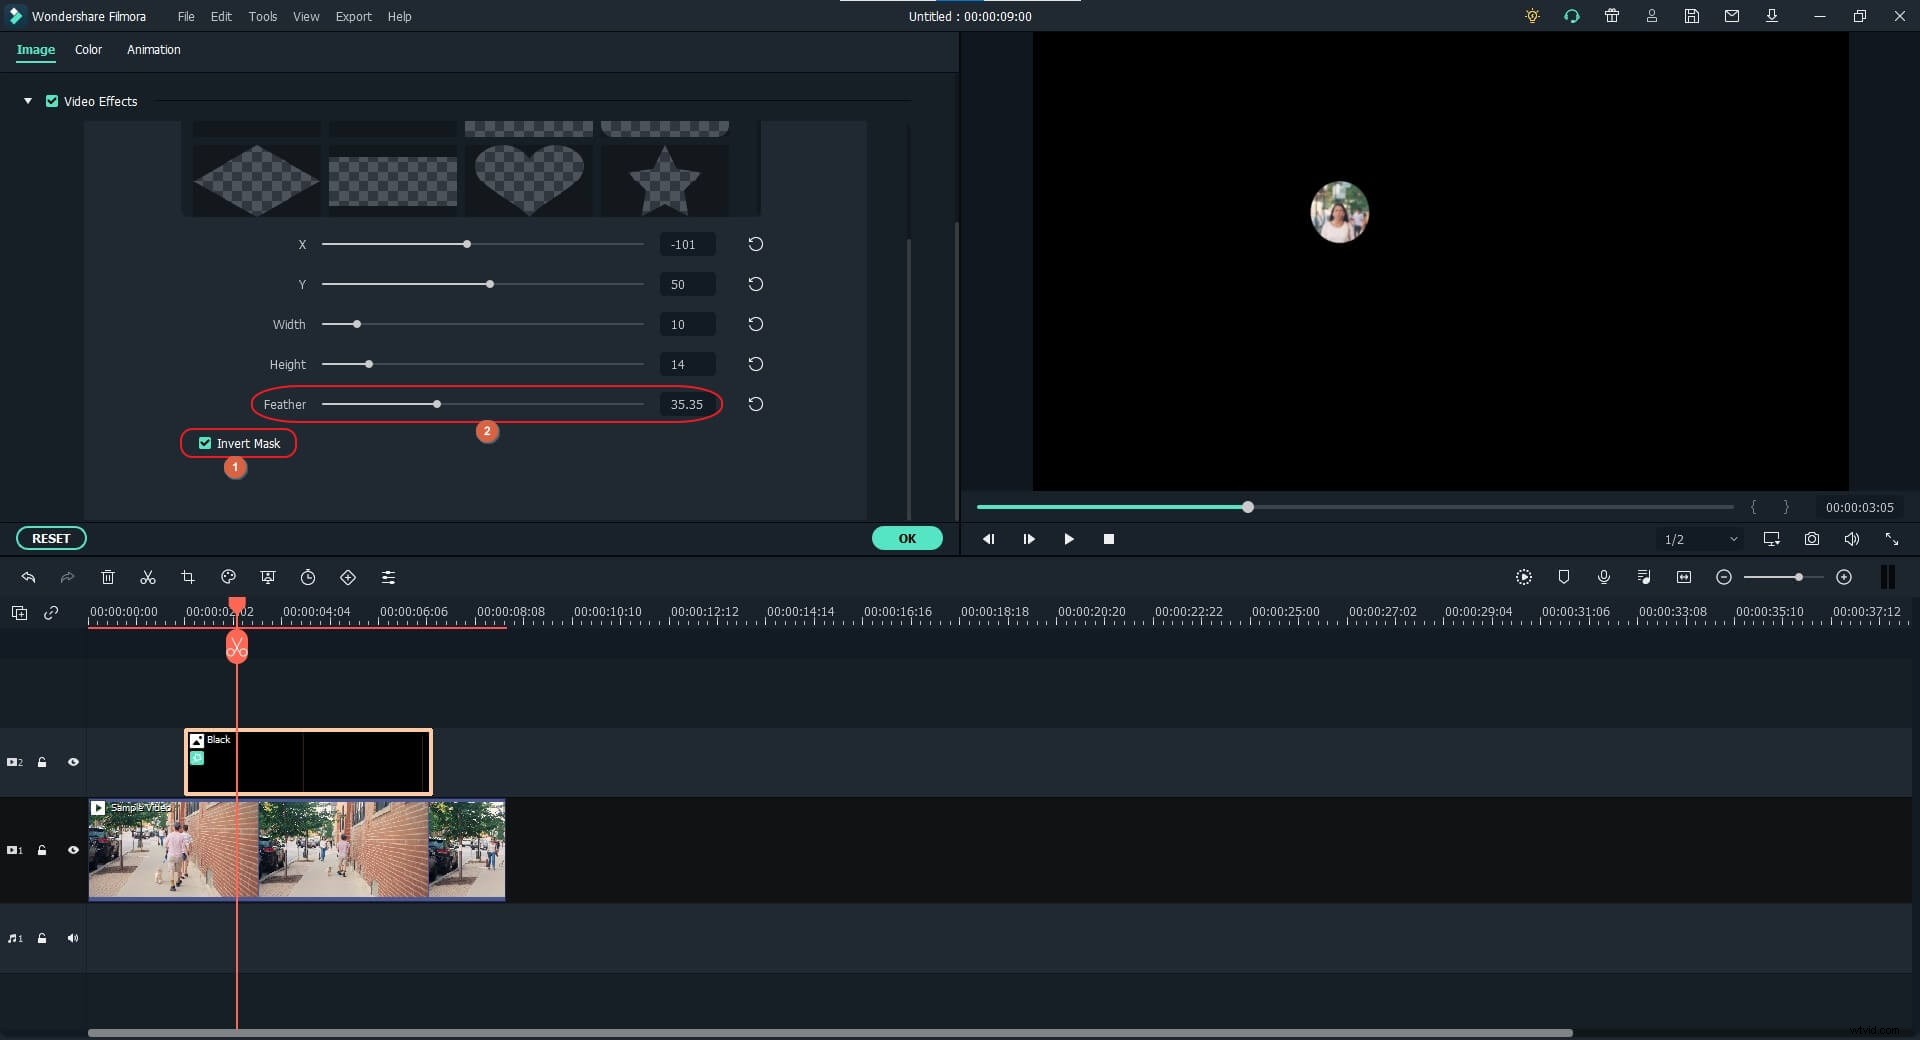
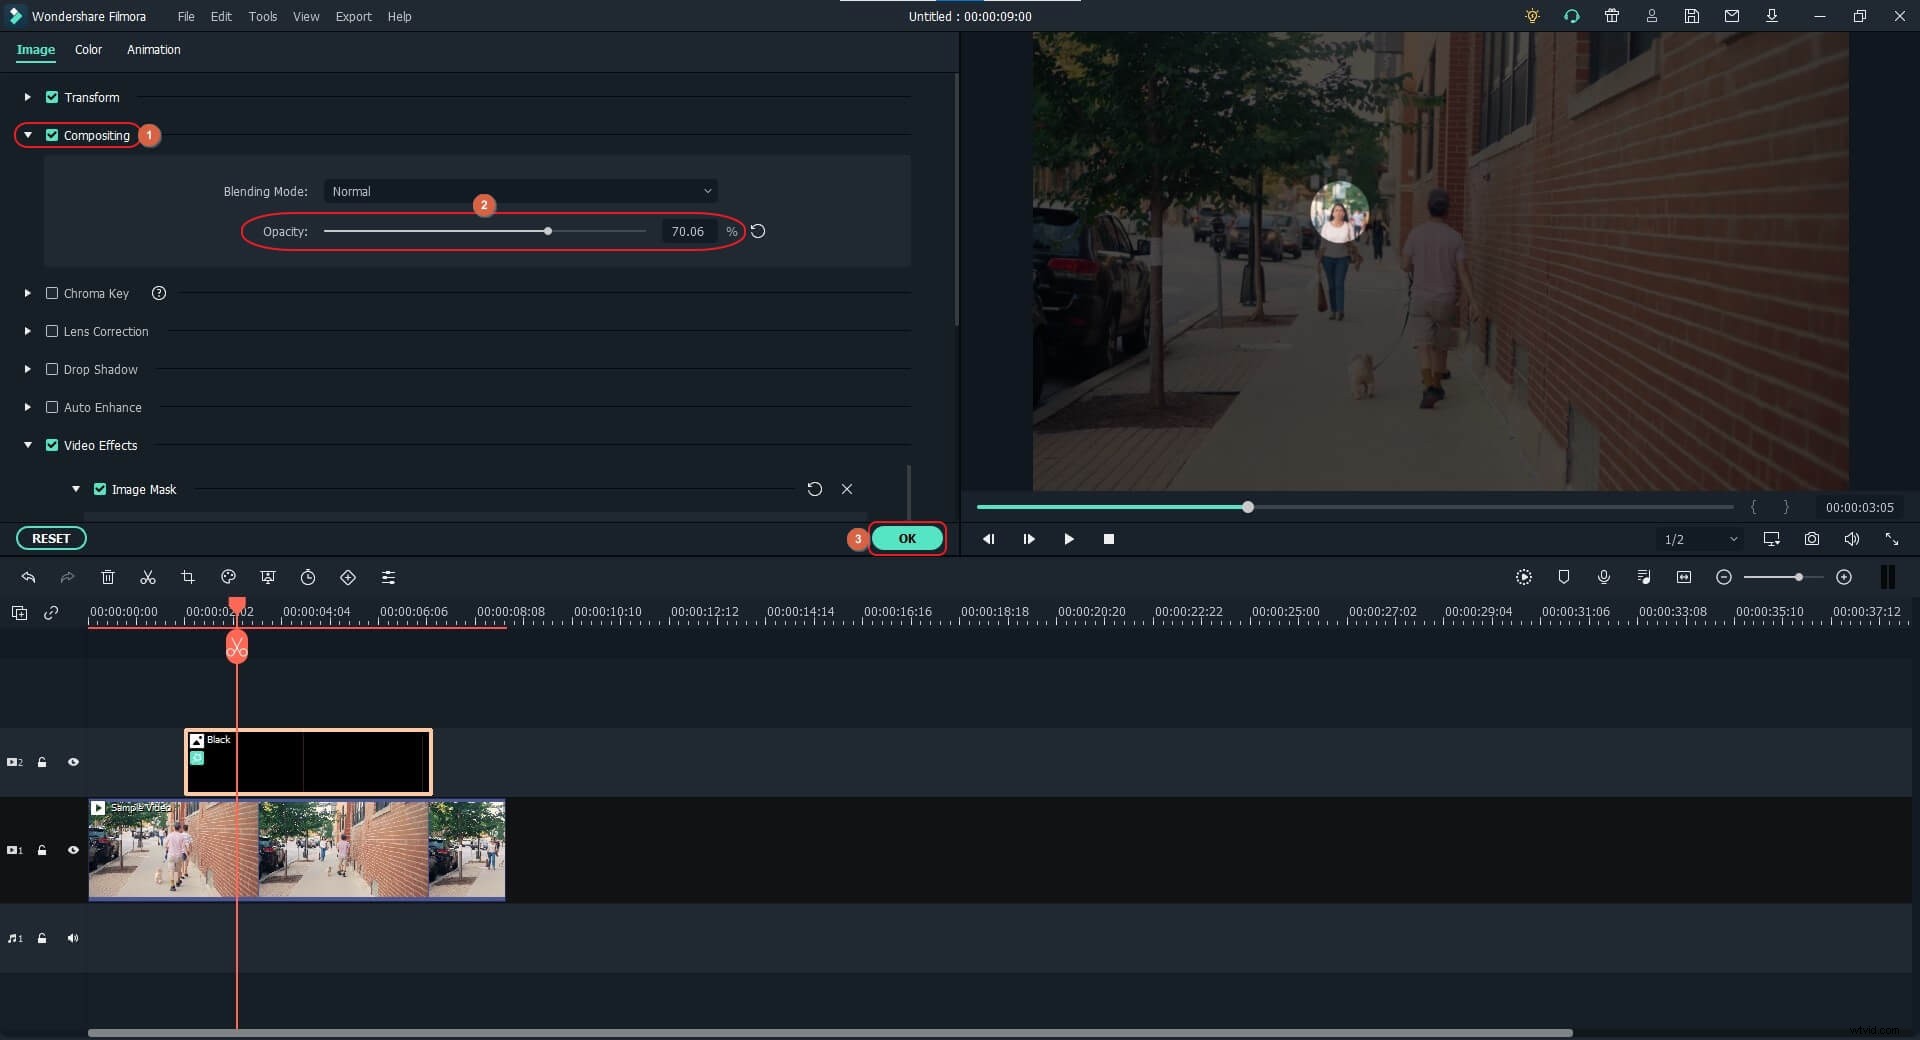
Scroll down the Image Mask section, and check the Invert Mask box. Use the Feather slider to add smoothness to the edges of the mask.
Scroll up, expand the Compositing tree, and use the Opacity slider to increase the transparency level of the mask. Click OK when done.
Step 3: Track the Motion
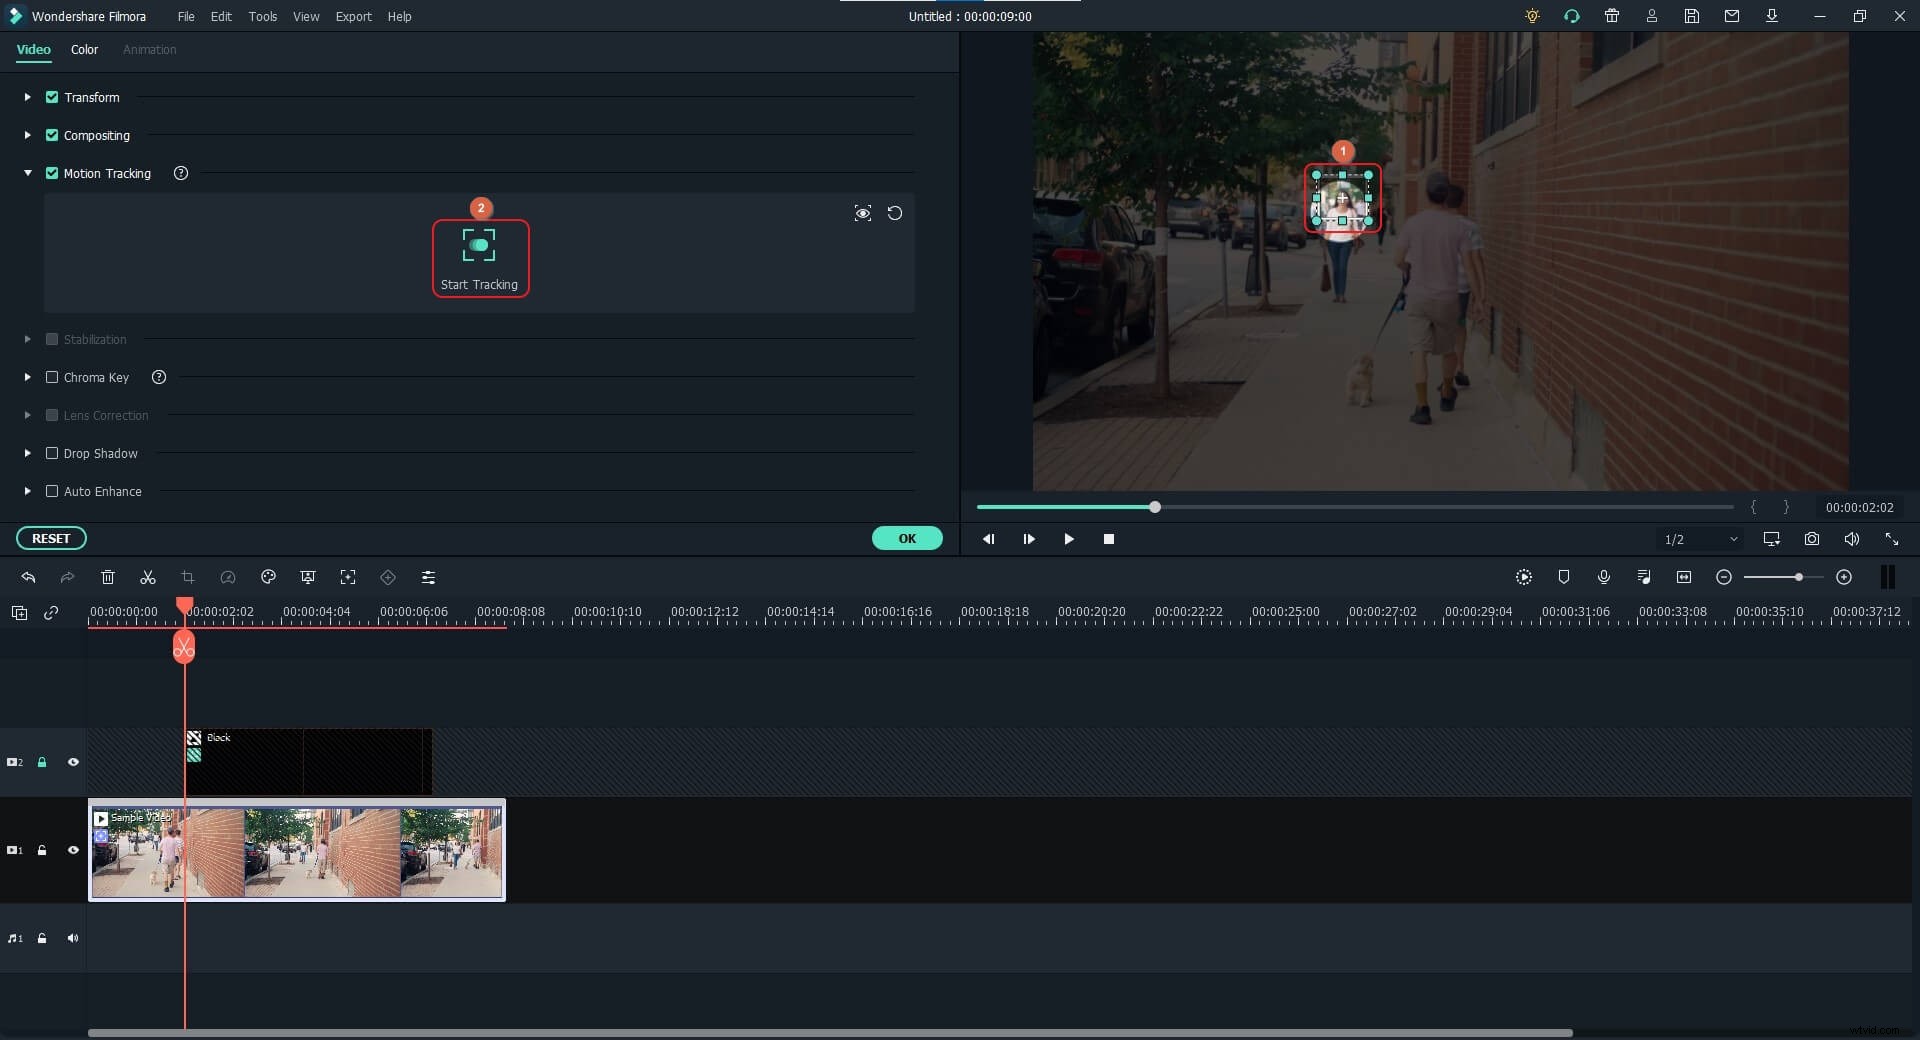
Now, let’s track the motion of the walking woman. It is recommended to lock the color track with the mask from the left pane of the timeline first to avoid mistakes. Select the video track, and click Motion Tracking from the toolbar above the Timeline itself.
Click to select the tracking frame in the Preview window, use the scaling handles to resize the frame, and position it over the object that you want to track. Click Start Tracking from the Motion Tracking window.
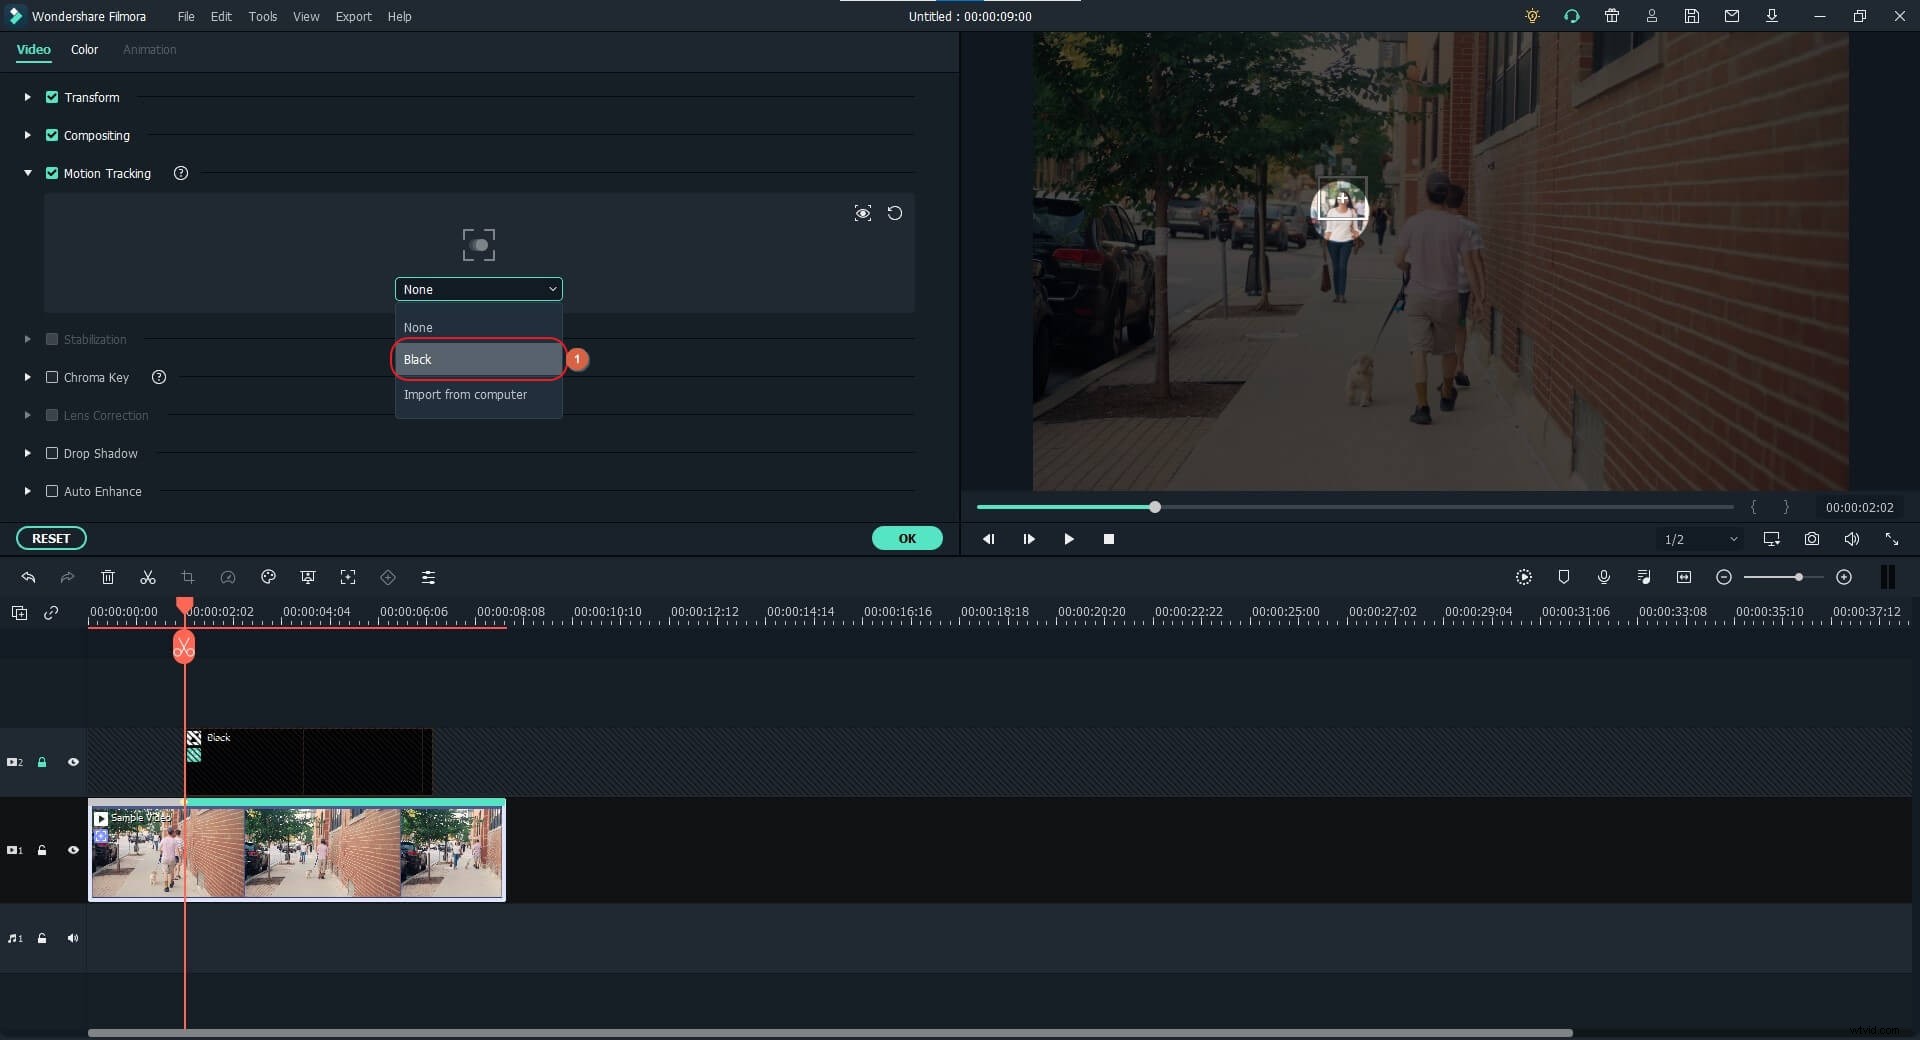
Once the tracking is complete, choose the sample color from the drop-down list that appears under the Start Tracking button.
For more information about the creative use of motion tracking feature in Filmora, you can read how to do motion tracking in Filmora.
Step 4: Resize the Mask Layer and Render the Preview
Unlock the mask layer, and resize the mask in the Preview window to fill the entire screen.
Next, use the scaling handles of the mask in the Preview window to increase its size so that it goes beyond the screen, yet keeping the object located within the highlighted area.
Finally, click Render Preview from the right toolbar to render the preview for quick reviewing before you can export the video for distribution. And then click the Export button to export the video to local or upload to YouTube directly.
Here is a video tutorial made by YouTuber Pixl Creations, which demonstrates how to highlight moving objects in Filmora X step by step.
Part 2: How to Highlight Elements in Video [Filmora X Tutorial]
Highlighting a particular section or element in a video makes the audience focus on that area. The process of highlighting an element in Filmora X is almost identical to the one explained in the previous section. It is only the masking part that needs to be skipped while highlighting. The process of highlighting video elements in Filmora X is given below:
Step 1: Add a Color Layer
Use the method explained above to add media footage to the timeline. Position the play header on the desired frame, and add a color from the Sample Color directory to the second track so the entire screen is filled with that shade.
Step 2: Increase Transparency
Also use the method explained earlier to get to and expand the Compositing tree from the left pane, and use the Opacity slider to increase the transparency level of the color layer.
Step 3: Resize the Color Layer
Back on the previous mode, select the color layer, use the scaling handles in the Preview window to reduce the size, and then place it over the object you want to draw the audience’s focus on. Finally, after reviewing the footage, you can go ahead and export the video for distribution.
Below is a video tutorial about how to highlight video elements made by YouTuber Daniel.
Conclusion
It is easy to learn how to highlight a moving object in a video when using Wondershare Filmora. If it is a person, the process of how to highlight a person in a video is equally easy with motion tracking and keyframing animation features. These tweaks are important when you want to draw the viewers’ attention toward a moving element. Furthermore, if there is a particular region of interest in a scene, you can highlight that particular area with a semi-transparent sample color in the Filmora video editor.