If you don’t know how to use them, DaVinci Resolve’s Auto Select controls can trip up your workflow. Here’s everything you need to know about this highly useful (but sometimes tricky) tool.
Whenever you jump headfirst into new software, there’s always that one feature that keeps tripping you up, and it usually takes a bit of time to figure out what is going wrong. In DaVinci Resolve that feature is the Auto Select control.
It might be one of the most important functions on the timeline because it will directly cause edits on the various tracks on your timeline to perform differently. The Auto Select is a multipurpose control that can increase the efficiency of an edit. What does it do? Its function is to allow editors to specify which tracks will undergo changes during an edit to multiple tracks.
For example, in the screenshot below, I want to make an insert edit with the video and audio from the source monitor. I want the media to land in V1 and A1, so I have selected those tracks. I want the current media on those tracks to ripple forward, and I also need the score on A3 to remain as it is, and for the clip in V2 to continue the fade out.
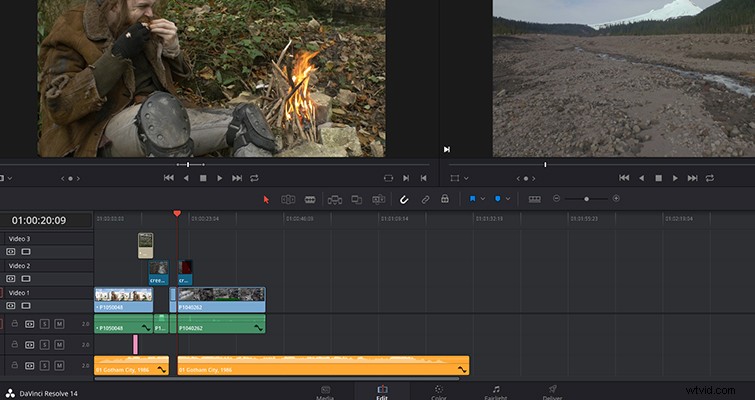
However, when I do so, the insert edit has affected all of the tracks with clips that extend through the marked area. It’s separated the video on V2, along with the score on A3, even though I was only inserting it to tracks V1 and A1. This is because the Auto Select is on for all tracks (it’s on by default). Now, let’s deactivate the Auto Select by turning off the Auto Select button on the track tools.
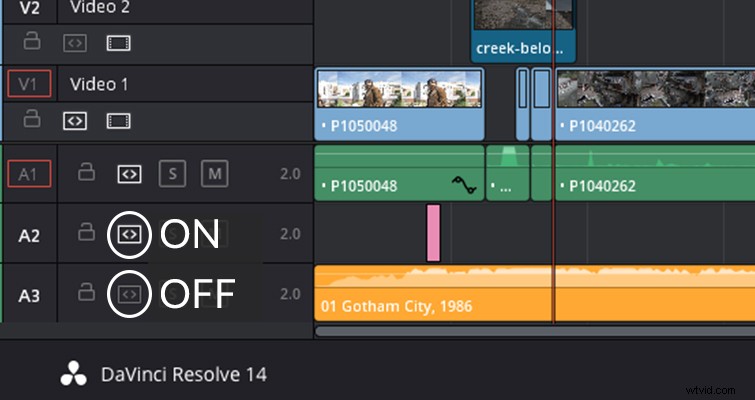
Here, I’ve turned Auto Select off on tracks V2 and A3, and now when I insert edit, something a little different happens.
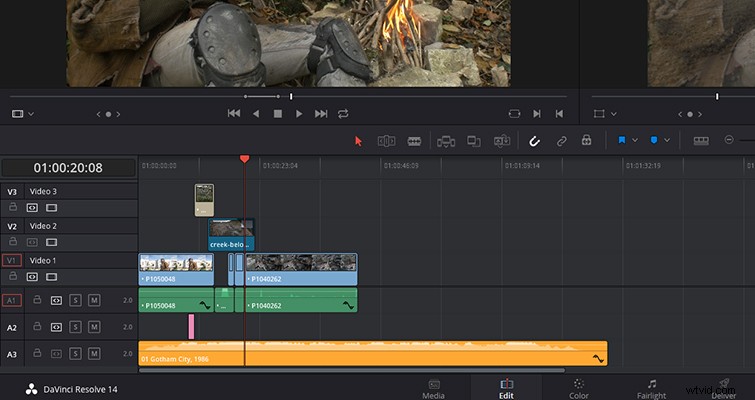
Both the video and audio from the two deactivated tracks have been omitted from the process.
We can see from this very simple edit that the Auto Select controls can be ideal for editing multiple tracks — or cause headaches if you only want to affect one track.
An obvious question is Why not just lock the track? When you lock a track, you completely remove the ability to perform any edit on the track or the individual clips. There may be some circumstances when this is the better tool to use — perhaps locking down a score to remain in place. But this is precisely the point of Auto Select: you are not disabling edits, you’re just removing the track from a multi-track operation — and there are plenty of operations that will respond differently depending on the state of Auto Select:
- Cutting
- Ripple cutting
- Copying
- Deleting clips
- Deleting gaps
- Selecting edit points
- Selecting clips
- Marking clips
- Match frame
- Pasting clips
- Paste insert
- Insert edit
- Ripple overwrite edit
- Finding gaps
- Using the Selection Follows Playhead function.
Further, you can also manually override the Auto Select function by manually clicking on a clip on a track that doesn’t have Auto Select active — an operation that isn’t possible with a locked track.
If you’re an editor who loves to keep your hands on the keyboard as much as possible, you’ll be happy to know that you can manage up to eight video and eight audio tracks with shortcuts. You can turn each video track’s Auto Select on and off with keyboard shortcuts F1 through to F8, and audio tracks Ctrl+shift+F1 through to F8 (Option+CMD if you’re using a mac).
Last year, when I was undergoing training on Resolve 12.5, the course leader said that Auto Select is one of those edit functions that you have to try and perform to understand how it works, and I want to echo those words. As with the Slip and Slide trim edits, Auto Select controls can be a little confusing when you’re simply reading about them. But once you open Resolve and perform a few multi-track edits with the Auto Select, you’ll see how beneficial the control is. If you’re here solely because your timeline has been playing up and you’re not sure why, well, now you have an answer.
Lewis McGregor is a certified BlackMagic Design DaVinci Resolve Trainer.