Whether you’re new to DaVinci Resolve or have been editing with it for a while, here are a few workflow considerations for your next project.
YouTube is full of editing tutorials that’ll take you from A to B with lessons about new applications. Often, it’s through that process that you might find a few quick tips. But really, most editing tutorials recap the basics of the application. The playbook series focuses on tips and tricks foremost — a series of quick tips and tricks that’ll make you say, “I wish I knew that.”
Auto Select
Before we talk about any tips or tricks, we must first talk about the most useful feature on DaVinci Resolve’s editing page. It’ll directly affect the clips you insert onto the timeline and any edits you made, and it’ll also cause you a lot of headaches if you’re unsure how it works.
We’re talking about Auto Select.
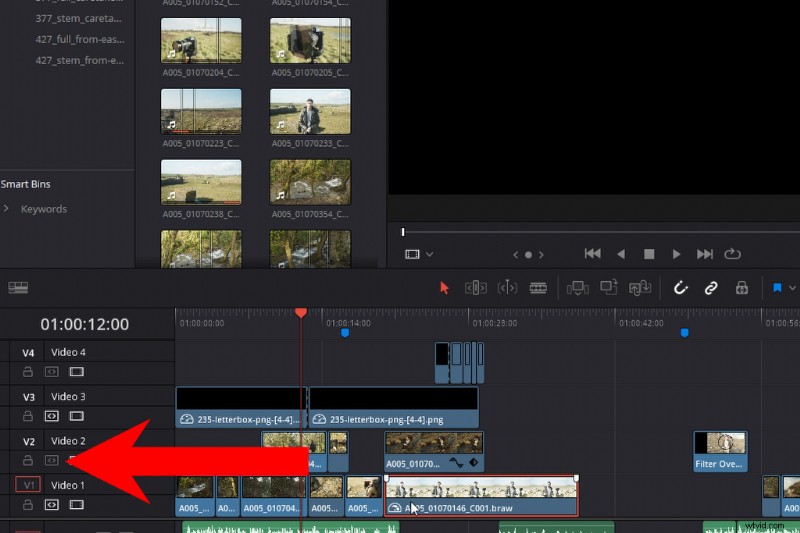
The best way to think of Auto Select is that when it’s activated, it’s telling Resolve, “Hello, make sure you include me in any edits.” For example, if I ripple delete this clip, every single clip on an active track past the playhead will fall back to the space that was taken up by the deleted clip.
The same goes for any inserts or ripple edits, and so on. Every edit affects the timeline as a whole or, more specifically, affects the tracks with Auto Select active. If I turn off Auto Select on track three, the media doesn’t move when I insert a new clip from the source viewer.
Also, it can cause a lot of headaches if you’re prone to using delete instead of backspace. Backspace removes the single clip then deletes that space. As a result, you may find yourself moving clips and audio tracks that you wanted to remain in place. Therefore, be vigilant about which tracks have an active Auto Select.
This function is also incredibly important when we look at the next tip from this playbook episode, which is keyboard shortcuts to increase efficiency.
Keyboard Shortcuts
If you recently moved from Premiere, you may notice that there isn’t a tool or button to select all clips on a track. That’s because it’s under a keyboard shortcut, which is Y. However, my favorite variation of this shortcut is Alt+Y, which will select all clips across all tracks forward from the playhead. This is perfect for when you want to move all clips forward or backward (for whatever reason) quickly. And, just like we talked about in our previous entry with the Auto Select, when clicking Alt+Y, it’s only going to select the tracks that have Auto Select on.
Keyboard shortcut: Alt+Y to move all clips from the playhead forward or backward.
Editing Interviews
I’ve been cutting a lot of interview-based material lately, and one issue with interviews is that you can’t quickly scrub through the clip to look for a particular moment of action, say in comparison with a two-minute shot that has a horse jump over a fence. That’s because, often, the interviewee is static, and likewise, scrubbing through a long clip doesn’t present audible dialogue.
The basic keys for movement are J to rewind, K to stop, and L to play forward. However, if you hold Shift+L or double-tap L, the playback speed doubles. You can hit L again to increase to 4x and so on. But at 2x, we can now listen through a lengthy interview to try and find that critical moment.
Keyboard shortcut: Shift+L for faster playback preview.
Next is the nudge keyboard shortcut, which is comma (,) to nudge a clip backward, or period (.) to nudge a clip forward. If I’m being honest, I don’t think this keyboard shortcut is wholly unique or unknown to new editors. However, if you were to hit T, which brings you into the trim mode, the way Resolve interprets the nudge is different. Instead of rolling the clip up the timeline, it instead slips the position of the media.
If you’re not too sure what a slip edit is — let’s say the original media is twenty seconds long, and we’re using five seconds — by slip editing, we’re adjusting what five seconds out of those twenty seconds we’re using. The length stays the same, but the content of the original media is different.
The Retime Control
The final useful shortcut in this episode is Shift+R — the retime control.
This is an excellent way of manipulating the speed of a clip, instead of just right-clicking and selecting change speed. For example, you could increase a clip’s speed by 200 percent, then reverse it and later play forward at 50 percent — all within the same clip.
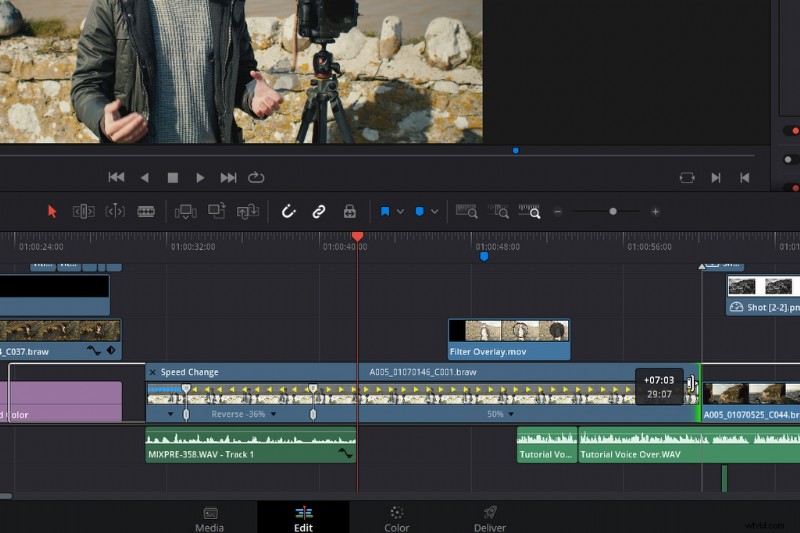
At the bottom of the clip, you’ll find a small, black drop-down triangle. By clicking on this, you open the retime speed menu. Here, you see the same options from the clip speed menu, plus some extra features. To adjust the speed of a specific portion of your clip, add a speed point to the desired area (do this by moving the playhead), then add another speed point to the area where you want the speed change to stop or differ, then change the speed within the individual speed menu.
One of my favorite Premiere Pro features was the snapshot tool that would allow you to take a still of the current frame and make a jpeg you could use as a thumbnail for YouTube or something, but more so, importing that and using it as a freeze-frame.
In Resolve, we don’t have a one-click freeze-frame button — although Shift+R will freeze an entire clip, unlike Premiere, where that snapshot tool will create an independent still image. Resolve uses the clip itself. It can be a pain, sometimes, as you need to slice that specific area you want frozen, then extend it.
Therefore, I like to use the retime control to create that particular frozen area. I’m going to hit Control+R, bringing up the retime controls, find where I want the freeze-frame to occur, add a speed point, then change that selection to freeze-frame.
Slow-Motion with 24fps
The talk of speed changes and increasing speed will bring me into my next tip, which is how you can get slow-motion footage without shooting at a higher frame rate.
Several years ago, when the DSLR revolution was firmly taking place, there was a plug-in called Twixtor. It would take 24fps footage and optically blend the frames to make it appear as if it were slow-motion. It had a hit-and-miss use. It didn’t work well in clips that had too much movement.
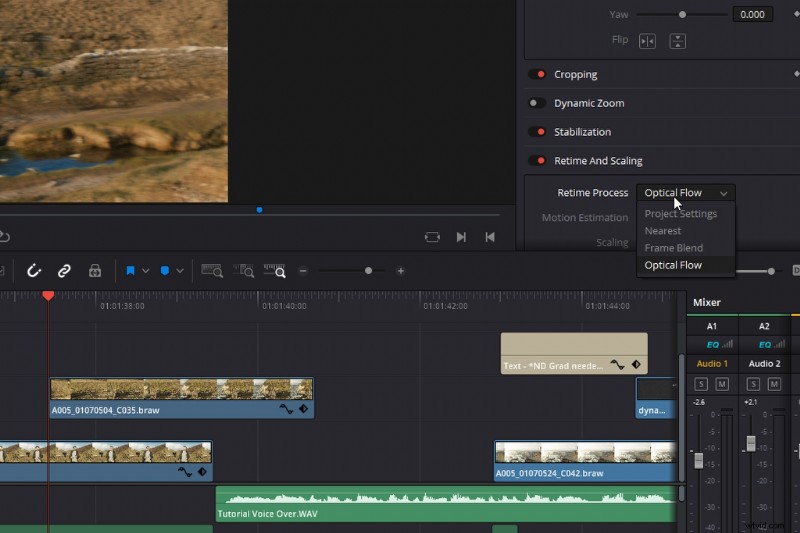
This was a plug-in you had to buy, but in Resolve, we have something similar. It’s not in the Effects Library, nor is it in the Pop-up Menu when you click speed change, instead. You need to open the inspector, scroll down to retime and scaling, and select Optical Flow. This’ll generate new frames based on the information of the previous and following frames to create a realistic, slow-motion effect — as if the original shot was at a high frame rate.
Now, of course, there’s a limit to how far you can push this with movement occurring in your shot. But, for the most part, I think if you have a simple pan or static shot with minimal movement, you may be able to convey a slower sense of speed.
Cleaning the UI
Finally, we’re going to look at a few ways to declutter the UI. The software engineers have done a fantastic job of giving you a streamlined user interface. In fact, there’s very little to declutter in comparison with, say, After Effects, which can get very messy very quickly. It’s extremely fluid and responsive. You can open panels by simply clicking the respective icon, extended by pulling or pushing the box edge, and when you see these icons, it means we can extend the panel. Not only that, we can add another panel box to the UI. Amazing, and yeah, there’s not a lot of cleaning to do. But, what I do want to do is change these page buttons at the bottom.
It can be a hassle to click these page buttons accidentally and head to a new page outside of your edit. And, if you have a low-performing PC, the fusion page can take a bit to load up.
So, what I suggest doing is removing the tabs that you know you’re not going to use. You do this by going to Window > Show Page.
Flatten Unused Clips
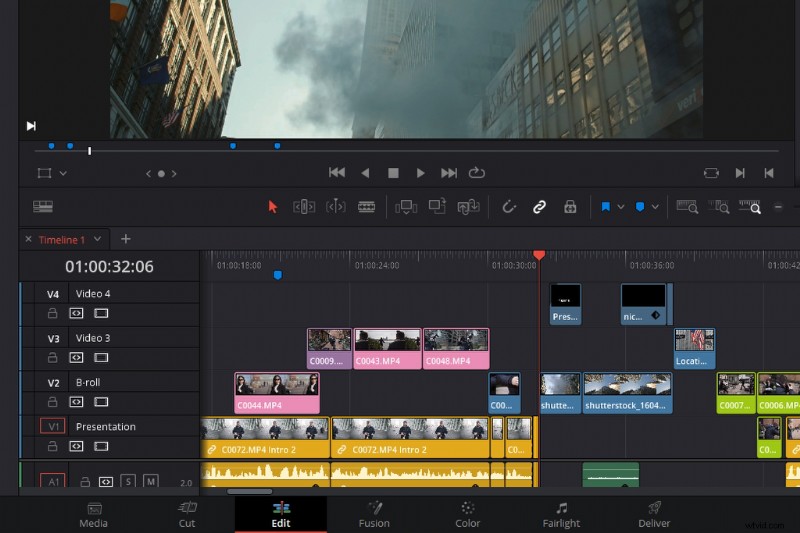
And the final timeline tip: sometimes after a long edit, you may find your timeline has got away from you (despite trying to be organized), you may have a timeline that is quite cluttered, or there are some clips that are on a separate video track for no reason. For example, in this edit, if we look at this specific area, there’s no real reason why these clips should be so spread out on different video tracks.
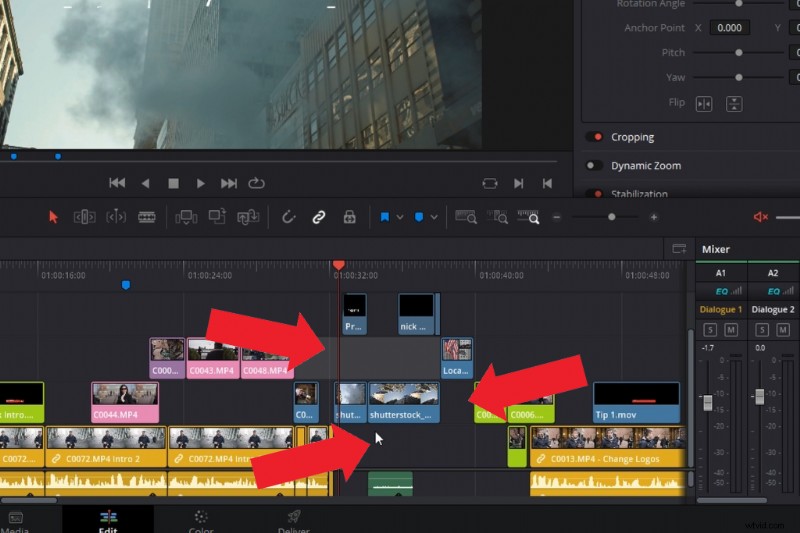
So, instead of trying to bring down each clip — which may knock off its position within the timeline — we’re going to go to Workspace > Timeline > Cleanup Timeline > to flatten unused clips.
As a result, any track that features free space, or if the clip underneath is not being used, will get flattened by Resolve.
Interested in the tracks we used to make this video?
- “Flaming Lo Fi” by Trending Music
- “Tempting” by Trending Music
- “Late Night Groovin’” by Marc Walloch
- “Hip Hop Travel” by Trending Music
- “Boom Bap Hip-Hop” by Trending Music
Looking for more editing tips and tricks? Check out these articles.
- Filmmaking Roundup: The Best Free Video Editing Programs
- Premiere Pro Playbook Part 2: 10 Workflow Tips for Streamlining Edits
- Things to Consider Before Building a Video Editing Computer
- 9 Beginner Tips For Editing Footage in Final Cut Pro X
- Premiere Pro Playbook: 10 Video Editing Workflow Tips