You’d think that with all the guides now built into cameras you’d be able to take a picture with a straight horizon. It would appear not, as levelling horizons is still a much asked for common fix for your photos.
Luckily built into Photoshop’s ACR (Adobe Camera RAW) is a swift horizon correction tool that will enable you to straighten the wonk.
While the tool is easy to use it isn’t immediately apparent as it resides in the ACR rather than the main Photoshop interface.
As the tool is ACR based it needs to be applied as one of the first fixes to an image; before adding layers or making other enhancements to the picture.
Another gem with this tool is that as it’s based in ACR, precisely the same principles apply in Lightroom.
Let’s take a look.
1/ Open from Bridge
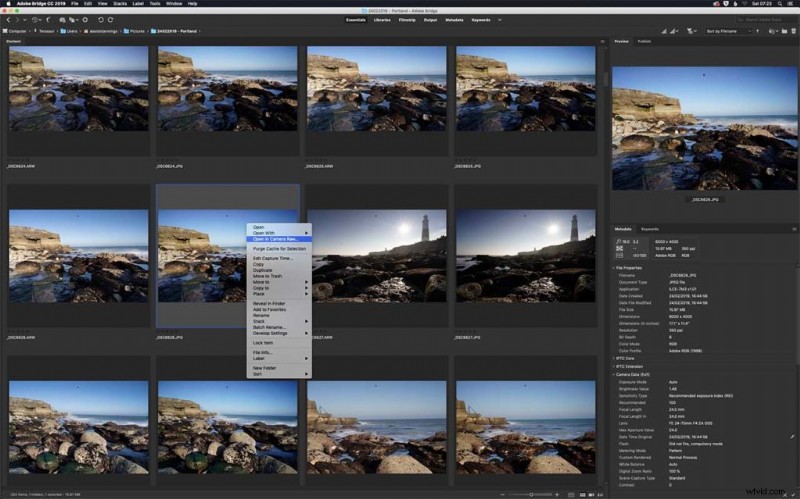 The first step is to open the image; RAW files will automatically open in Bridge; however, you can also open jpegs in the application. Navigate to the image you want to straighten and right click and select ‘Open in Camera Raw’.
2/ The Straighten Tool (A)
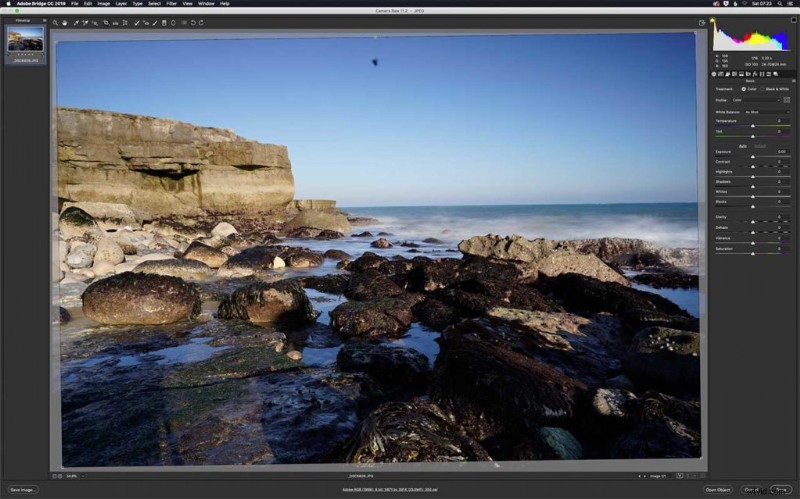 Along the tools at the top of the screen is a small icon that looks like a level, this is the Straighten Tool, and it can be used in one of two ways. Click and drag along the horizon or double click and let ACR handle it.
3/ Fine Tuning
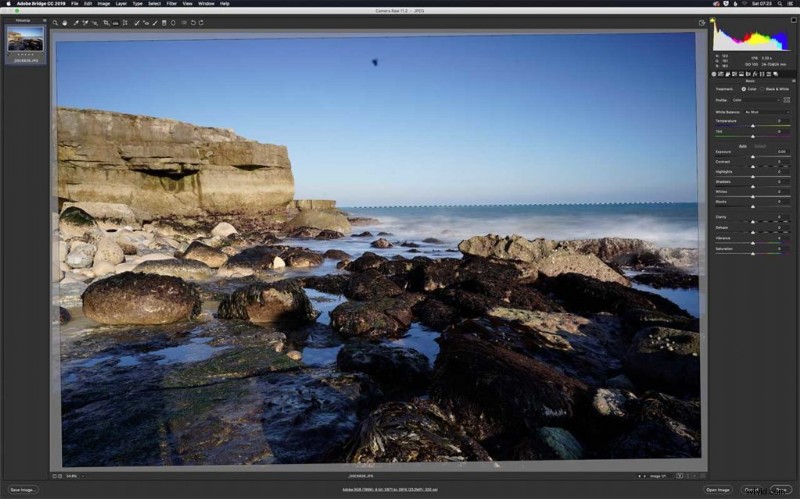 If Auto doesn’t quite do the job. Select the ‘Straighten Tool’, click and hold the right mouse button down on the left point of the horizon and drag to the right, releasing the mouse when the line is drawn.
4/ Finishing off
 Now the image has a level horizon your free to move onto the next stage. Click the ‘Hand Tool’ (H) to see the corrected image. You can now apply more corrections in ACR or click ‘Open Image’ to open in Photoshop.