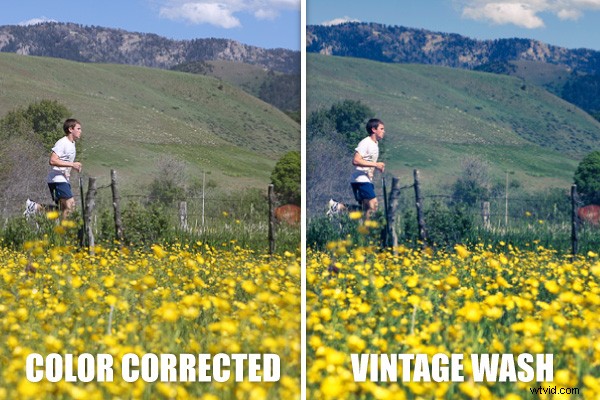
Introduction and Overview
Vintage fades and washes seem to have recently become quite popular. Perhaps since the modern DSLR has enabled everyone to shoot such high quality/high definition images, there is more of a desire to reach towards the past with these vintage effects. Regardless of the reason, in this tutorial, I am going to show you just how simple it is to create a vintage wash in your images by cross processing your image with Curves in Photoshop. The best part about it, this technique will literally take you less than 1 minute to do manually, and only seconds if you turn it into a Photoshop Action.
If you would like to see the video version of this tutorial, please go to the SLR Lounge YouTube Channel, or go to SLRLounge.com for this as well as hundreds of other Lightroom and Photoshop video tutorials.
Understanding the Look
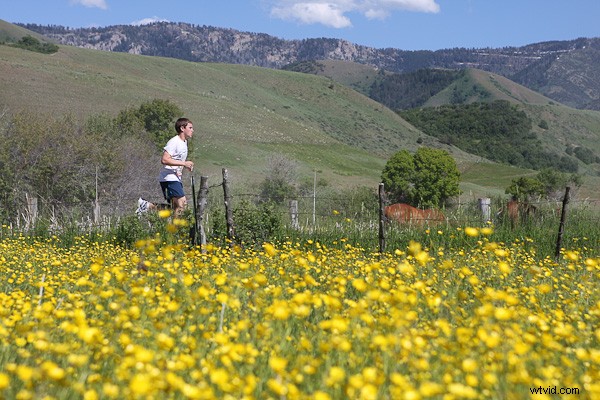
Before we get into creating the effect, I want to briefly discuss what we are trying to achieve. In vintage photos, colors fade over time. The first color to typically begin fading is usually the blues in the highlights of the image. Because of this, the reds and greens of an image become more prevalent in the highlights and fade in the shadows thus revealing more of the blues. This process is exactly what we are going to mimic in Photoshop via cross processing using Curves. Below is our standard color corrected image which we will apply our effect to.
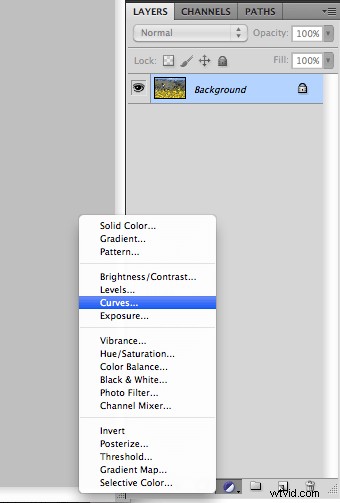
Step 1 – Add Your Curves Adjustment Layer
The first step is to open your image which should be color corrected and then add a Curves Adjustment Layer as shown below.
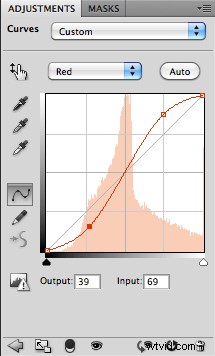
Step 2 – Adjusting the Red Channel
Ok, so as we mentioned, vintage photos fade so that the reds are pumped up in the highlights and dropped in the shadows to reveal the blues. So, we are going to do just that by selecting the Red Channel in our Curves adjustment layer. Next add a point on the line near the highlights and drag up, then add a point in the shadows and drag down. You should see an S shape as shown in the example below.
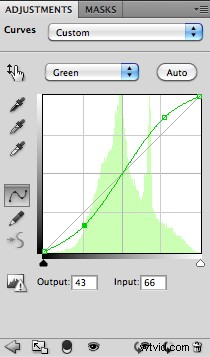
Step 3 – Adjusting the Green Channel
Now we are going to do the exact same thing with the Green Channel. Select the Green Channel and create the exact same effect by pulling up in the highlights and down in the shadows. Just a note, I usually will inflate the reds slightly more than the greens. Once done, your green channel should have the same S shape as shown below.
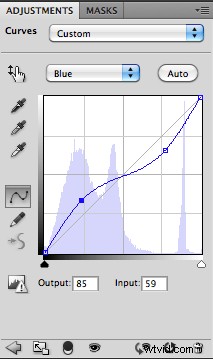
Step 4 – Adjusting the Blue Channel
Now it’s time to work on the Blue Channel. Now, if you remember, we talked about how vintage faded images typically lose blues in the highlights while the blues become more revealed in the shadows because of the loss of greens/reds. So, let’s do just that. We are going to create an inverted S in the Blue Channel by pulling down on the highlights and pulling up in the shadows as shown in the example image below.
Finishing Touches
We are done with our effect. If you feel like it is too strong, simply adjust the opacity down on your Curves Adjustment Layer that we just made. You should see something like the final example shown below. Enjoy!
