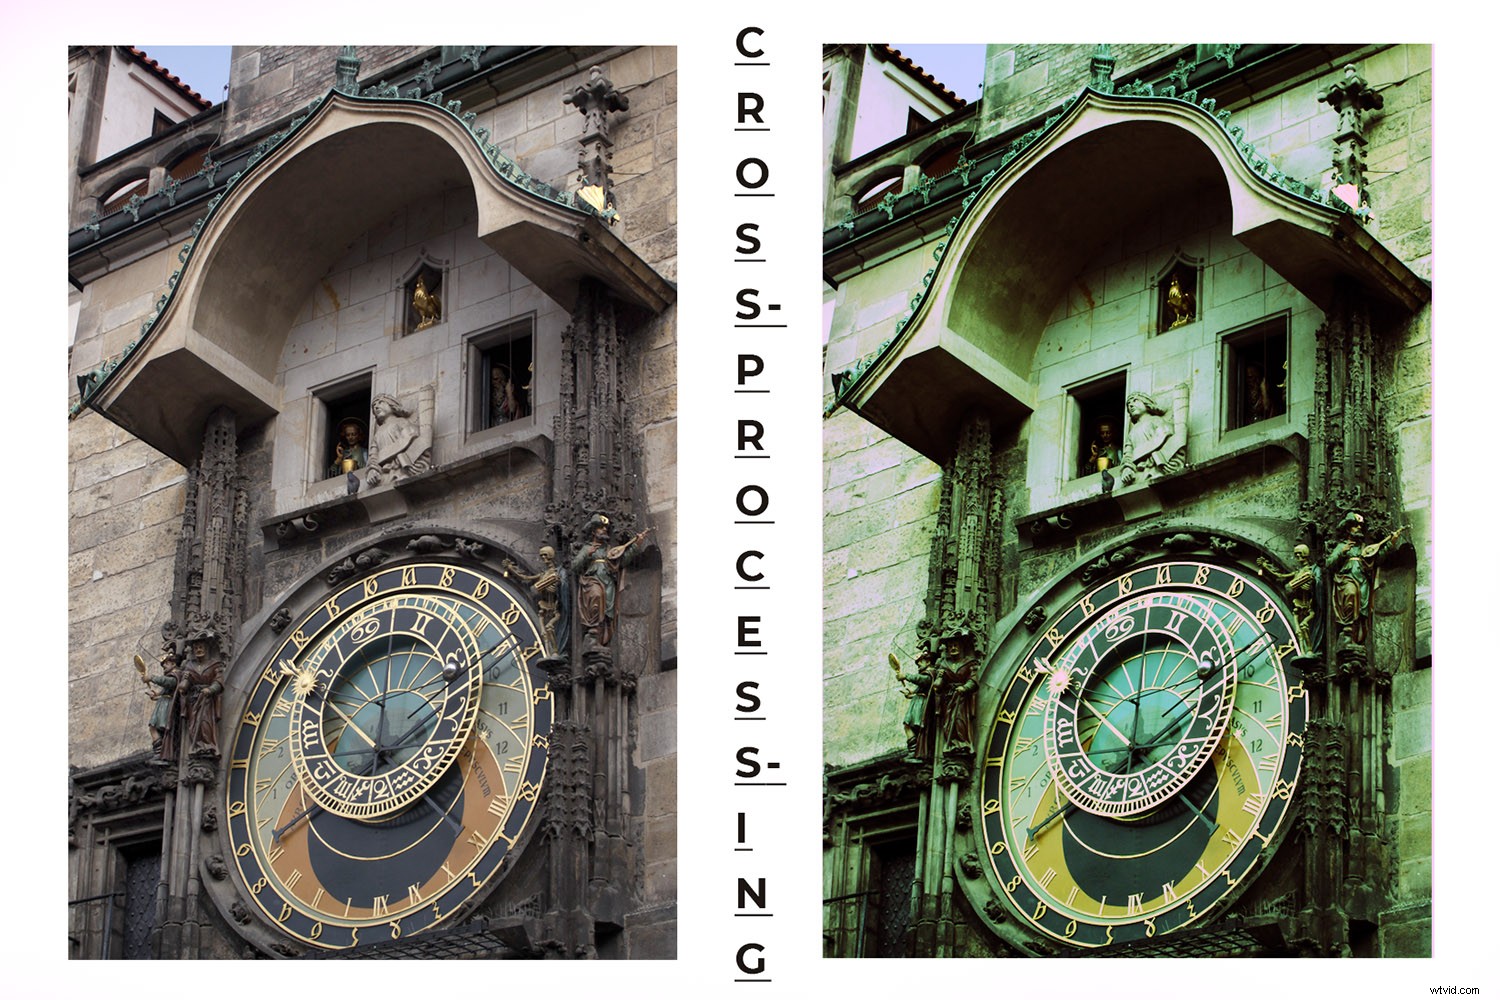
Cross-processing is a technique that comes from the darkroom days. You would purposely develop film in the wrong chemicals to achieve special color effects. When no film or chemicals are involved in digital processing, it is possible to mimic a cross-processing effect in Photoshop. I’ll show you how in a few easy steps.
The technique is called cross-processing because it referred to the processing of negative film with a chemical developer designed for reversal film. Or vice versa. You will also find it under the name ‘x-pro’ or ‘Xpro.’
Of course, replicating this effect directly in camera isn’t possible, but you can reproduce the results with Photoshop. You can make your image look like it’s the result of cross-processing.
In Photoshop there’s often a preset that solves your problems. Cross-processing is no exception. I will show you a step-by-step way to do it so that you can have more control over the end result. There is no right or wrong. One is no better than the other. It’s about giving you a choice so you can decide what works best for you.
So, let’s get started.
The Cross-Processing Preset
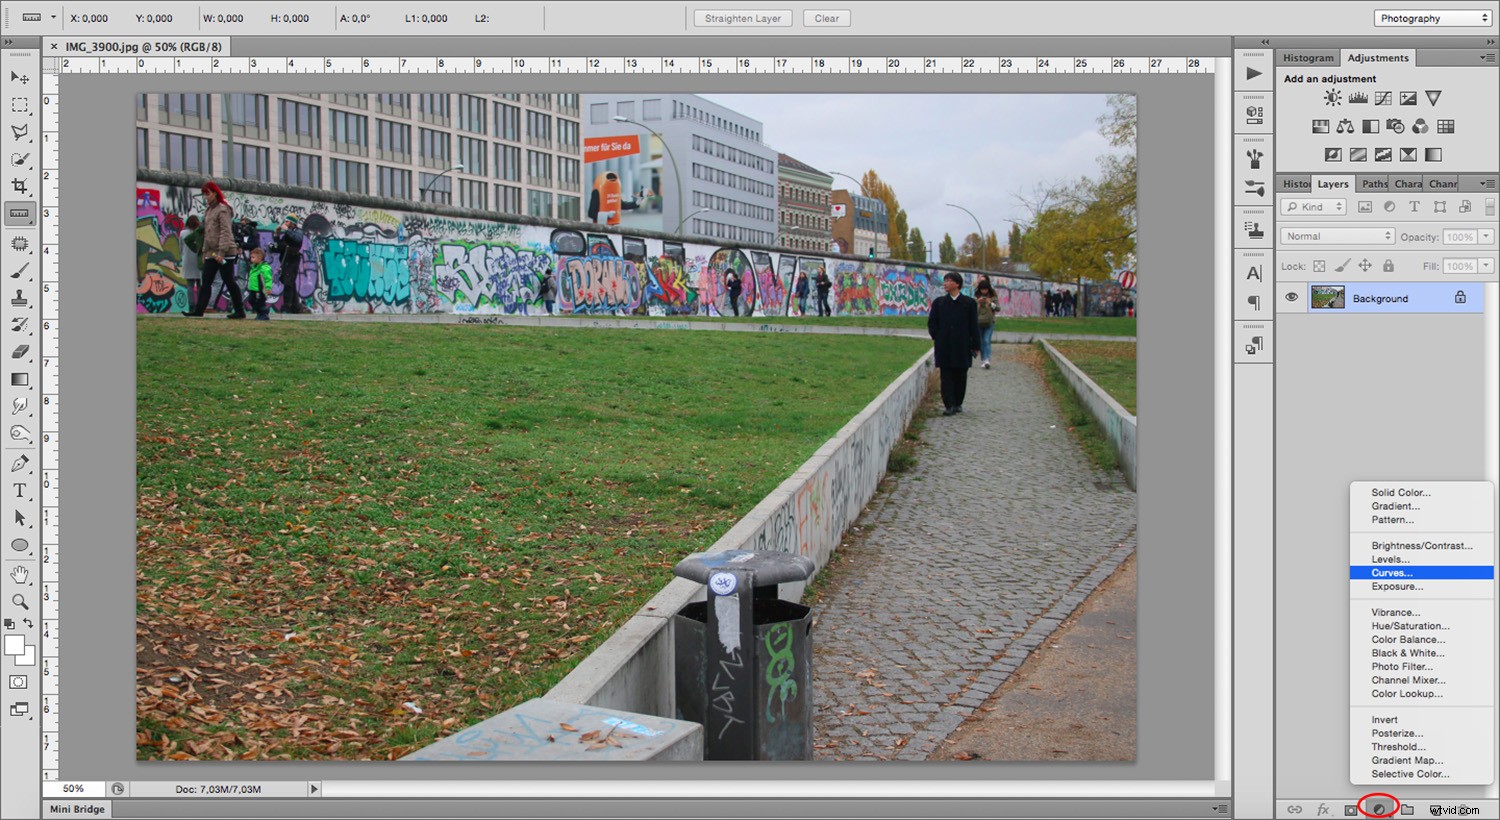
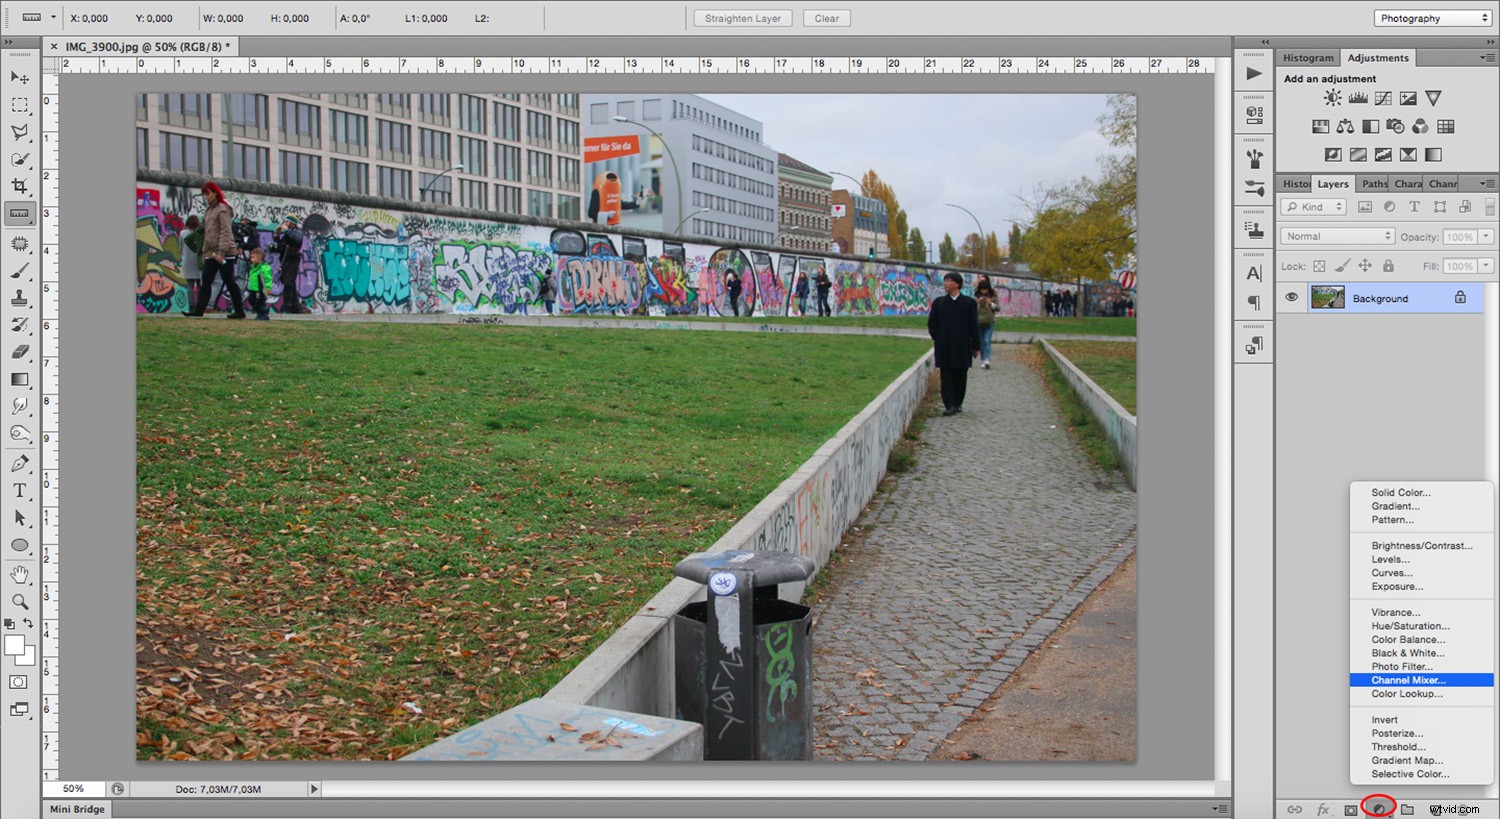
To find the ‘Cross-processing’ preset add an ‘Adjustment’ layer. Click the button at the bottom of the layers panel and choose ‘Curves’ from the pop-up menu.
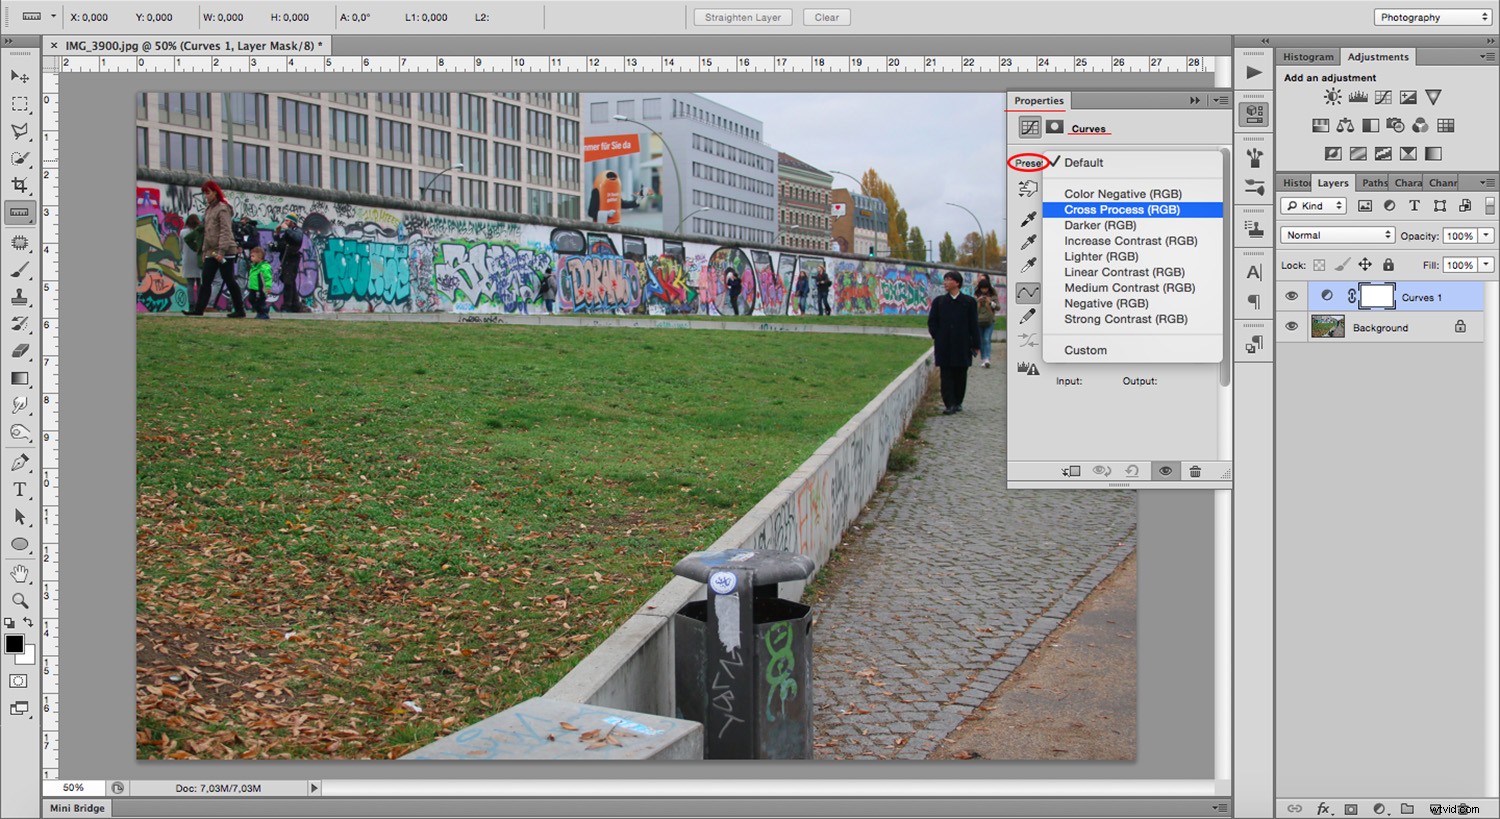
From the ‘Properties’ panel open the ‘Preset’ menu. Change it from ‘Default’ to ‘Cross-Process (RGB).’
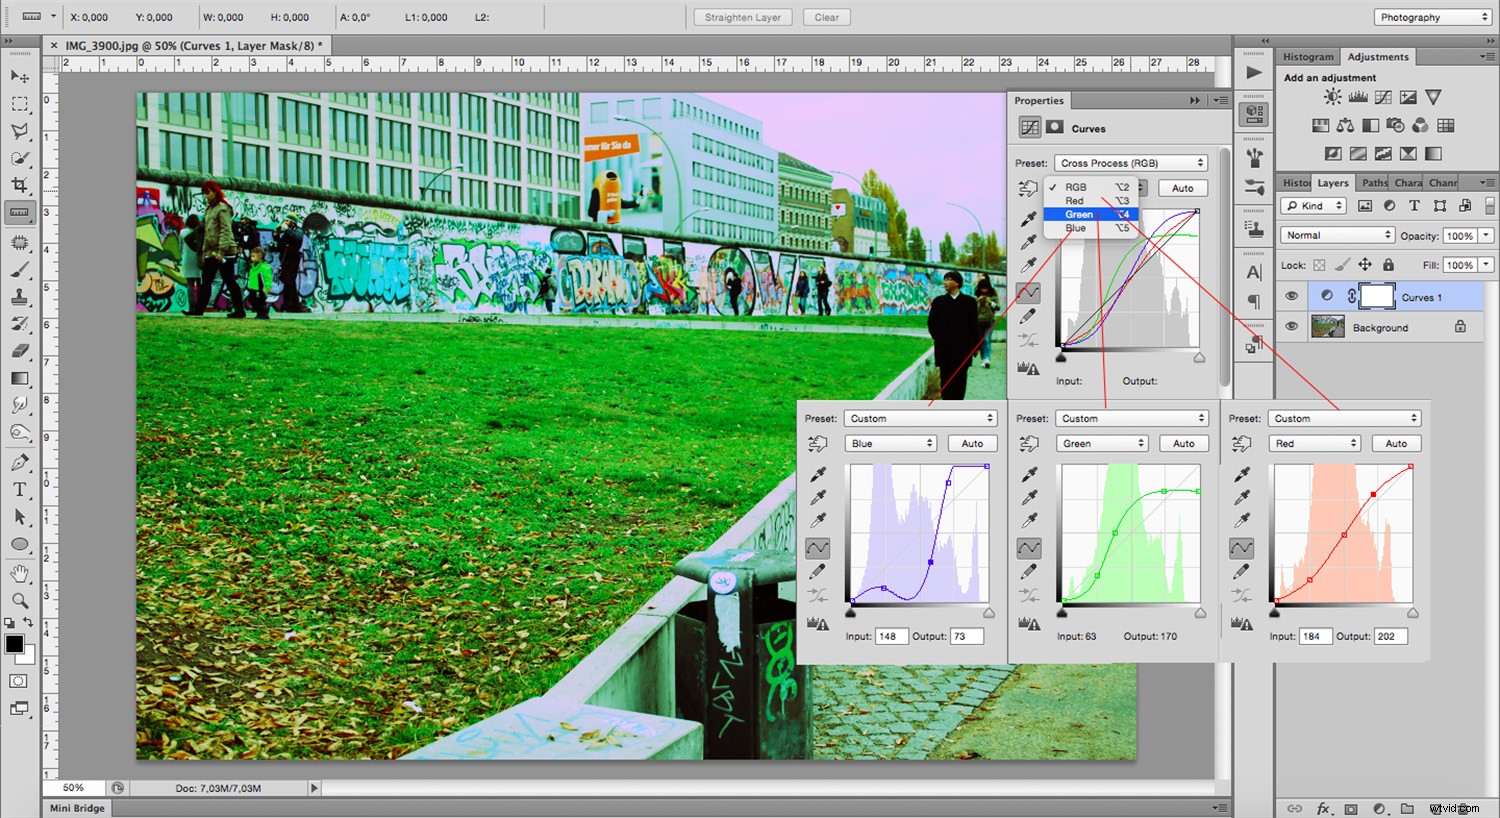
Notice the colors of the image are very saturated and have a definite green color cast. The graph now has three colored lines: Red, Green and Blue. Each line has a different shape.

Those three colored lines represent the three channels (Red, Blue and Green) adjusted by the Preset to create the effect. Therefore, you may create this effect manually without using the preset. You can achieve this manually by tampering with each color channel separately.
Using Curve Properties to Achieve the Cross-Processing Effect
For this, instead of changing the preset menu, open the ‘RGB menu.’ Go into each color and move the curve in the graph.
However, many people don’t find the ‘Curves’ tool very comfortable. So I’ll show you a tool to work with sliders to achieve similar results.
Discard the ‘Curves’ layer or hide it by clicking the ‘Eye’ symbol to the left of the layer. That way you can work with the original image. Now add an ‘Adjustment’ Layer with a ‘Channel Mixer.’
In the Properties panel, find the ‘Output Channel.’ Here, open the drop-down menu to change from one color channel to another.
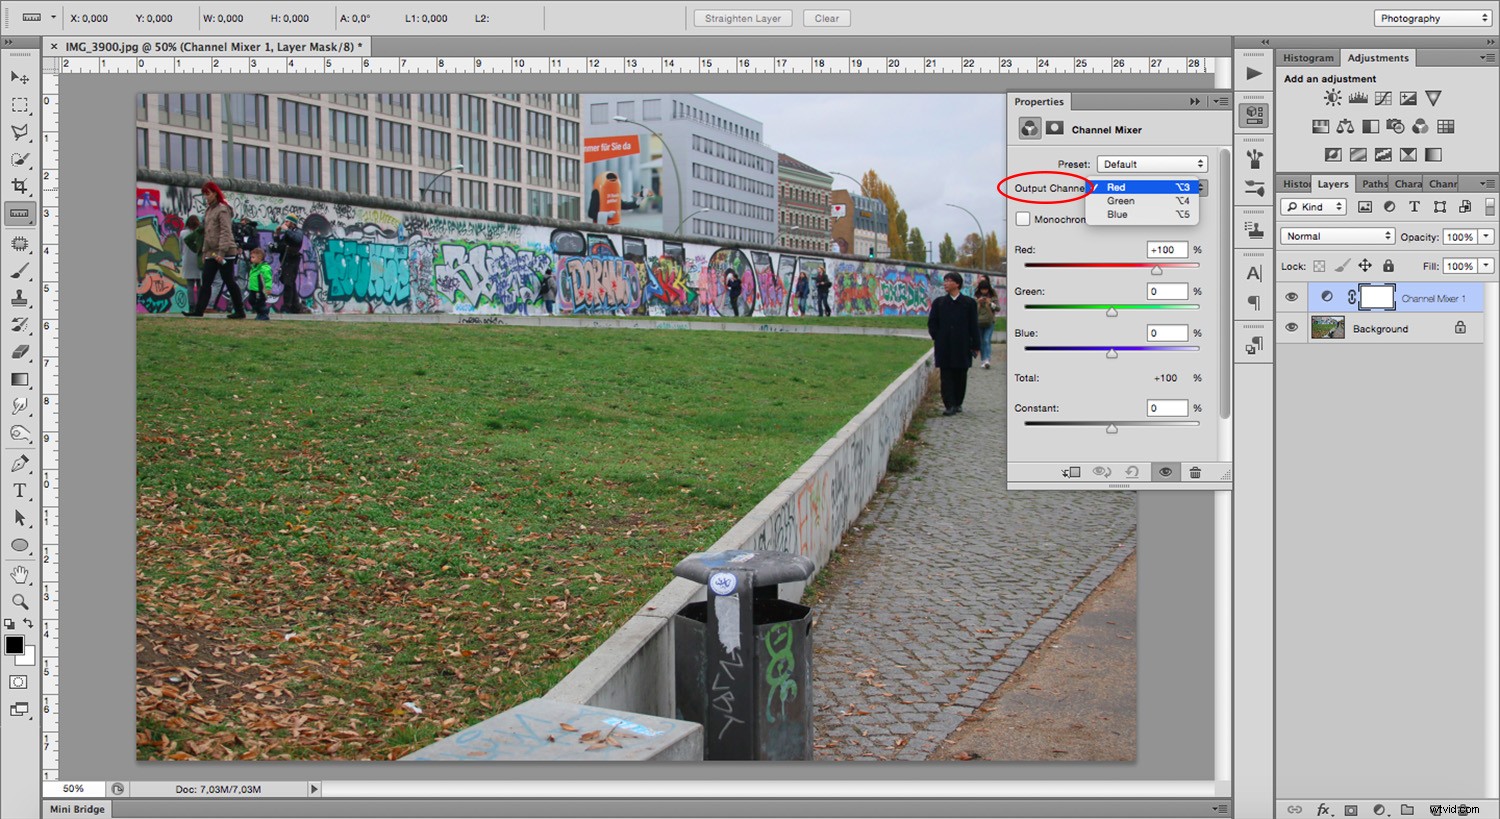
In each color output channel, you can see the corresponding color slider will be at 100%, while the other two are set to ‘0.’ So, in the ‘Red’ channel, the Red slider is set at ‘100’ while Green and Blue are at ‘0.’ In the ‘Green’ channel, the green is set at ‘100’ and the Red and Blue are at ‘0.’ In the ‘Blue’ channel, the blue is set at ‘100’ with Red and Green at ‘0.’
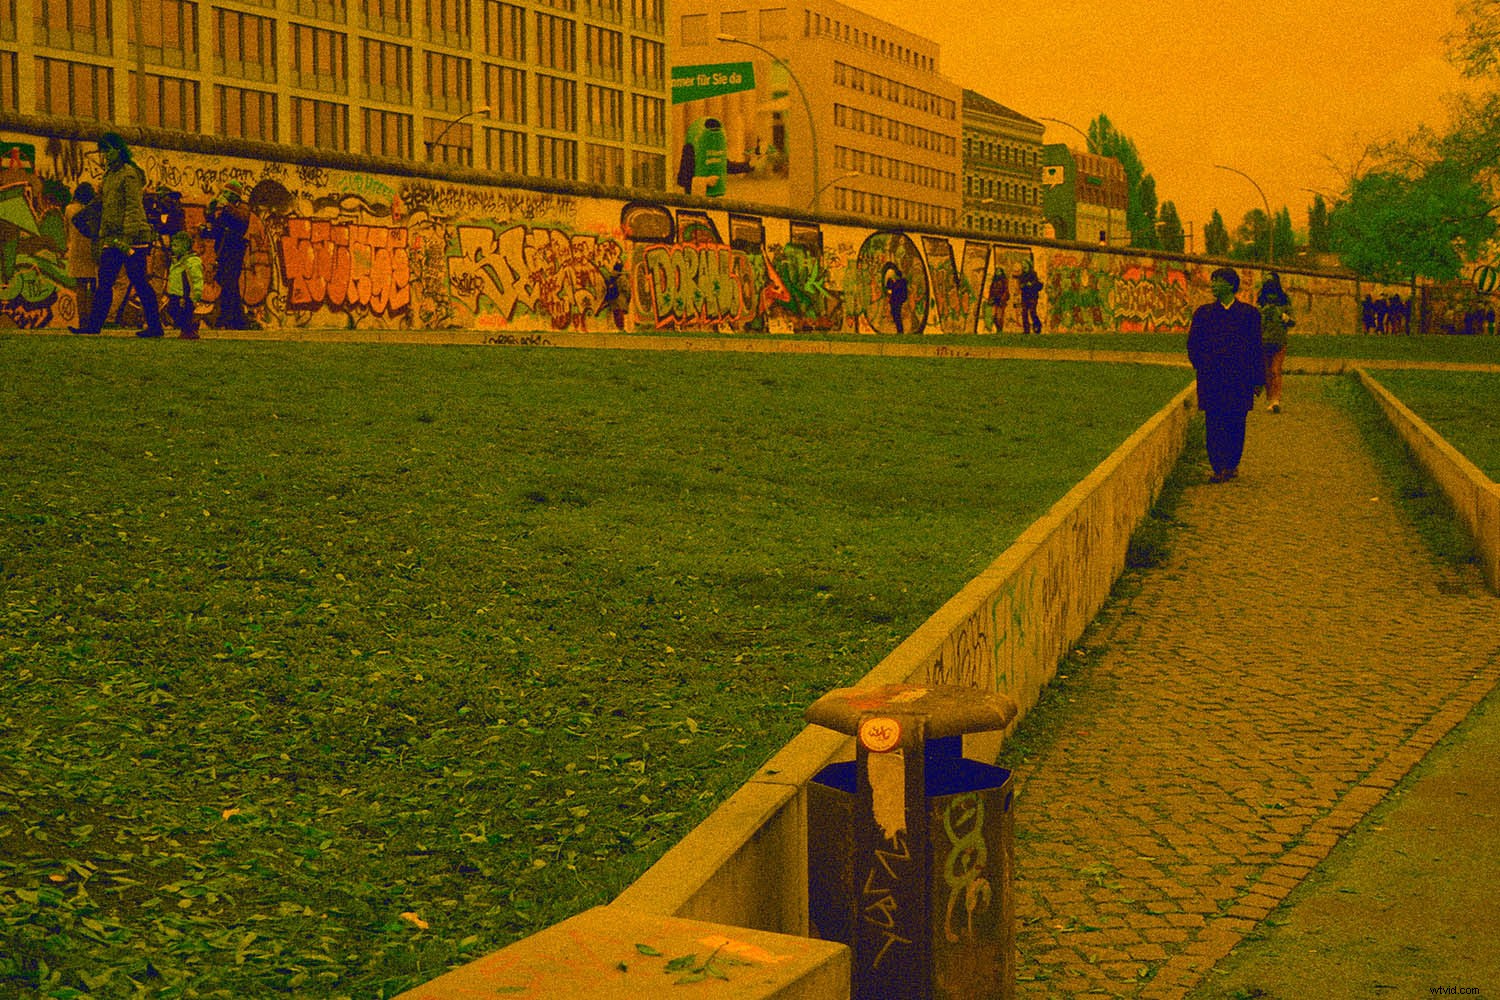
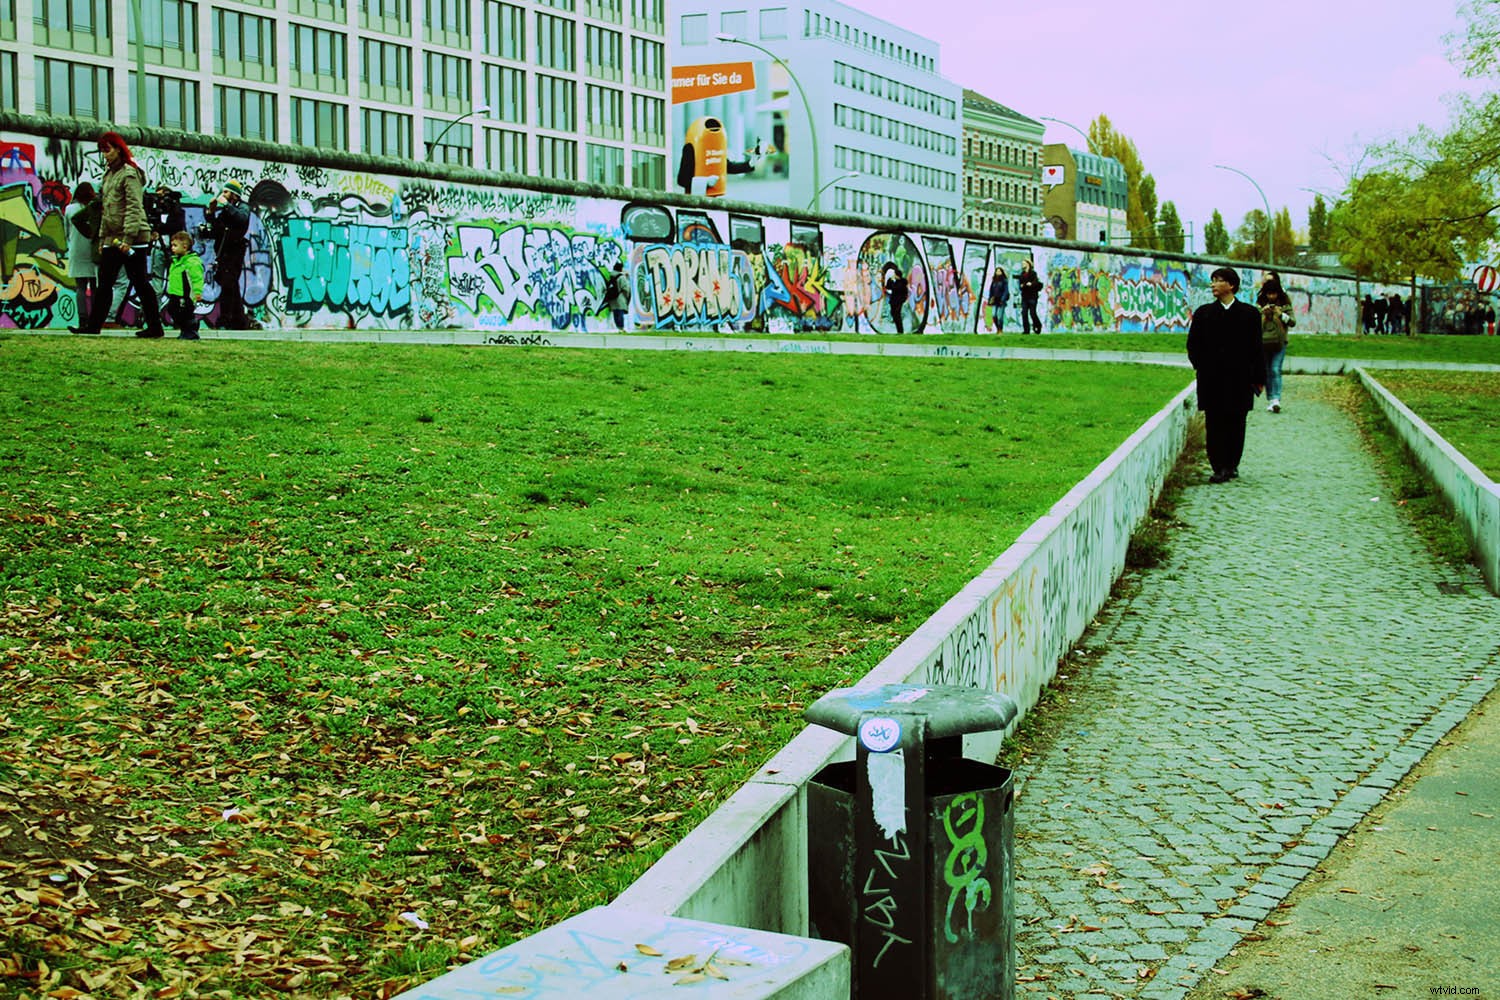
Move the sliders to create your own cross-processed image. Move all three channels sliders around until you’re satisfied.
Remember, you don’t need to duplicate the result that the Preset proposed. But if that is your objective, you don’t need to go into moving any setting individually.
To reiterate, to achieve an image that suggests cross-processing, more than one formula exists.
A few things to keep in mind:
- Cross-processing was initially a ‘mistake’ (even if done on purpose) causing unpredictable results. Thus, feel free to experiment and be creative because there is no wrong answer.
- Cross-processed images look oversaturated with a distinct color cast.
- Using the wrong chemical would often distress the image, to mimic this you can introduce some noise.
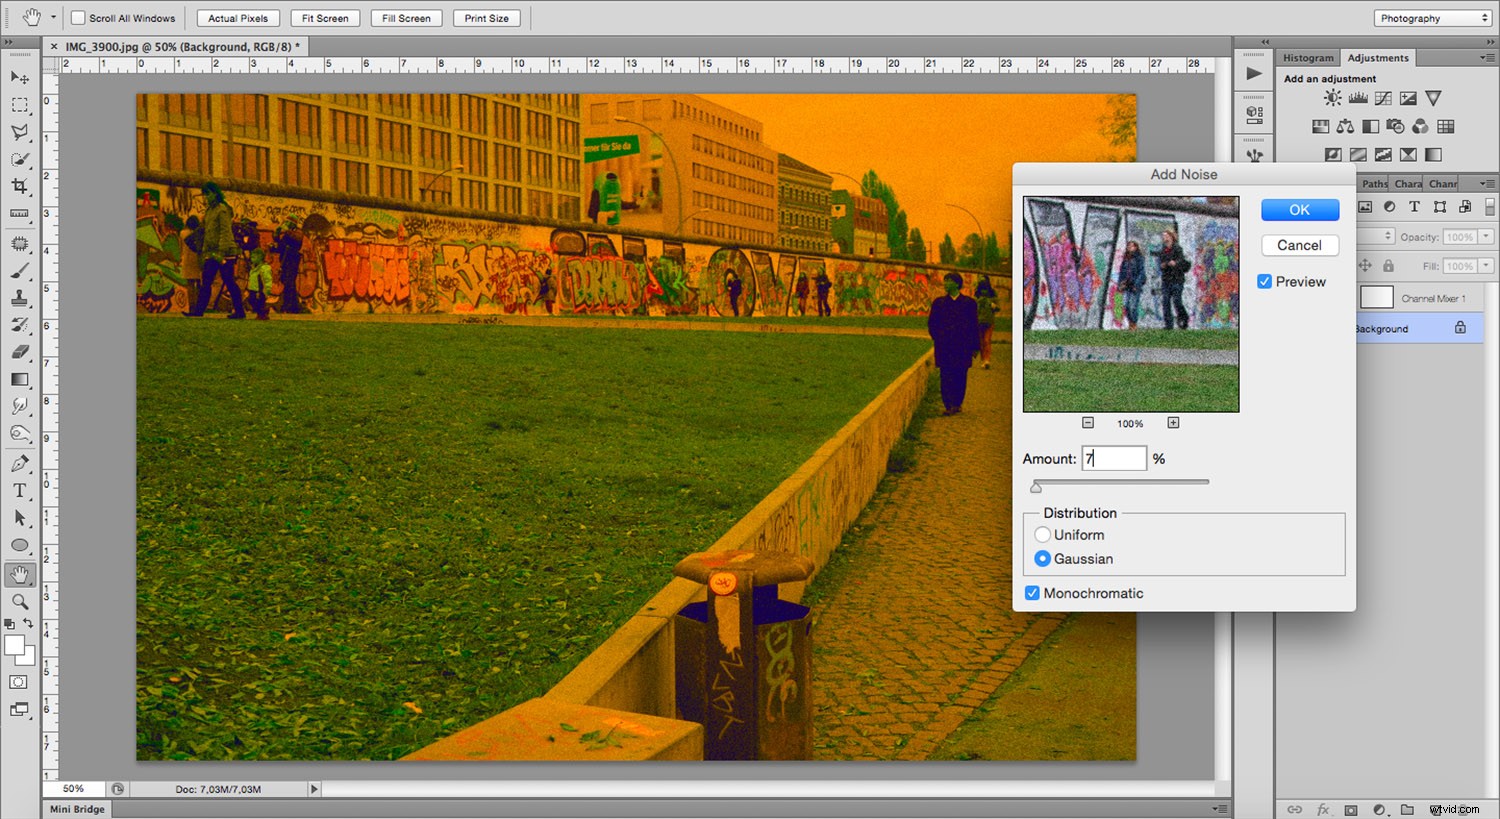
Adding Noise to Your Image
To add noise to your image, select your image layer and go to Menu -> Filters -> Noise -> Add Noise. A pop-up window will open giving you a preview of the filter you are applying and the sliders to adjust it. Make adjustments to your preference.
Keep experimenting and have fun!
If you have you experimented with cross-processing effects in Photoshop, please share with us in the comments below.