Waterfall photography often requires the use of a neutral density filter. You need it to be able to create a silky smooth waterfall effect. But you can also create a beautiful waterfall effect in Photoshop.
If you don’t have an ND filter, you can add the effect afterwards.
In this tutorial, I’ll teach you how to add a waterfall effect in Photoshop.
How to Create a Waterfall Effect in Photoshop
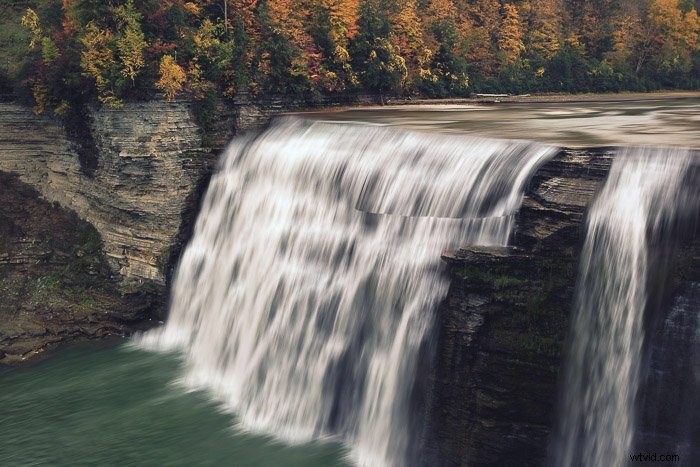
I will use this photo to create a beautiful and smooth waterfall effect. You can use this technique on any waterfall photo.

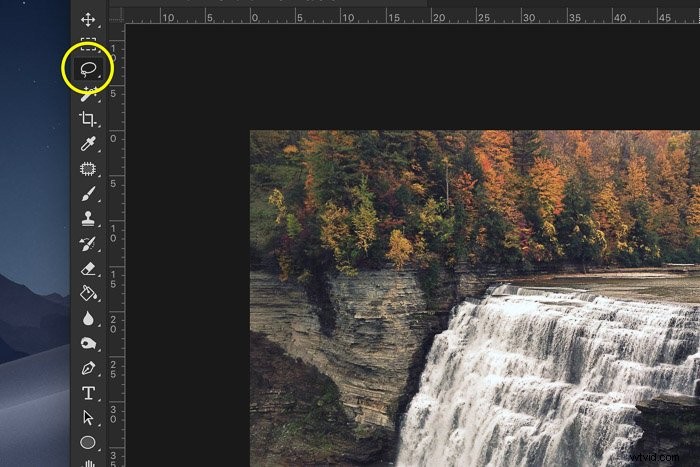
Step 1: Make a Selection of the Waterfall
Select the lasso tool in the tool bar on the left.
If the tool bar isn’t there, go to Window > Tools to make it appear. You can also use shortcut ‘L’ for the Lasso tool.
Make a selection of the waterfall. It doesn’t have to be perfect right now. We’ll clean it up later.
If your photo has two separate streams of water, like mine, you can select the second one simultaneously by holding the Shift key.
Holding the Shift key will add anything you select to the selection. If you don’t hold Shift, the first selection will disappear.

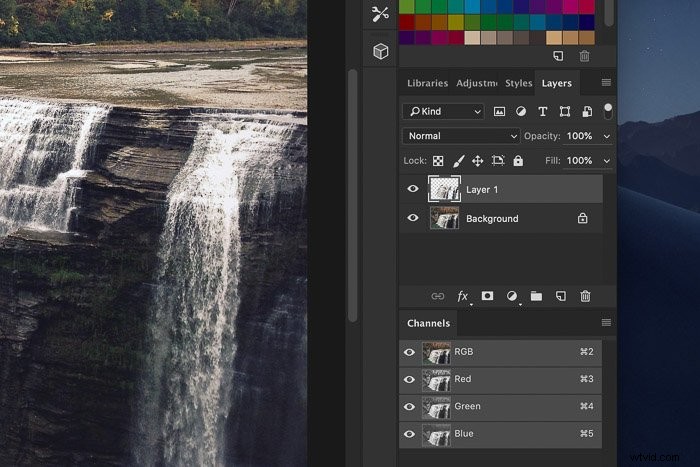
Step 2: Copy the Selection to a New Layer
Use shortcut Cmd + J (Ctrl + J for Windows) to copy the selection of the waterfall to a new layer.
This will allow you to edit the effect without affecting the original photo.
Step 3: Add Blur
The best filter for creating a smooth waterfall effect, is Motion Blur.
Go to Filter > Blur in the top menu and select ‘Motion Blur’. A new window will appear.
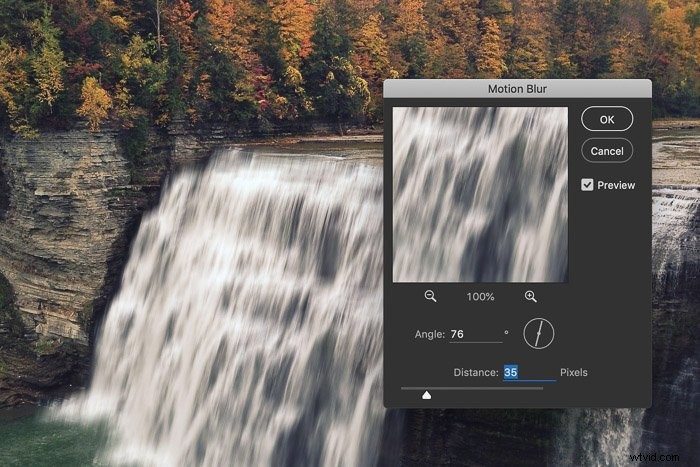
Make sure to tick ‘Preview’ so you can see what happens when you adjust the settings.
First, you need to adjust the angle of the blur so it matches the angle of the water falling down. Select the value in the text box by using the up and down arrows.
You can also use the compass shaped icon next to the text box. Simply click and drag the line to the left or right to change the angle of the blur.
Now, drag the Distance slider to adjust the amount of blur. For my example, a value of 35 looks pretty good. Don’t overdo it or the result will look fake and surreal.
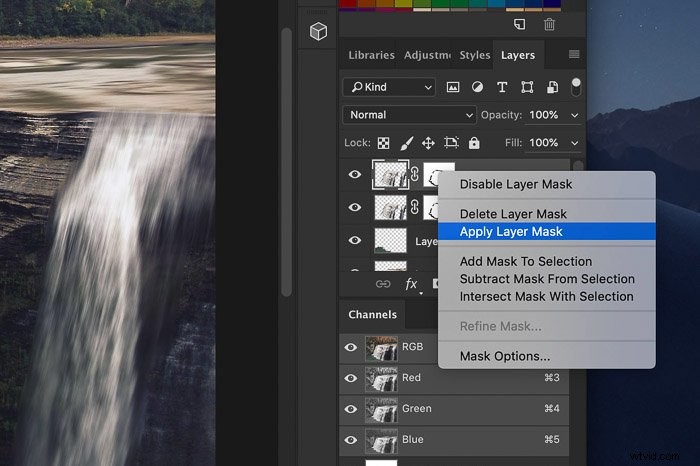
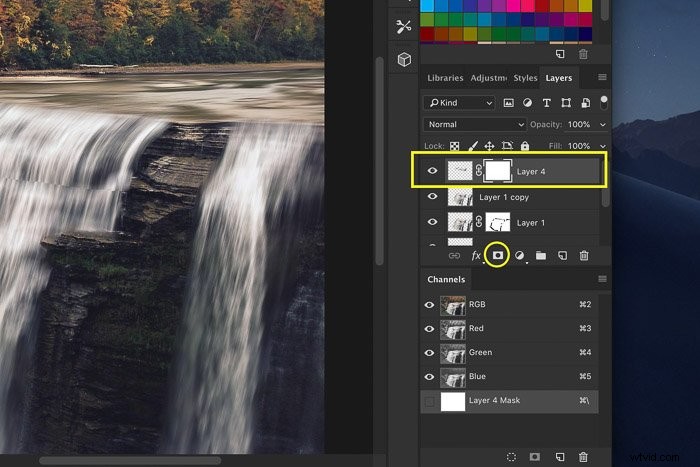
Step 4: Add a Layer Mask
It looks good but the blur extends too far.
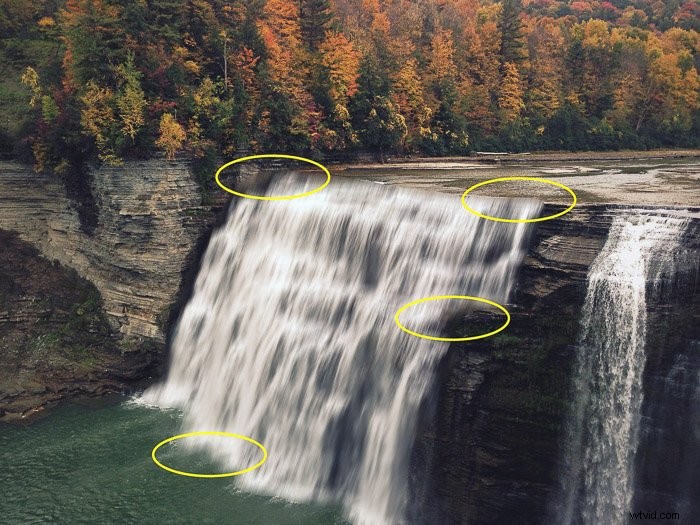
We need to clean up the edges of the waterfall. You can do it by using the Eraser but there’s a better way: a layer mask.
A layer mask allows you to erase pixels with the paint brush but also to bring them back if you make a mistake. It’s the best way to clean up fine details.
Select the layer where you applied the blur filter and click on the ‘Add a mask’ icon.
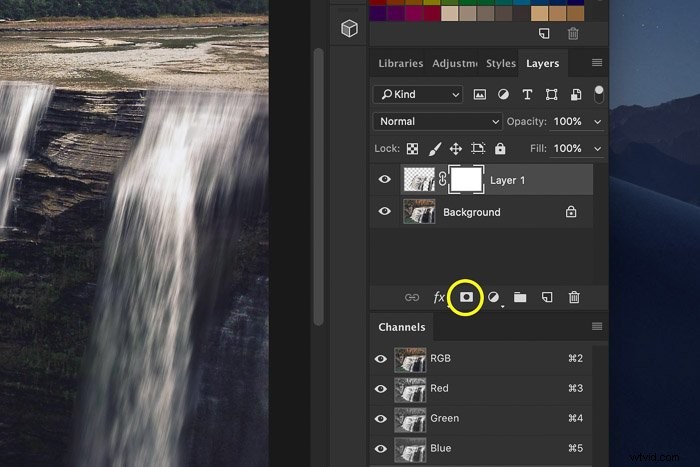
A layer mask thumbnail will appear.
Step 5: Clean Up the Edges of the Waterfall
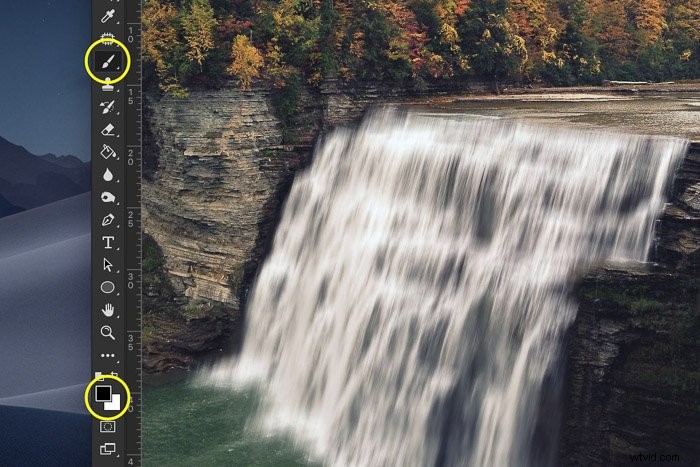
The layer mask thumbnail is white. That means the layer mask isn’t affecting the layer yet. No pixels have been removed.
Select the Paint Brush tool in the tool bar. You can also use the shortcut ‘P’. Use a soft-edged brush for best results.
Set its colour to black and start painting around the edges of the waterfall. This will erase parts of the blur effect.
If you erased too much, you can bring it back by painting with white.
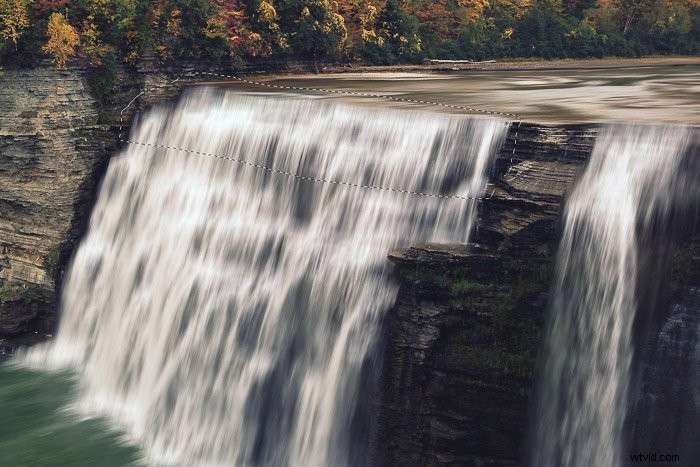
Step 6: Add Blur to the River
It’s a lot better now, but because we applied a long exposure effect to the waterfall, the river looks strange.
It should be silky smooth for a natural looking result.
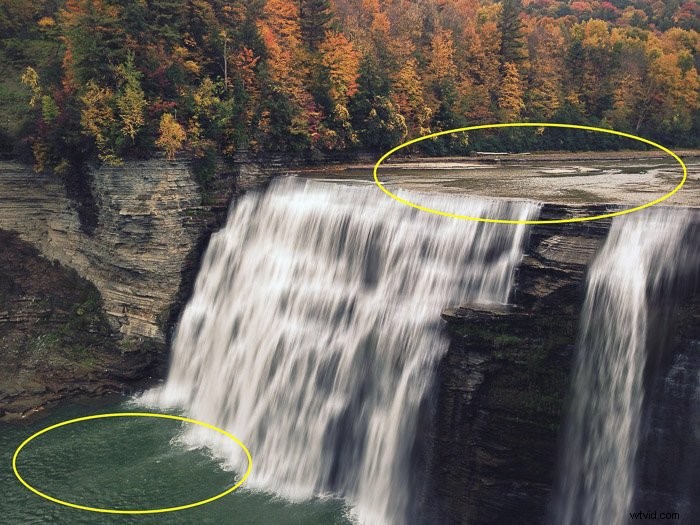
You have to apply steps 1 to 5 to the upper and lower parts of the river. Here’s how it should look.
Make sure to adjust the angle of the blur effect! It should be almost horizontal.

Use the Warp Tool to Make It Look Perfect
We’re getting close but there’s still a problem. The top part of the waterfall, where the water starts falling down, doesn’t look right. It’s too sharp and needs a curve to follow the path of the water.
A slight curve for a slow moving waterfall and a large curve for a fast one.
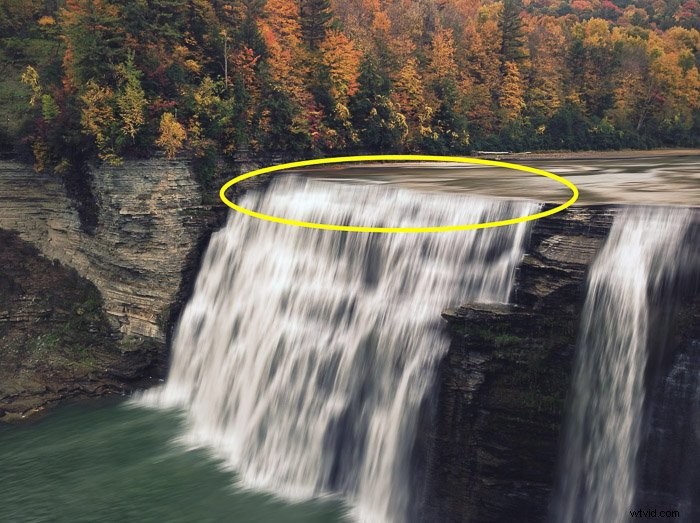
This is difficult to achieve and it will take some practice to get it right. It all depends on the photo you’re using and what the path of the water looks like.
Some waterfalls are separated into stages and others just drop down vertically.
In this case, the waterfall just needs a curve at the top. It could also be that you need to add a curve to the entire waterfall or to separate stages.
Step 1: Duplicate
First, we will duplicate the waterfall layer. Right click on the layer and select ‘Duplicate’. Then, select the layer mask thumbnail.
Right click and select ‘Apply Layer Mask’ so it doesn’t affect the new layer anymore.
Step 2: Select the Part that Needs a Curve
Select the part of the waterfall that needs a curve. In my case, only the top of the waterfall.
It’s better to select too much because we’ll clean it up later.
Use Cmd + J to copy it onto a new layer (Ctrl + J for Windows).
Step 3: Warp
Go to Edit > Transform and select ‘Warp’. A grid will appear over the selected area.
This is the hard part.
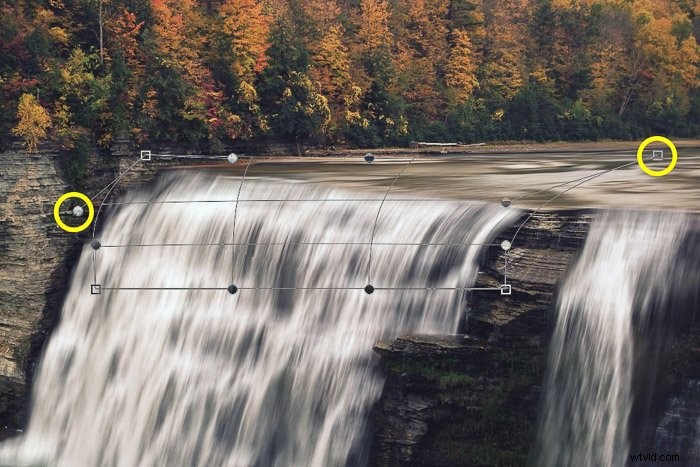
Drag the handles on the left and right to add a slight curve.
Use the corner point to add distortion. This will add a curve and also change the angle.
Click and drag anywhere inside one of the grid boxes to adjust the curve in that area.
The warp grid takes a bit of practice before you can really get the hang of it.
Use Cmd + Z (Ctrl + Z for windows) if you make a mistake.
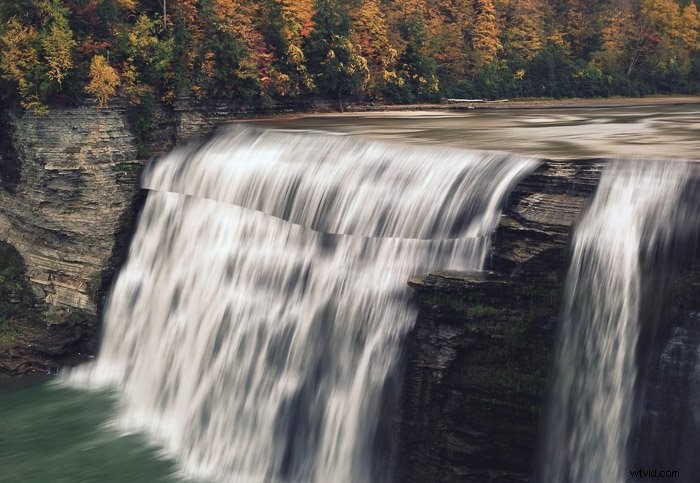
Step 4: Clean Up the Edges
The curve looks good but there’s a hard line now. It appeared because of the warping and we need to get rid of it.
Click on the ‘Add layer mask’ icon to add another layer mask.
Make sure to select the layer mask thumbnail.
Select the Paint Brush and paint with black over the hard line. Use a soft-edged brush.
Clean up any other edges that don’t look right.
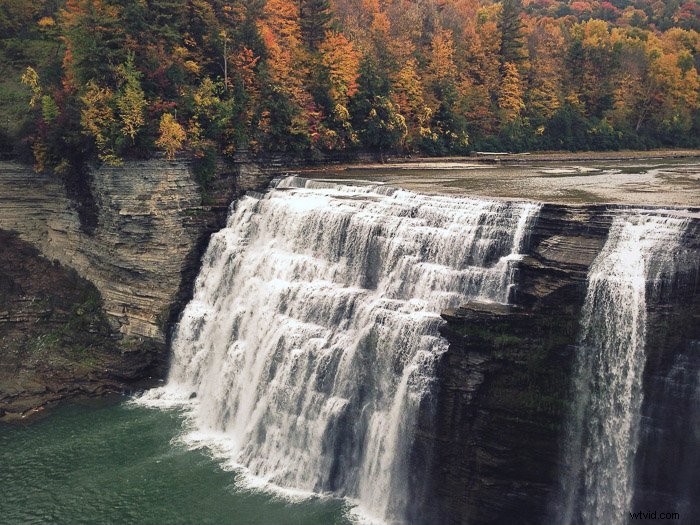
And that’s it! A beautiful silky smooth effect for waterfall photography.
Here’s the before and after result.
Conclusion
Most photographers use special equipment for waterfall photography. Long exposure is needed to get a silky smooth waterfall effect.
But if you don’t have it, there’s another way. It’s relatively easy to simulate that effect in Photoshop.
Be aware though that it will never look exactly the same as a real long exposure photo of a waterfall.
To get the best results, you should learn everything about long exposure photography.