The original image before the motion blur is applied
Motion Blur Filter
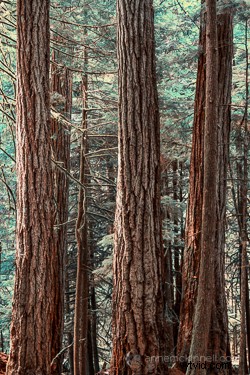
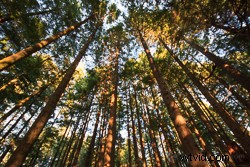
For the first technique I am going to start with this rather boring and cluttered image I made in a forest on Vancouver Island, British Columbia, Canada.
Maybe it wouldn’t be so boring if there was anything to show the scale of these enormous trees but it’s pretty hard to get away from cluttered in the dense forest there.
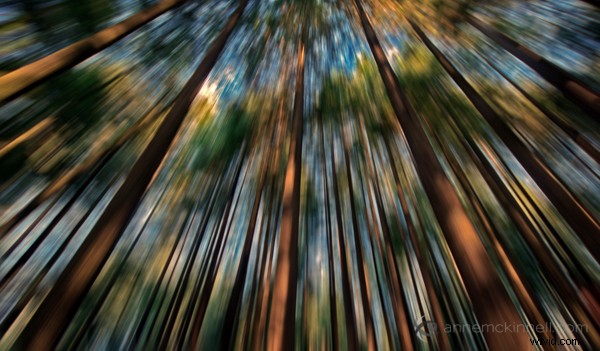
I decided to mimic the effect of in-camera panning by using the motion blur filter in photoshop to blur the image in the same direction as the strong lines of the trees.
Try this technique on your own forest scene or another scene with strong lines by following these steps. I am using Photoshop Elements but you can also do it in Gimp and some other photo editors.
1. Select Filter > Blur > Motion Blur
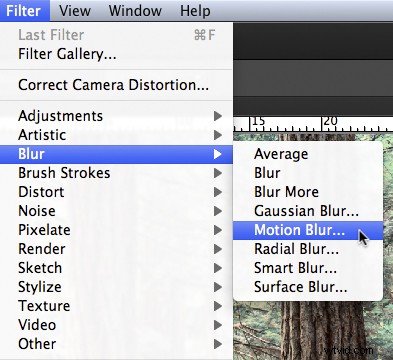
2. Set the direction of the blur to match your image and amount of the blur to your taste. For my image I made the blur vertical and the amount maximum.
If you have a photo editor that supports layers, make a copy of the background layer and apply the filter to the new layer. This will allow you do have some fun in step #4 below.
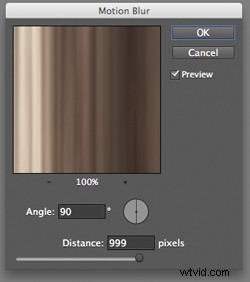
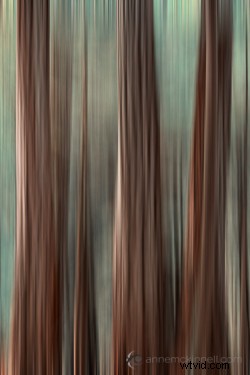
Image after motion blur is applied
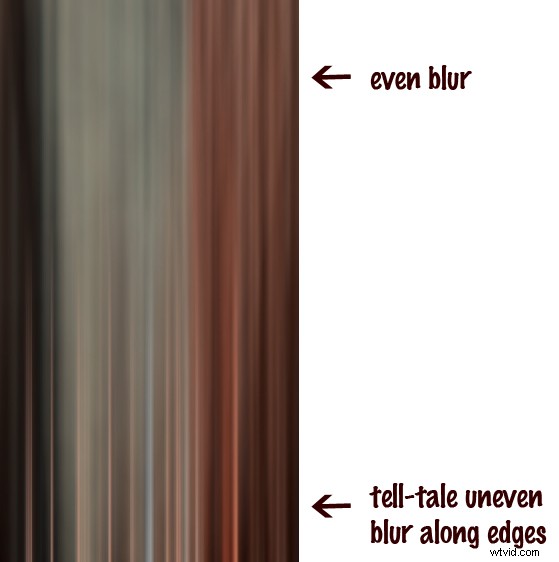
3. Crop the tell-tale edges out of the image.
I find that you can always tell when the blur is done in photoshop, as opposed to in-camera, because the edges of the image don’t blur evenly. Why they don’t blur evenly I don’t know! But they don’t so I always crop the edges out.
See the 100% zoom of a portion of my image below where you will see how the edges of the image don’t look right.
4. To add a little something extra try revealing a part of the original image without the blur.
If you applied the blur to a copy of the background layer as I mentioned in step #2 above you can try this. Either using a layer mask or simply using the eraser tool, remove the blur effect from a portion of the image.
This is the final version:

Here is a video I made that shows all the steps I took to make the final image using Photoshop Elements.
Original image before zoom blur is applied
Zoom Blur Filter
This technique is very similar to the motion blur effect but with a little bit of a twist.
As you can see the original image has a few problems. The trees are mottled with light and shadow and there are blown out highlights in the sky for a start. But I like the composition of the trees the way the wide-angle lens made them appear to lean in towards the centre of the frame.
I decided to try a zoom blur effect to emphasize the composition and even out some of the colours.
Try this technique on your own image by following these steps:
1. Duplicate the background layer (Layer > Duplicate Layer)
2. Rename the layer to “blur” or something else that makes sense to you
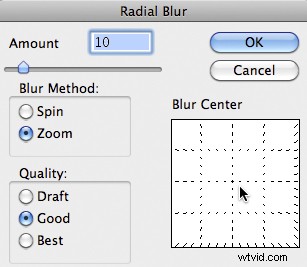
3. In photoshop, select Filter > Blur > Radial Blur
4. Change the option from “spin” to “zoom” and, in the section of the window named “blur center”, drag the centre of the zoom from the middle to the top of the frame to match the composition of the original image
5. Crop out the blown out highlights in the resulting image
Here is a video I made that shows all the steps I took to make the final image using Photoshop Elements.