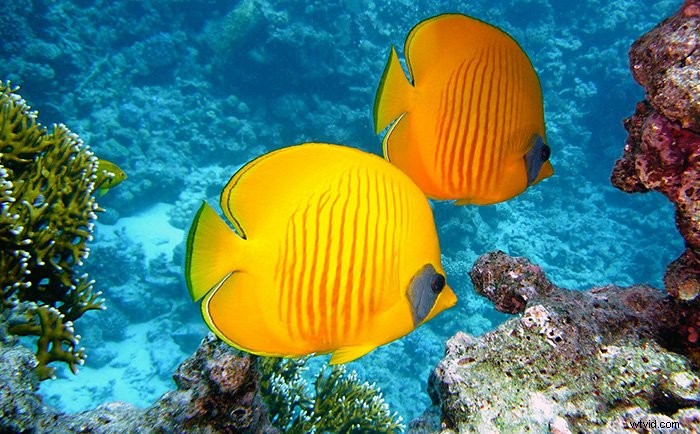
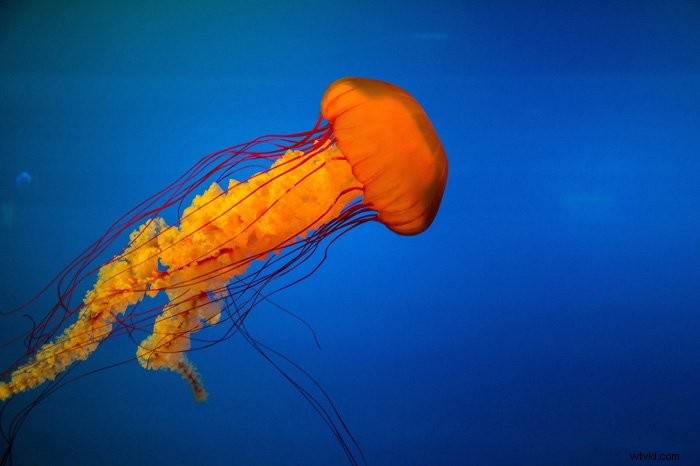
Don’t you just love all those beautiful colours in underwater photography?
Well, you don’t get those colours by just taking a photo while diving.
Underwater images need some editing. In this article, I’ll show you a few of the basics to edit underwater images.
How to Edit Underwater Images
Professional underwater photos always look vibrant and the colours pop. The only problem is that being underwater takes away a lot of colours and contrast.
It’s easy to fix all that in Photoshop. You can even add a bit of your own imagination. This is what you need to do to bring your underwater images to life.
Step 1: Add Contrast and Brightness
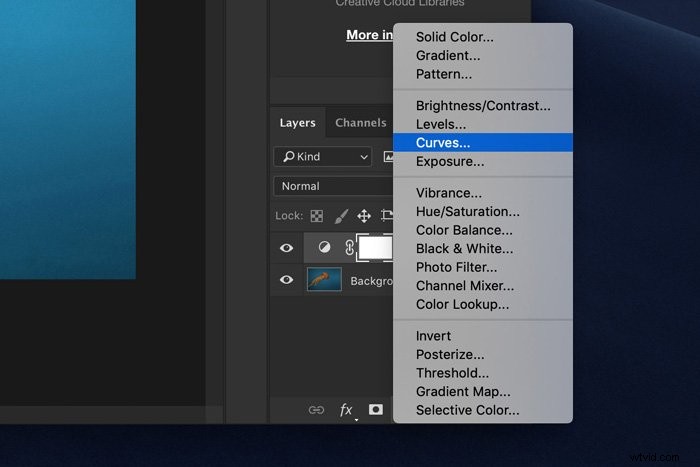
Click on “Create new fill or adjustment layer” icon and select “Levels…”.
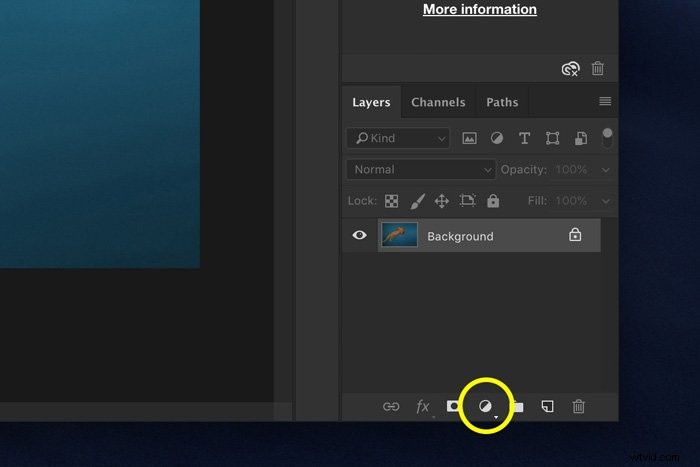
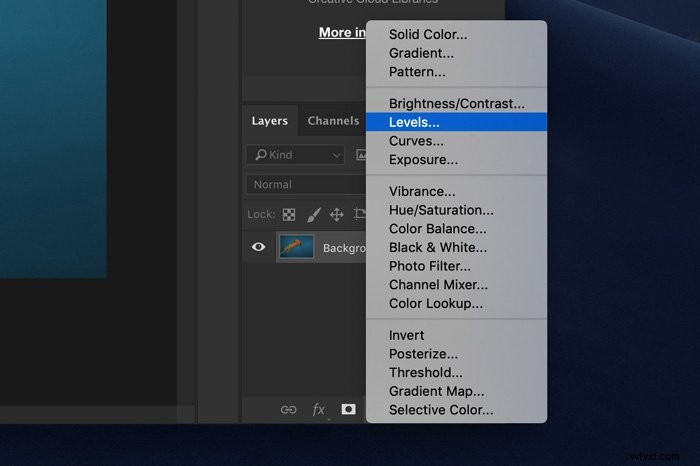
A new adjustment layer will appear in the Layers panel and the Levels panel will pop up.
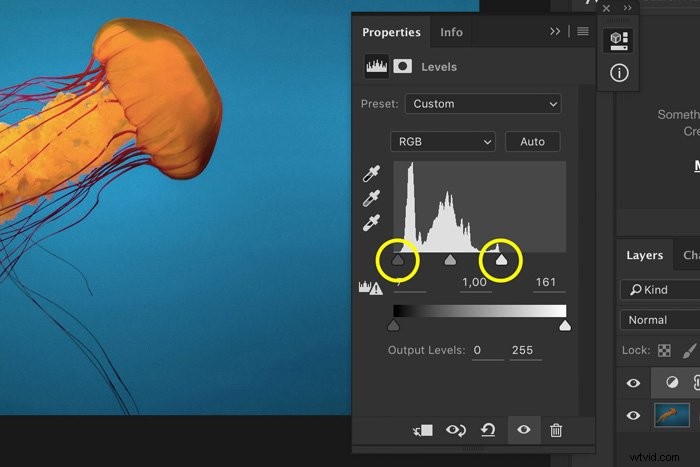
Here you can see the histogram. This is a graphical representation of the tonal values of your image. It shows the amount of every tone found in your photograph, ranging from black (0% brightness) to white (100% brightness).
Dark tones are displayed on the left side of the histogram. Light tones on the right.
In most cases, the histogram for an underwater image will be shifted to the left. This means it’s too dark.
Drag the white triangle to the left until it touches the edge histogram. Do the same for the dark tones on the left and leave the mid-tones for what they are.
This already creates a nice contrast but we can add more.
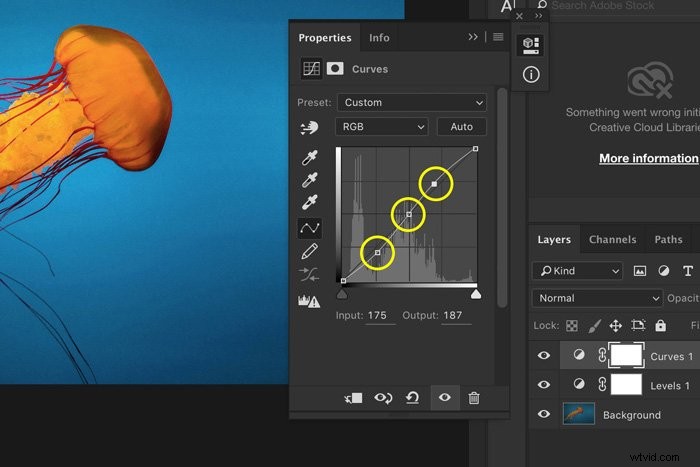
Click on “Create new fill or adjustment layer” icon again and select “Curves…”.
To add contrast, create an S-curve. Click in the middle of the curve to create an anchor point. Then, pull the top and bottom of the curve to create the shape of the letter S.
The more pronounced the shape is, the more contrast you add.
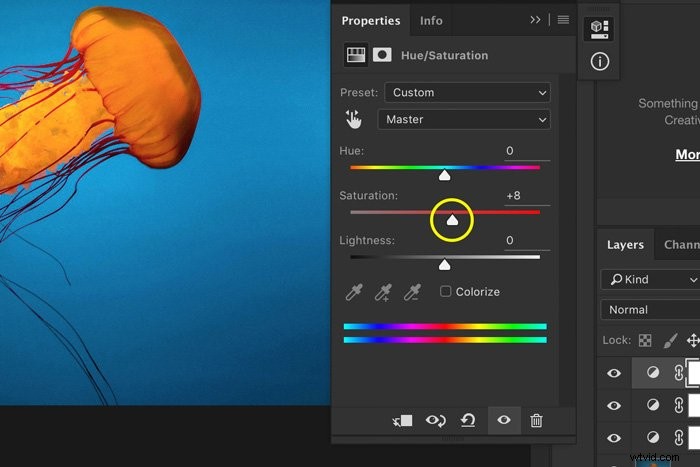
Step 2: Add Saturation
Next, we’ll make the colors pop a little bit more. Add another Adjustment Layer. This time pick Hue/Saturation.

Slide the Saturation slider to the right to add saturation. It’s a matter of taste. Don’t overdo it because your underwater image won’t look natural.
Step 3: Pick your blue
What kind of blue your underwater image has depends on a lot of things. I always like to adjust the blue depending on the other colours in the image. You can go for a cool blue or warm blue.
In the Hue/Saturation panel, select the Blues or Cyans.
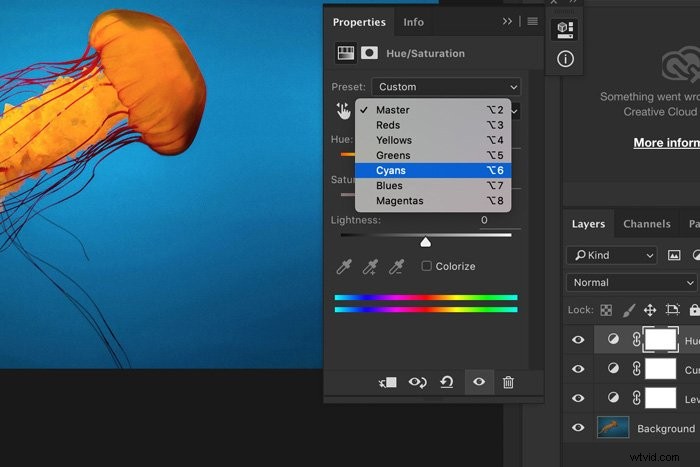
Then, drag the Hue slider to the left or right to change those colors. In my example, I like them a bit warmer.
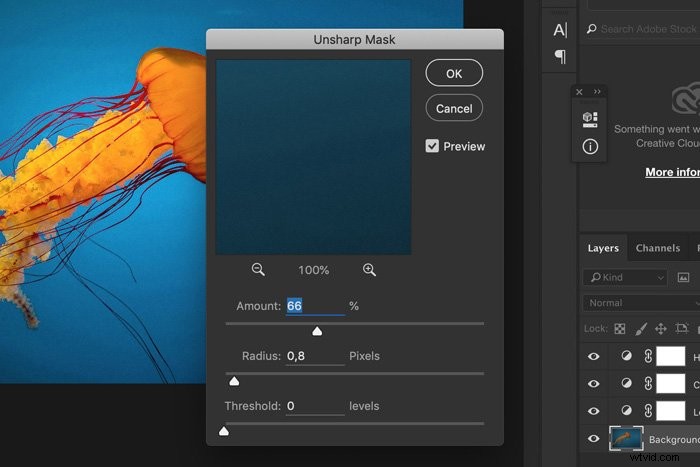
Step 4: Sharpen
Finally, let’s sharpen the image. Go to Filter > Sharpen and select Unsharp Mask.
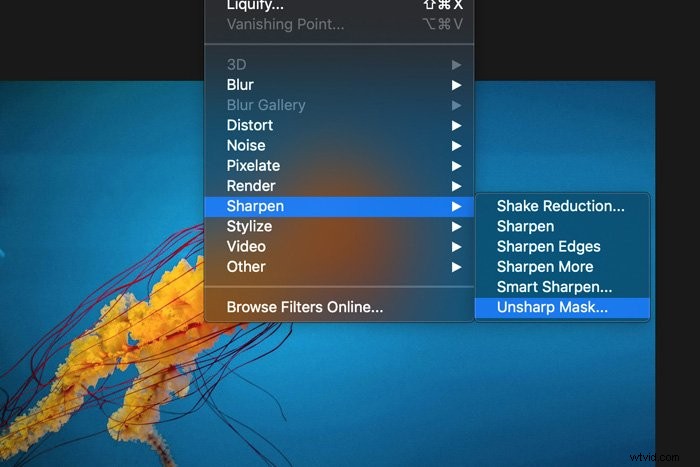
Make sure to select the layer containing the image and add sharpening. Usually, this depends on the size of your image.
And that’s it. A few basic steps to bring back all those vibrant colors.
Conclusion
Underwater photography is not easy and even when you’ve managed to take an awesome photo, it doesn’t stop there.
You need to edit underwater images to make them look professional. It’s all about showing those beautiful colors you can only find underwater.