iPhone and iPad users can further safeguard their privacy by using a private MAC address feature in iOS and iPadOS. This should be particularly useful if you’re frequently connecting to different public wi-fi networks, and you don’t want the devices MAC address tracking to be used.
For some technical background, every time you connect to a Wi-Fi network regardless of the device you’re using, your device has to identify itself to the network using a MAC address. The MAC address is typically a hardware address associated with your device, and by default the same MAC address is used as you switch between different Wi-Fi networks, which could be a security or privacy risk since it identifies your device. Furthermore, network operators and observers can easily track your activity and access your location over time since the same MAC address is used. However, Apple has managed to address this issue with the iOS 14 and iPadOS 14 and later system software versions, by allowing devices to use a unique MAC address for each network. This is sort of like spoofing a MAC address with a random address, if you’re on the geekier side and familiar with that process, except it’s automated and doesn’t require any tinkering at a command line.
If this feature sounds compelling to you, read along and you’ll learn how you can randomize and privatize your MAC addresses on iPhone and iPad.
How to Use Private MAC Address on iPhone & iPad
Make sure your device is running iOS 14/iPadOS 14 or later before going ahead with the procedure, since this privacy feature isn’t available on older versions.
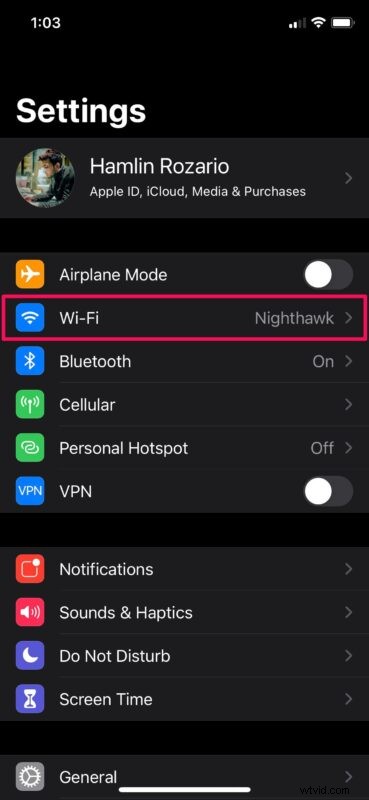
- Go to “Settings” from the home screen of your iPhone or iPad.

- In the settings menu, tap on “Wi-Fi” located right below the Airplane mode toggle to adjust your Wi-Fi settings.
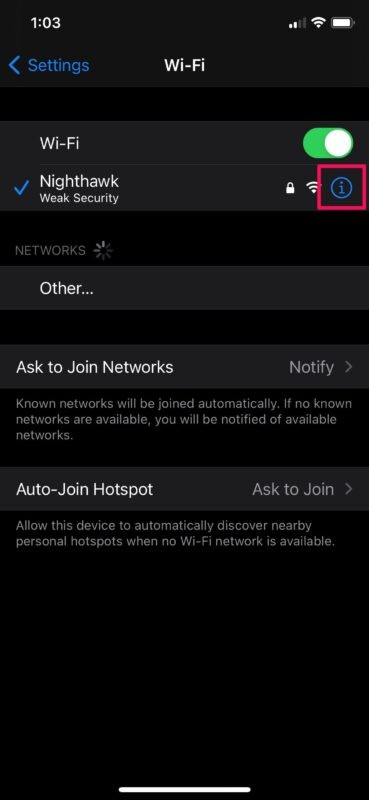
- Here, tap on the “i” icon next to the Wi-Fi network you’re currently connected to, as shown below.
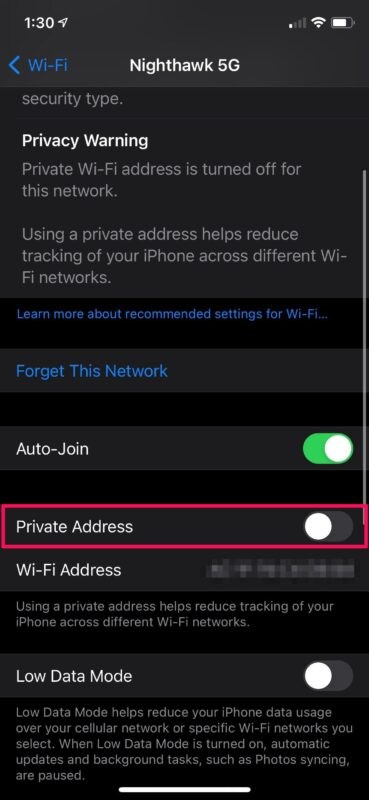
- Here, you’ll see a Privacy Warning as long as Private Wi-Fi address is turned off. Tap on the toggle for Private Address to enable this feature.
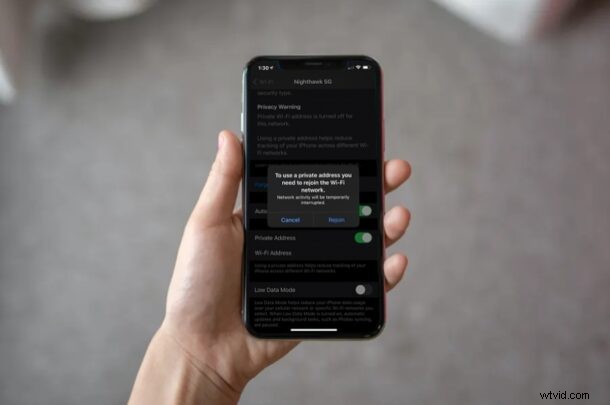
- You’ll get a pop-up message prompting you to rejoin the Wi-Fi network with the Private MAC address. Tap on “Rejoin” to disconnect and reconnect to the network.

It’s important to note that each time you disable and re-enable the Private MAC Address feature, a new Wi-Fi MAC address will be used with the network. This is why you’re prompted to reconnect to the Wi-Fi network.
Resetting the network settings on your device will also change the private Wi-Fi address it uses for the connection.
Despite all the security benefits of using a Private MAC address like reduced user tracking and profiling across networks, this feature could sometimes prevent you from connecting to certain Wi-Fi networks. For example, some networks may be unable to identify your device as authorized to join, since some networks use MAC address filtering as an authentication to determine which devices are allowed on a network – this is particularly common in institutional settings with multiple layers of security. Also, sometimes the network that allows you to join with a private address might block you from internet access. You can turn off the feature if you have any trouble.
Do you use an Apple Watch alongside your iPhone? Although we were focusing on the iPhone and iPad in this article, you’ll be excited to know that you can enable or disable Private Address on an Apple Watch too, as long as watchOS 7 or a newer version is installed.
Mac users don’t yet have this option natively as a simple setting, but instead they can use the command line to spoof or change a MAC address if desired.
What do you think of the Private MAC Addresses feature? Do you use this on your iPhone or iPad? Did you find it works flawlessly, or do you have issues with it? Share your personal experiences and voice out your opinions in the comments section down below.