As a general nod to creative decency, in my work, I tend to steer clear of the “influencer” types of photographs. You know the ones I mean. The photos of people standing at the edge of some gorgeous vista, smiling, but, of course, seldom looking at the camera. They usually have some brand name product conspicuously visible in the frame. It’s not that those kinds of images are wrong, neither in execution or intent, but rather slightly tired and overdone.
With that said, there is one type of photo that I find myself producing again and again, that I admit would fall into the category I attempt to keep myself away from most of the time. I love making photos at night time with light beams shining off into the dark of space.
The problem is, that without an enormously powerful light source, achieving highly pronounced light beams is fairly difficult to achieve. In short, your average consumer flashlight or headlamp likely won’t pack enough luminous punch.
This is where a super simple piece of Photoshop magic can make these types of photographs truly stand out. In this tutorial, I’m going to show you an easy way to enhance the light beams in your images using Photoshop.
Before we begin
As with most any type of photography, your finished results are directly dependent on the quality of the starting material. You should always strive to get as much right in-camera as possible before you move to post-processing. This means correct exposure relative to the elements of your images, accurate focus, and appropriate ISO settings.
While this technique can enhance light beams in any photo, the outcome will vary enormously in terms of both quality and realism depending on the solidity of the original digital file.
Alright, now let’s have some fun!
Process first
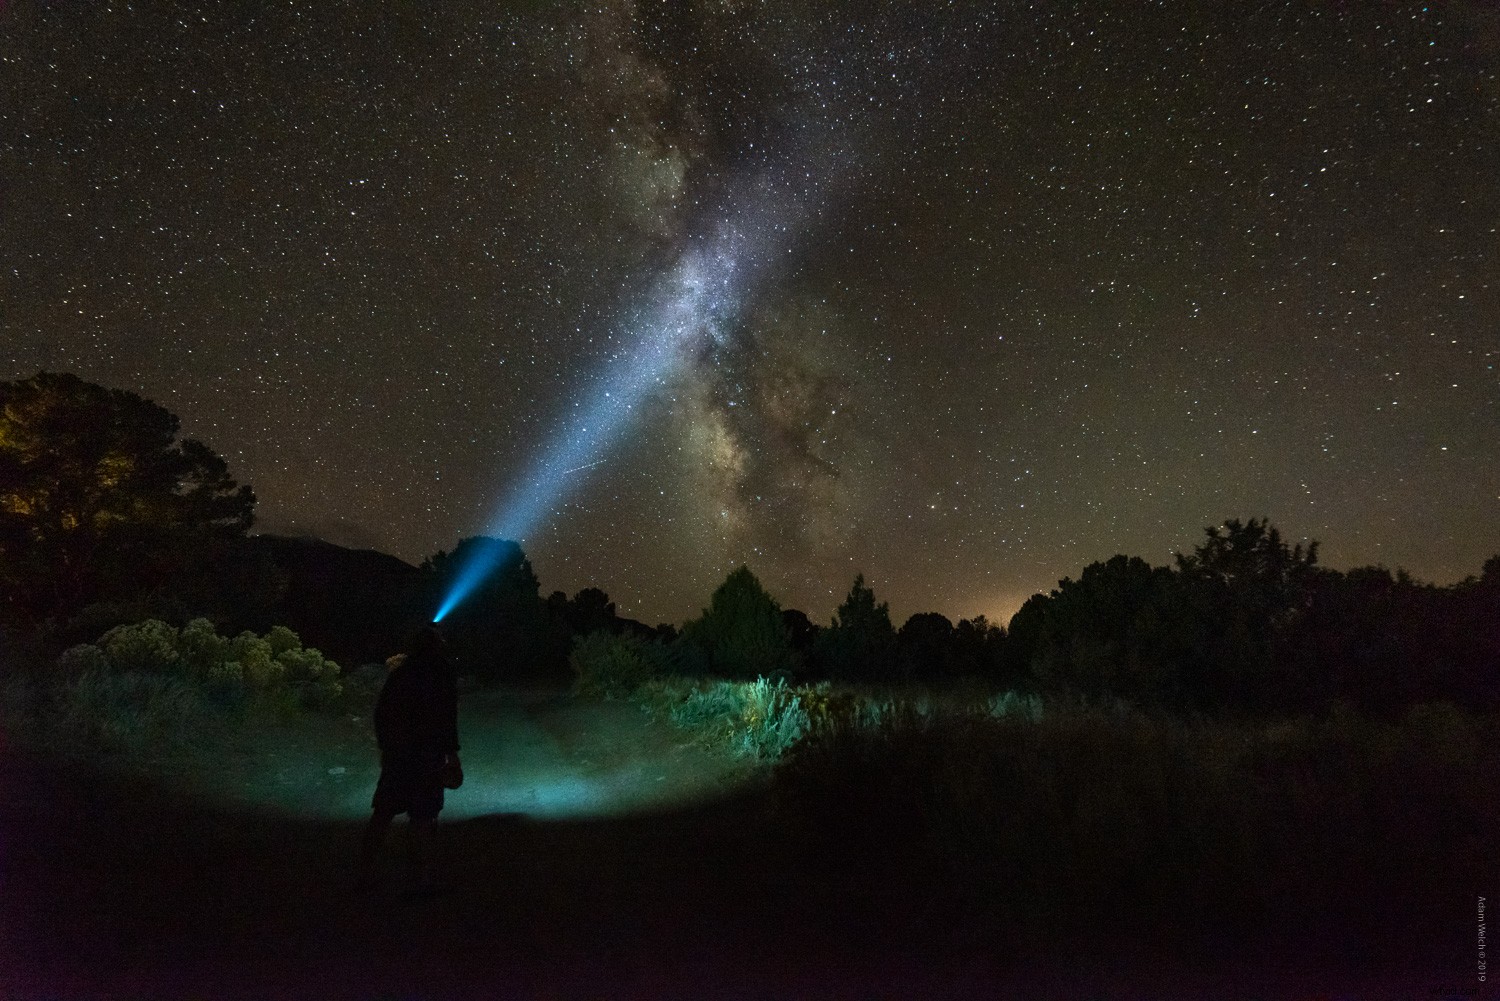
It’s a good practice to save the enhancing of the light beams in your photos until the very end of your post-processing. This means that you should process all other aspects of the image as you would like them to appear in the finished photo before you apply the steps we’re about to discuss. Here is the RAW file of our example image before any post-processing.
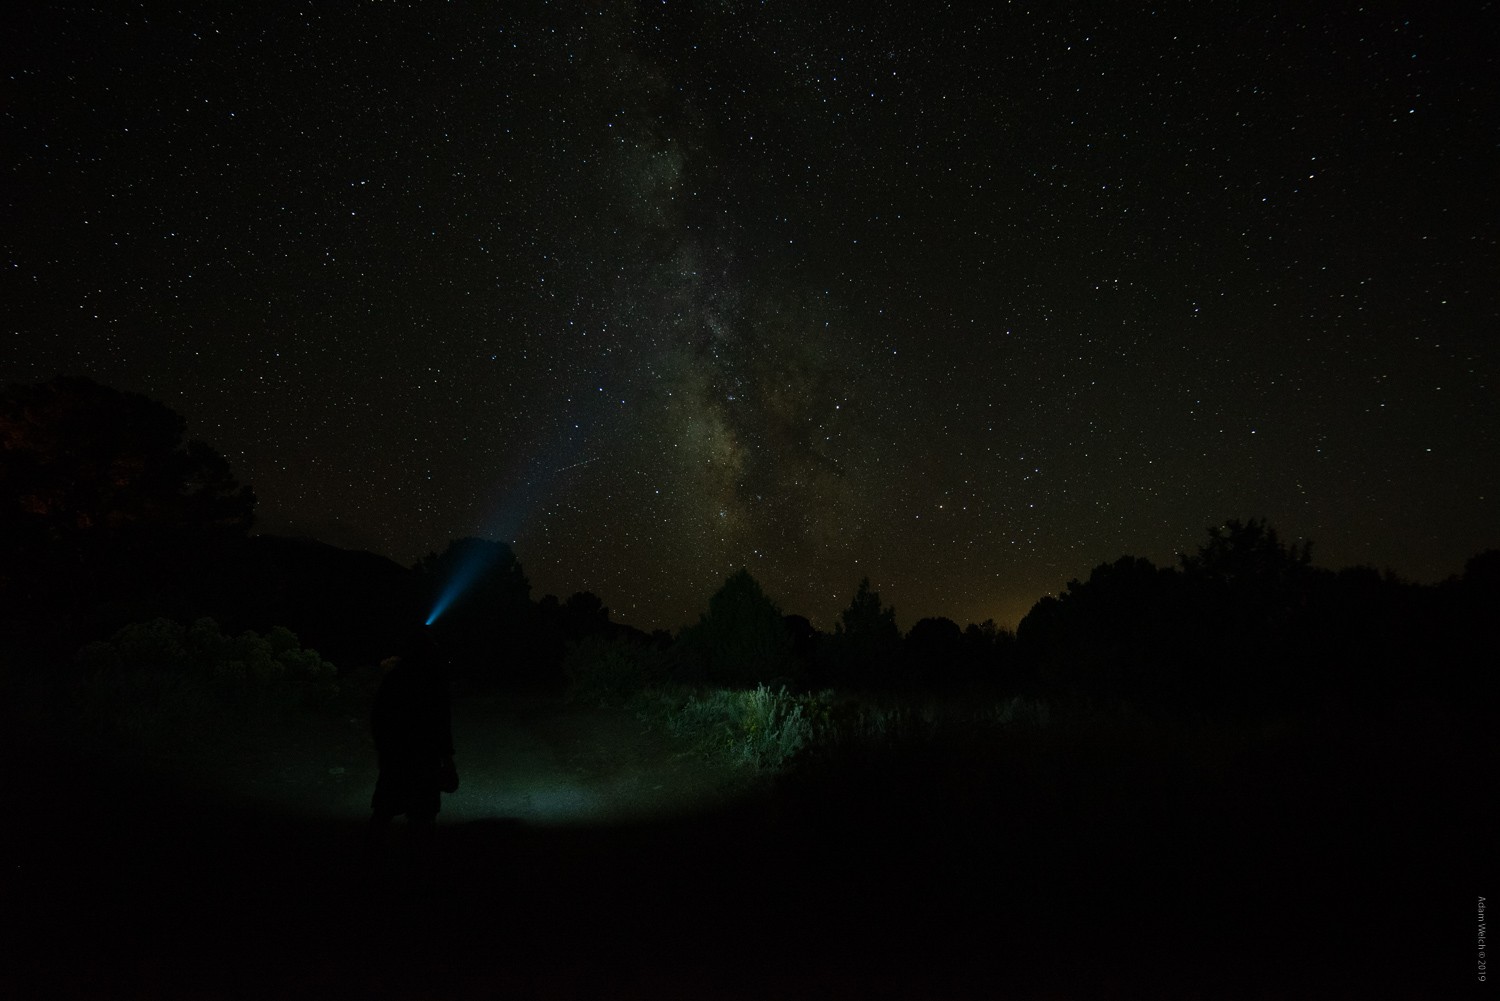
Here is that photo after I have finished the global and local adjustments. In short, aside from the somewhat lackluster beam emitted from the headlamp, the image shown here looks exactly the way I like.
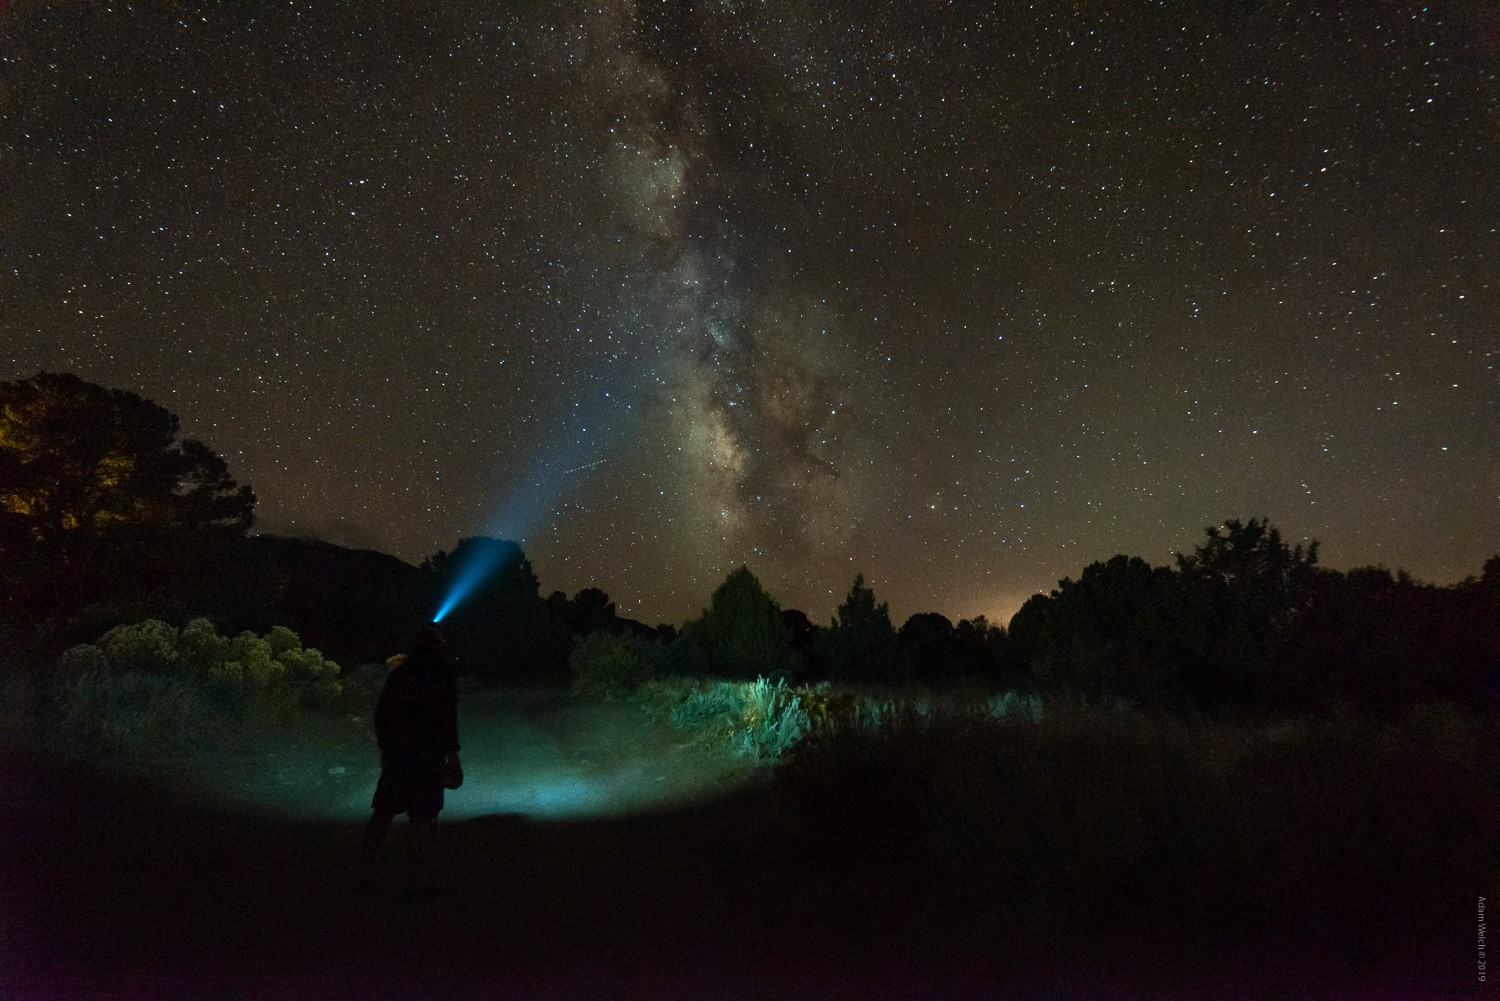
I have completed all exposure, contrast, color adjustments, sharpening and noise reduction. Regardless of what software you use to complete your post-processing, you will need to bring the image into Photoshop to finish your work. Since I use Lightroom Classic CC, I choose ‘Edit in Photoshop.’
How to enhance the light beam
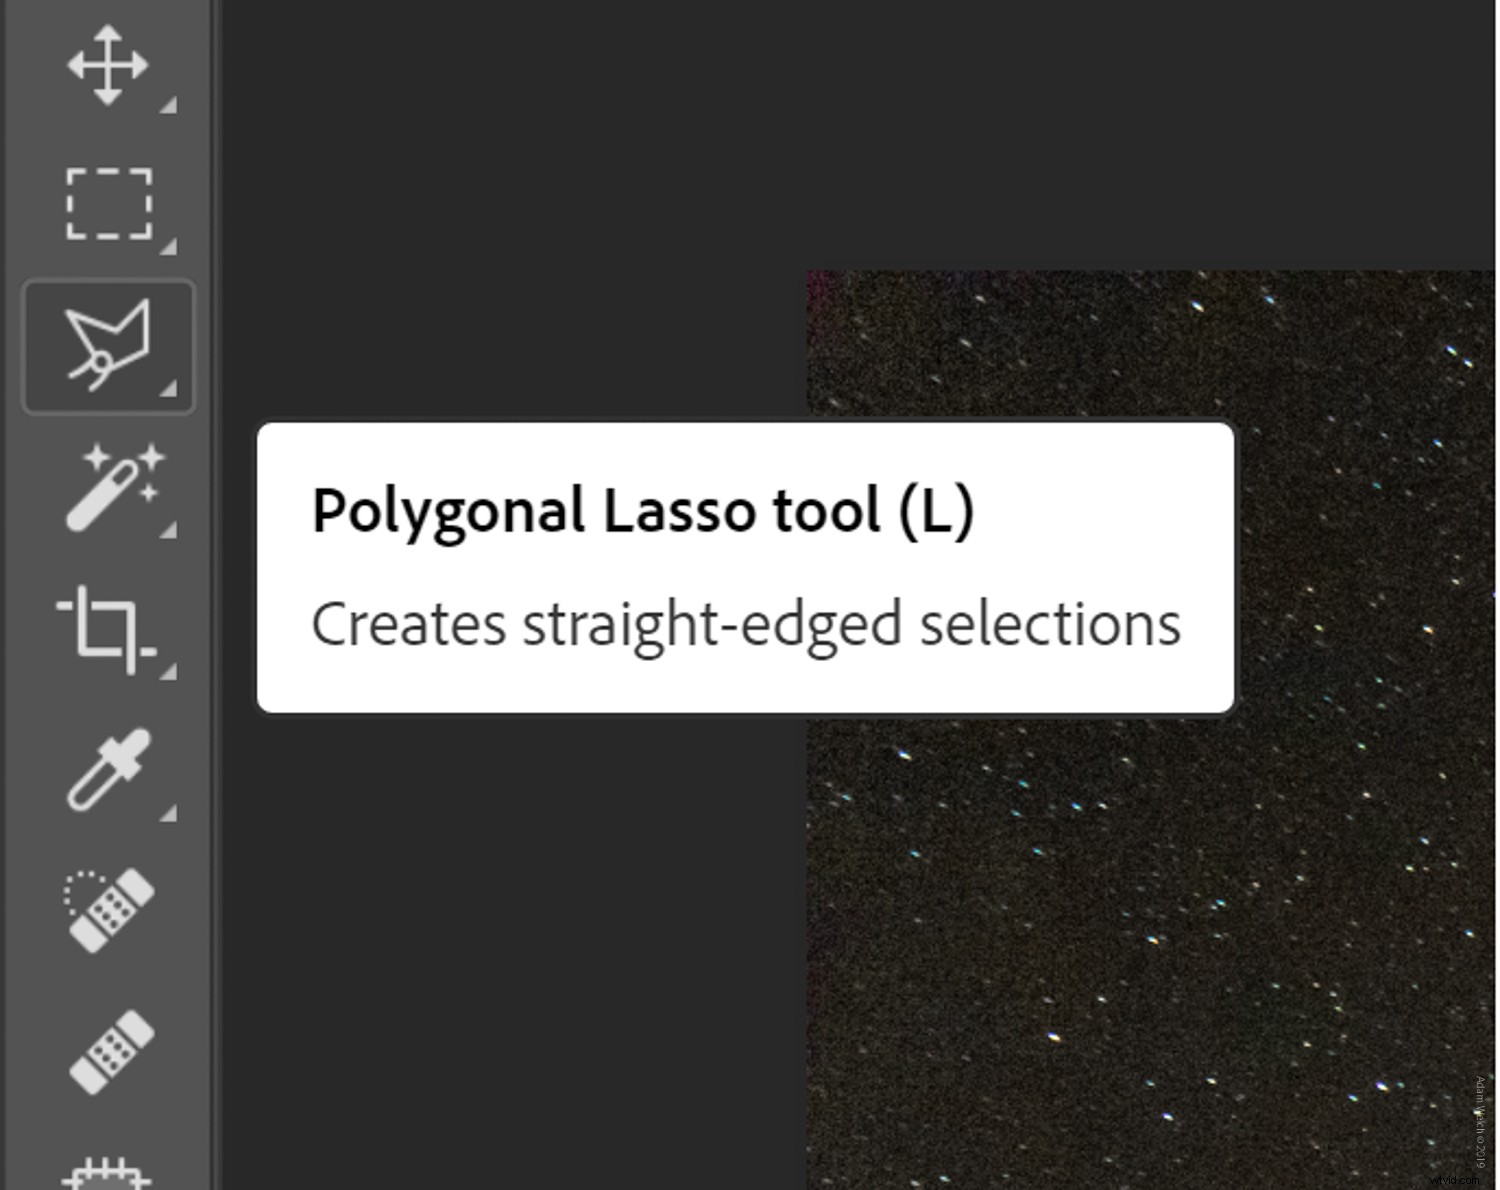
After you’ve kicked your image into Photoshop, it’s time to begin the incredibly easy process of enhancing that beam of light. We’ll do the entire operation with some super simple layer masking. To get started, select the polygonal lasso tool (keyboard shortcut ‘L’).
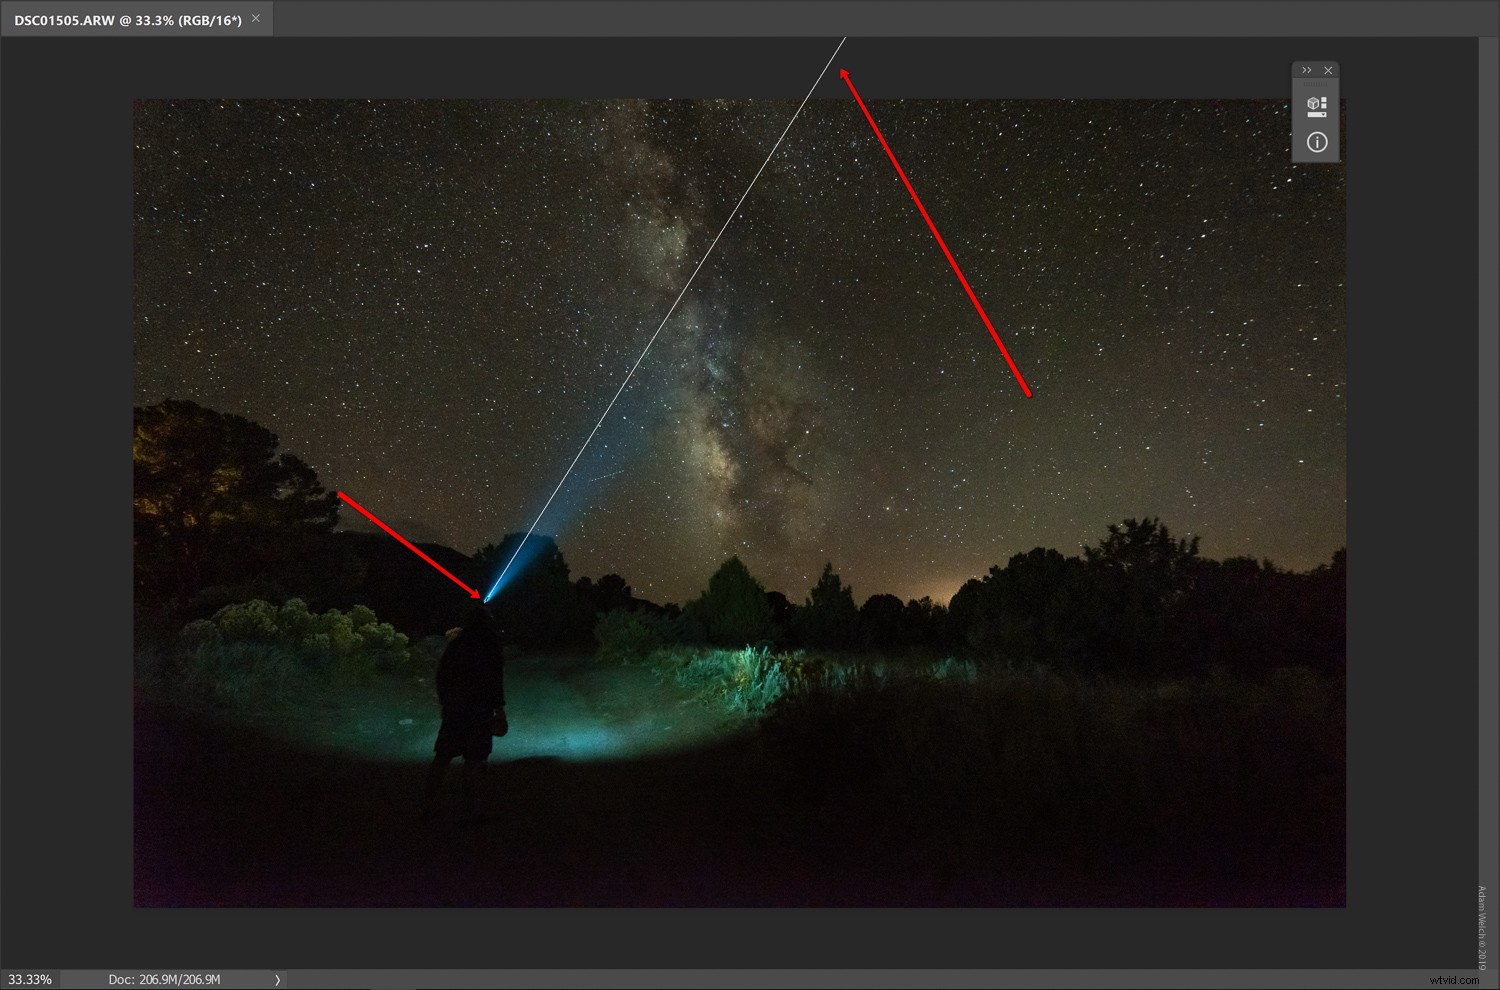
We’re going to imagine that we are drawing a shape which corresponds to how the light will naturally diverge from the source. In this case, the headlamp. So, beginning at the base of the light beam we’ll create our shape. Simply click and let go, then draw the first line. I recommend extending this first line past the canvas of the image. I’ll explain why in a moment.
Connect the dots
Now it’s just a matter of drawing more lines and connecting them. Click each point to anchor the lines together until you reach back to the beginning point. This will complete the shape automatically. At this point, the shape will also appear to be moving with the so-called “marching ants.” It will essentially look somewhat like a triangle.
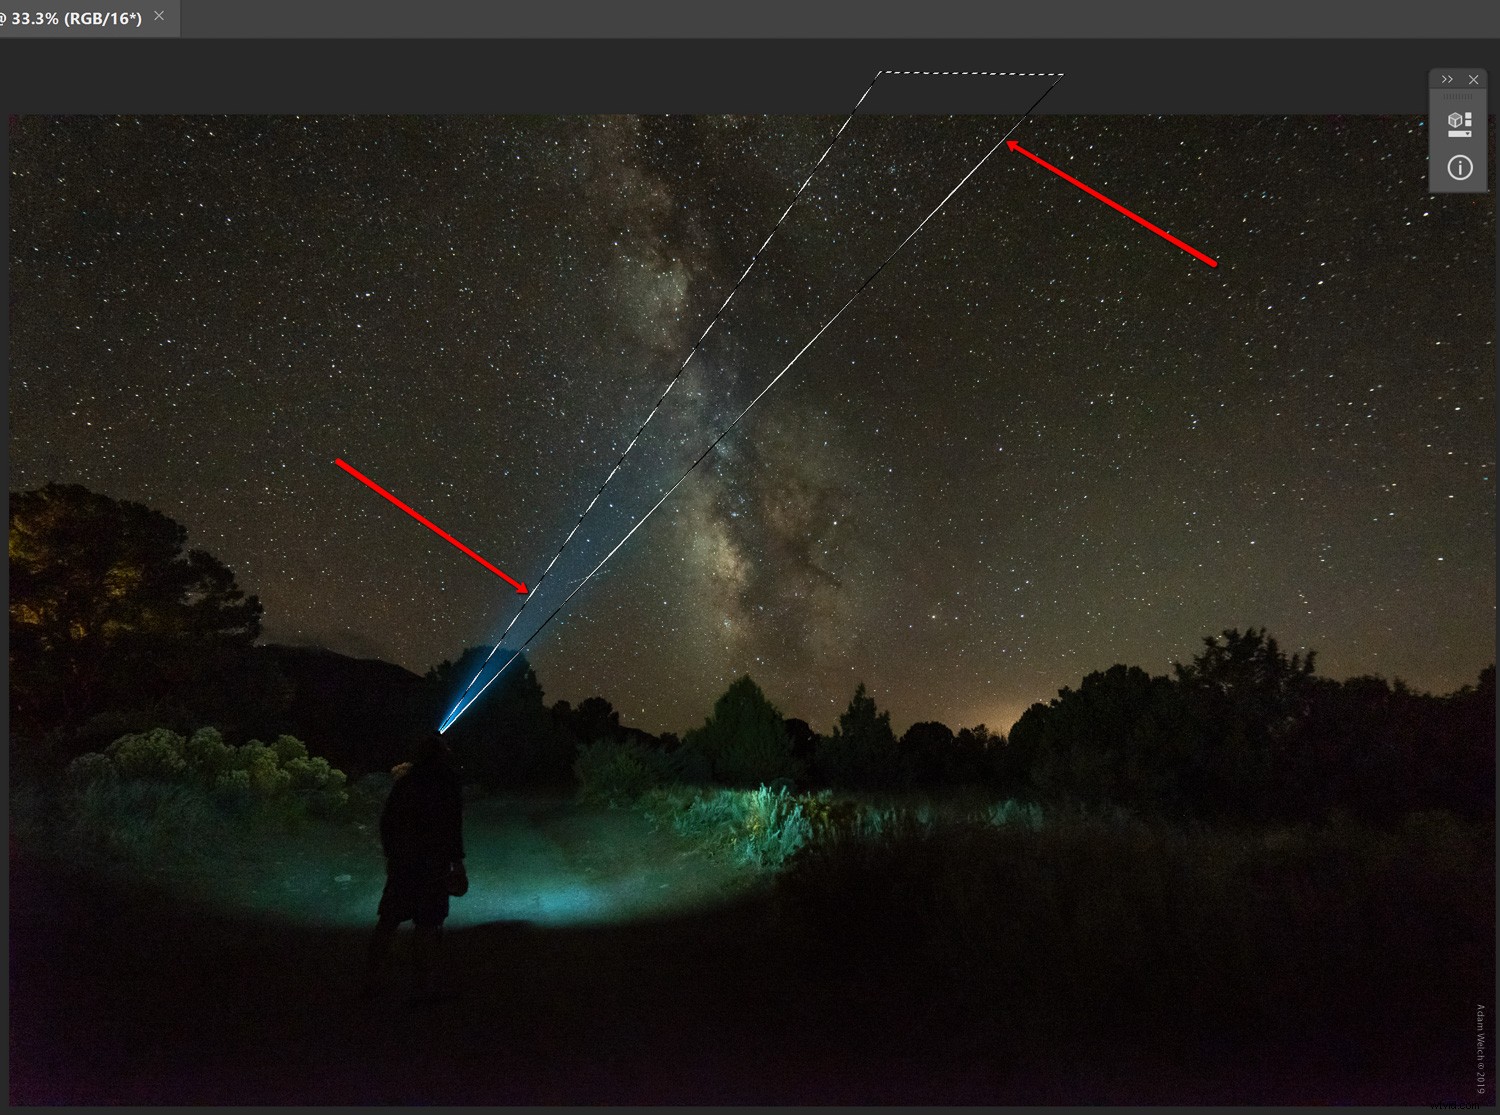
It’s this shape from which we will create our first mask. Believe me, this is all about to make perfect sense!
Add a Brightness Adjustment Layer
Click on the Brightness Adjustment Layer icon to add a brightness and contrast adjustment layer. Photoshop automatically creates the mask for this layer based on the shape we’ve just drawn.
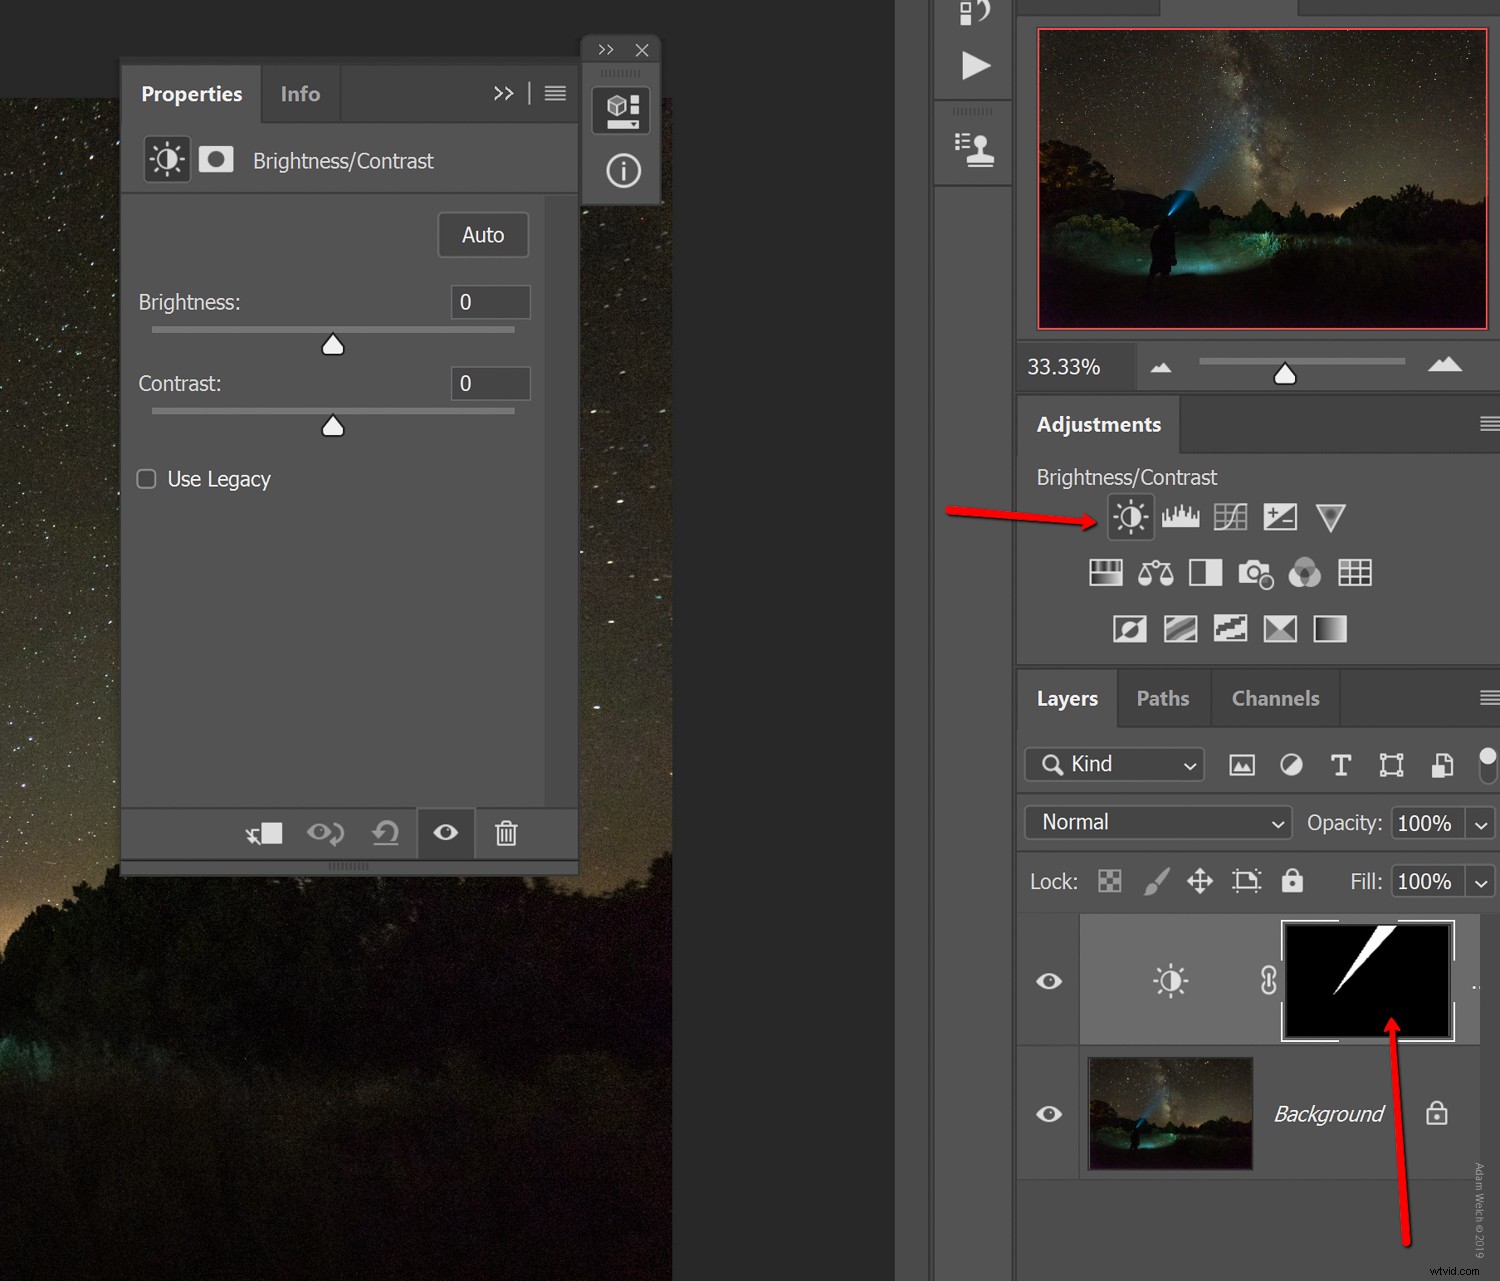
This is where the magic happens. Increase the brightness slider.
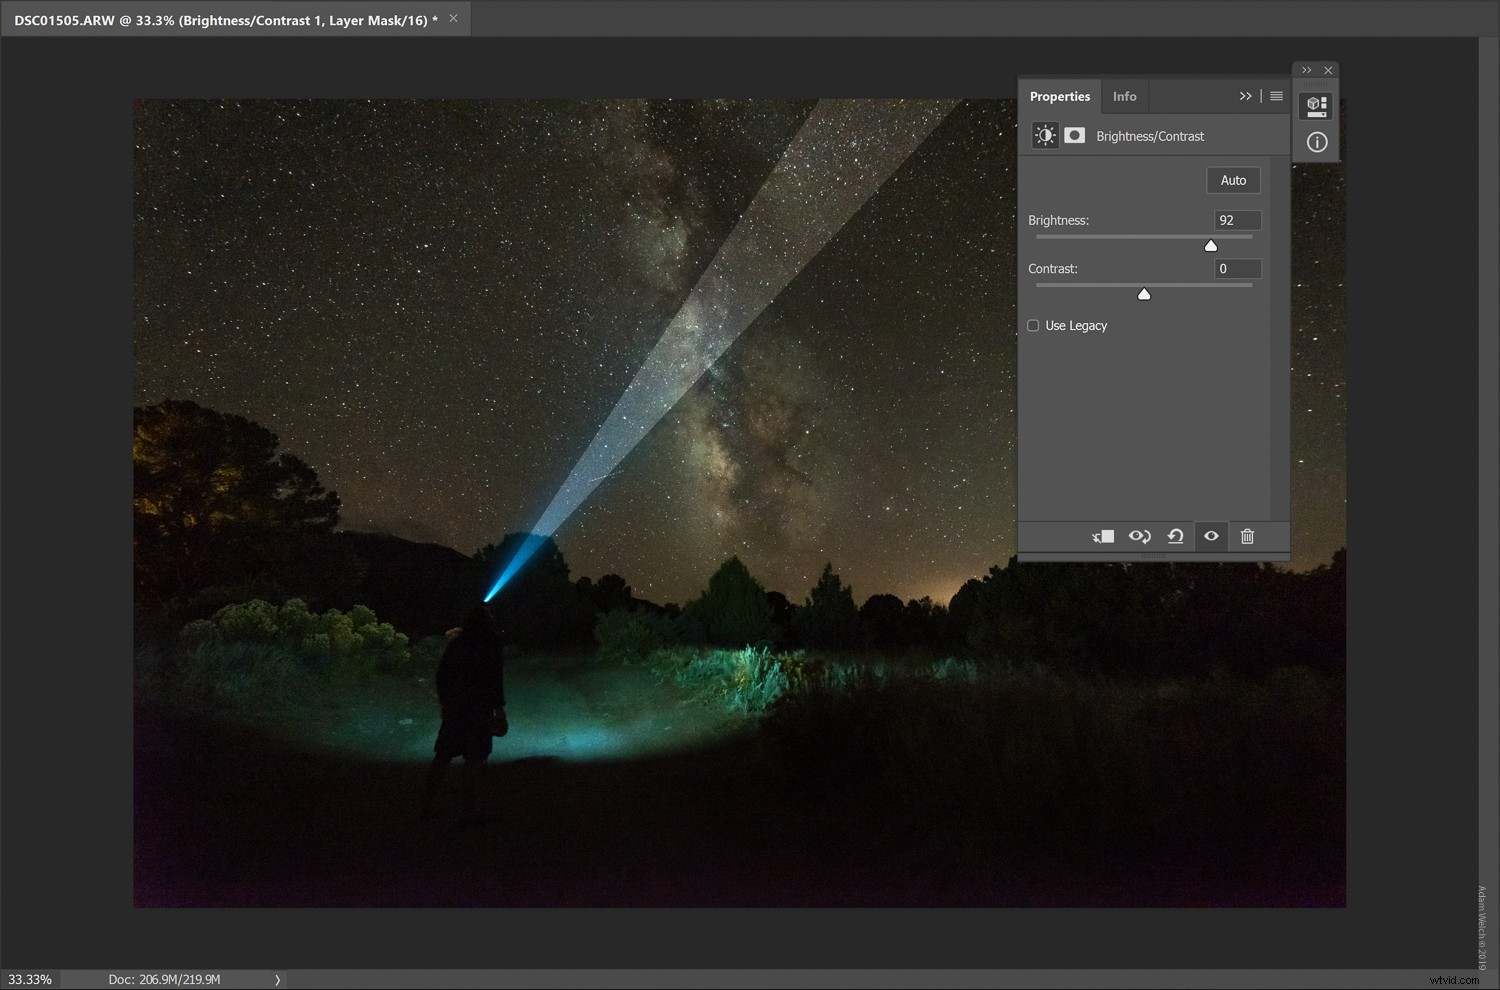
Boom. Isn’t that cool?! All that has happened is that the brightness increase only affected the shape we created with the polygonal lasso tool.
Feather the mask
There’s still a light problem, though. Look how unnatural the beam emitted from the headlamp now looks. We can fix this by adjusting the feathering of our mask. Click on the mask icon within the adjustment mask window.
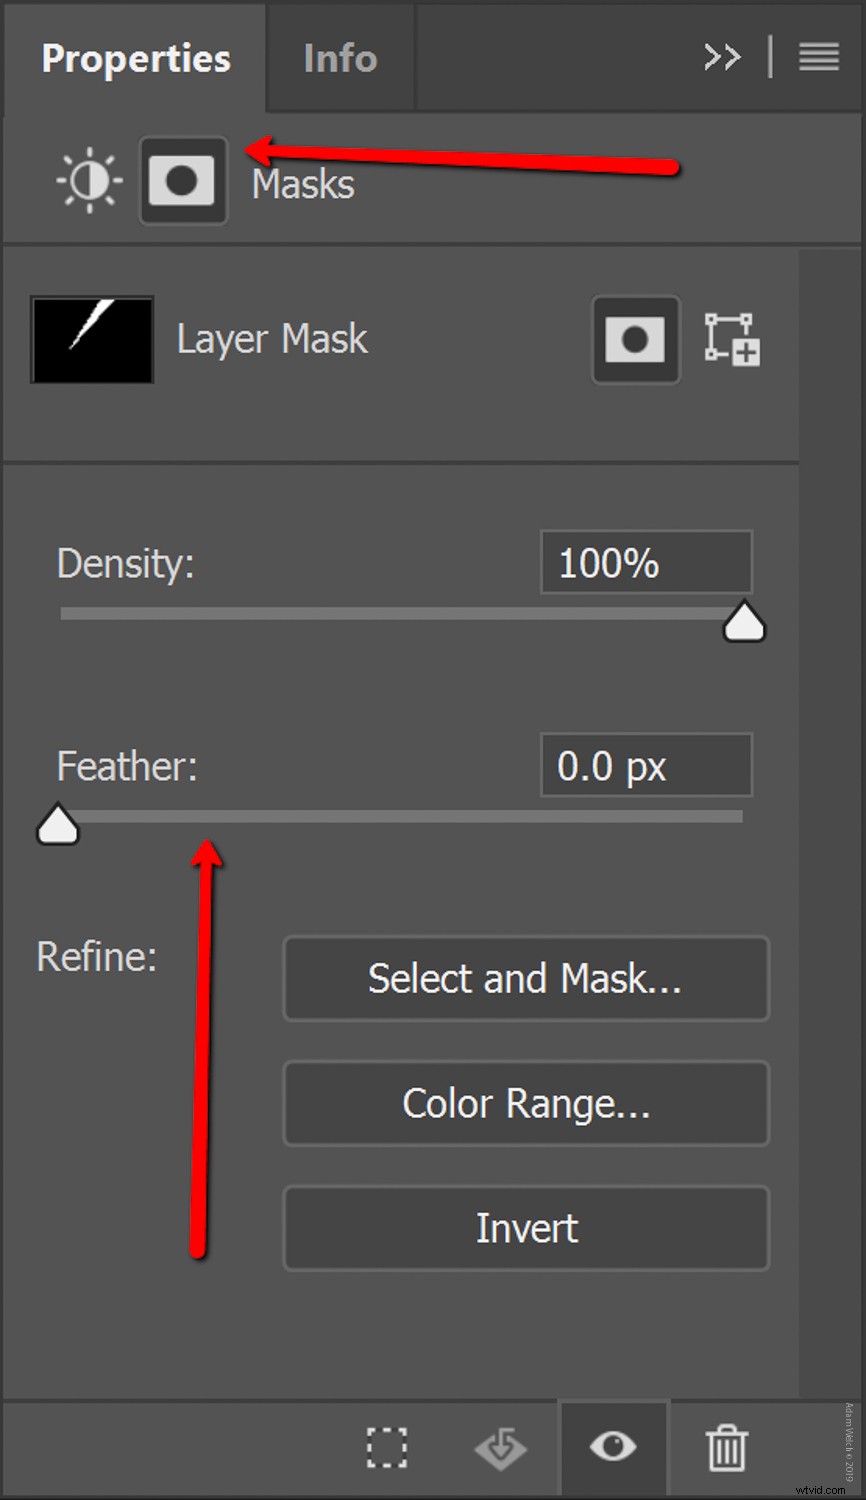
Increasing the feathering of the mask makes the edges softer and appear as if they are naturally diverging from a finite point of origin.
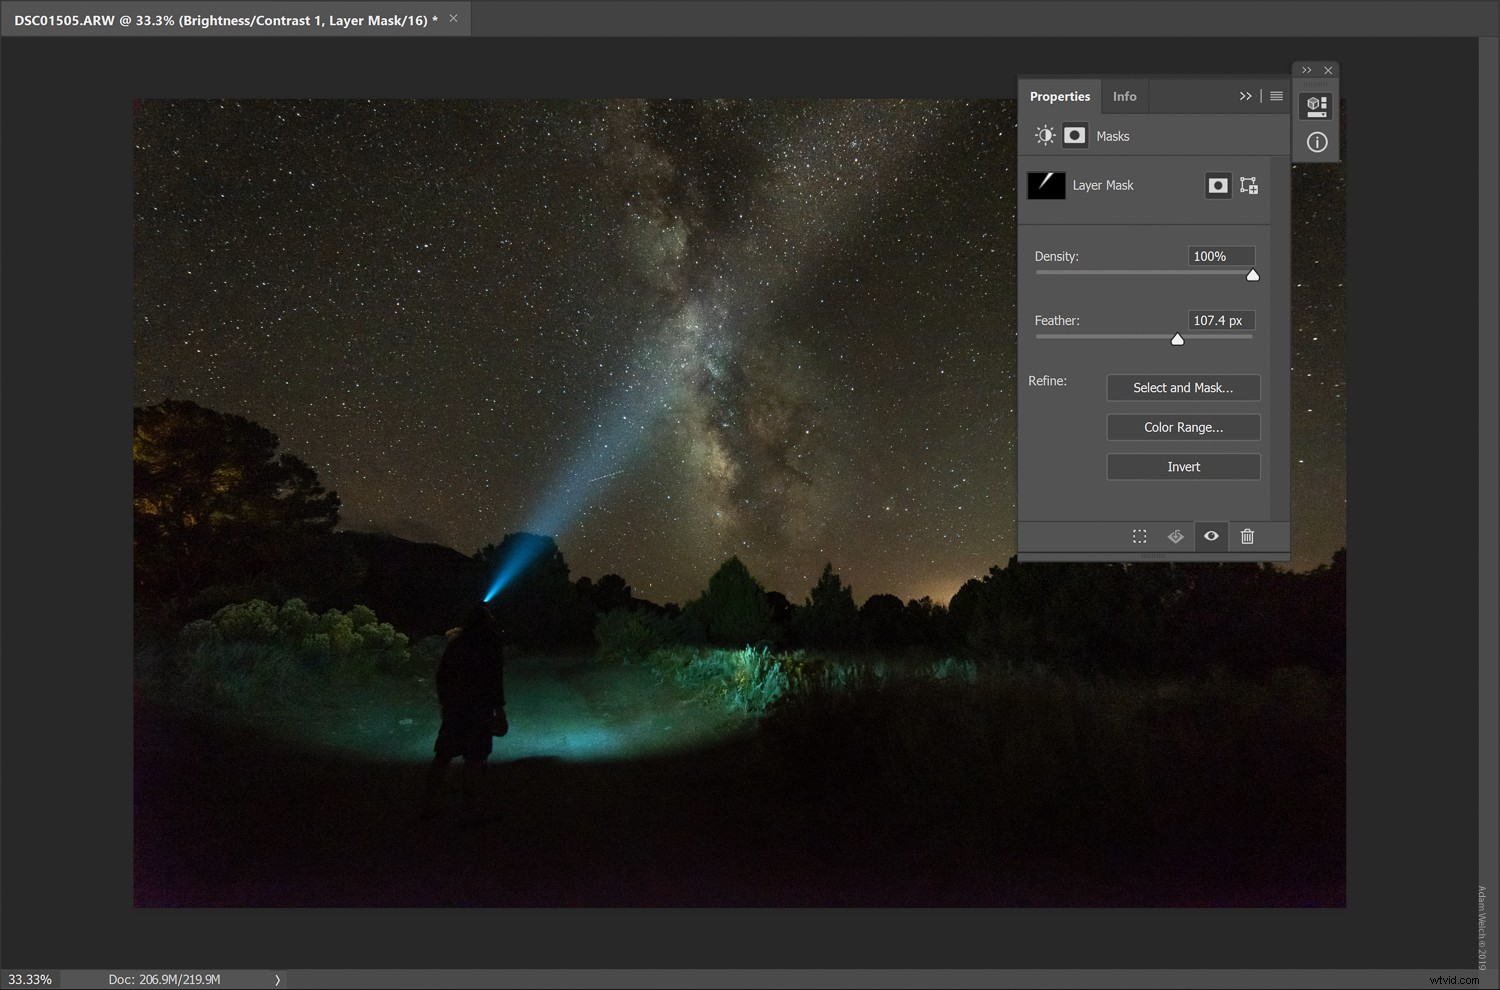
Doesn’t that look so much better already?
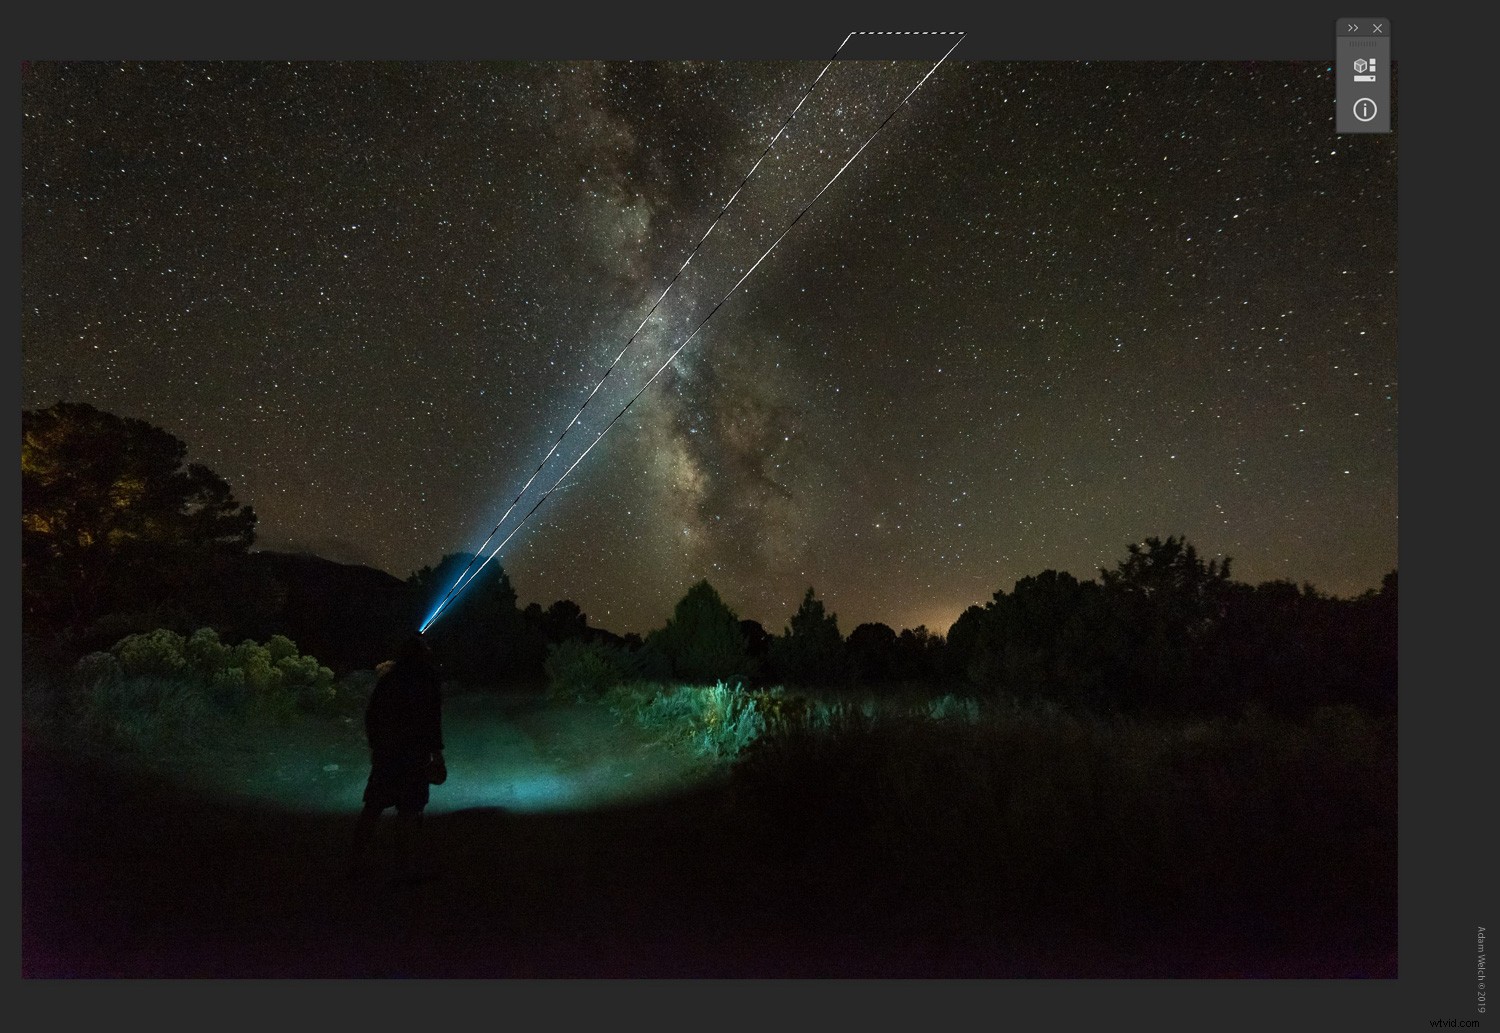
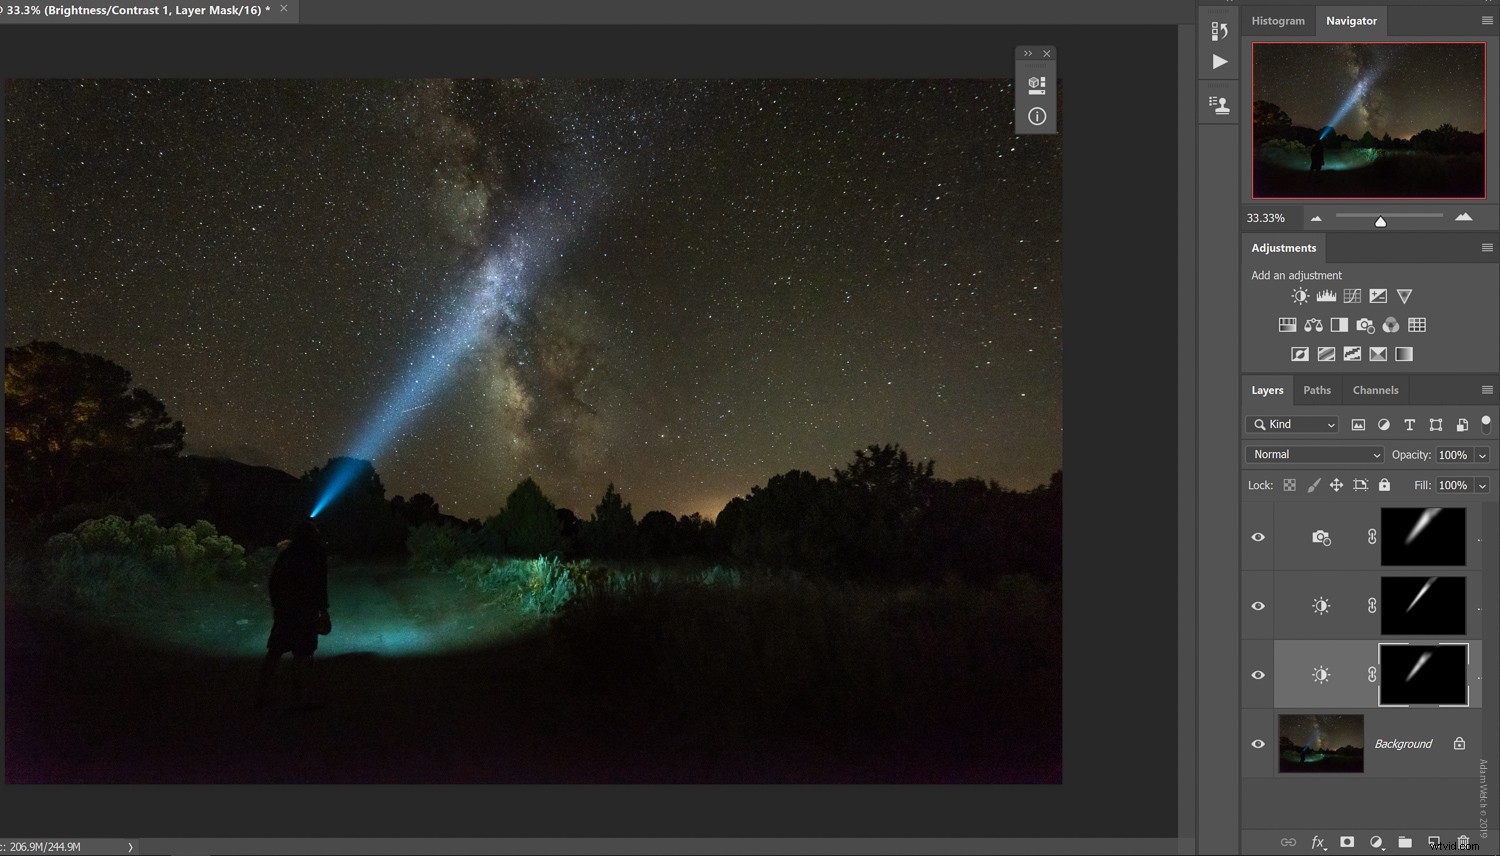
Create multiple masks
At this point, we could be completely finished, or we could repeat the steps we’ve already learned to “stack” additional layer masks based on shapes we’ve drawn using the polygonal lasso tool. In this particular image, I’m going to create another more intense beam inside the one we’ve already made.
Then it’s just a matter of adding another brightness adjustment layer just as we did before. Then adjust the brightness and mask feathering.
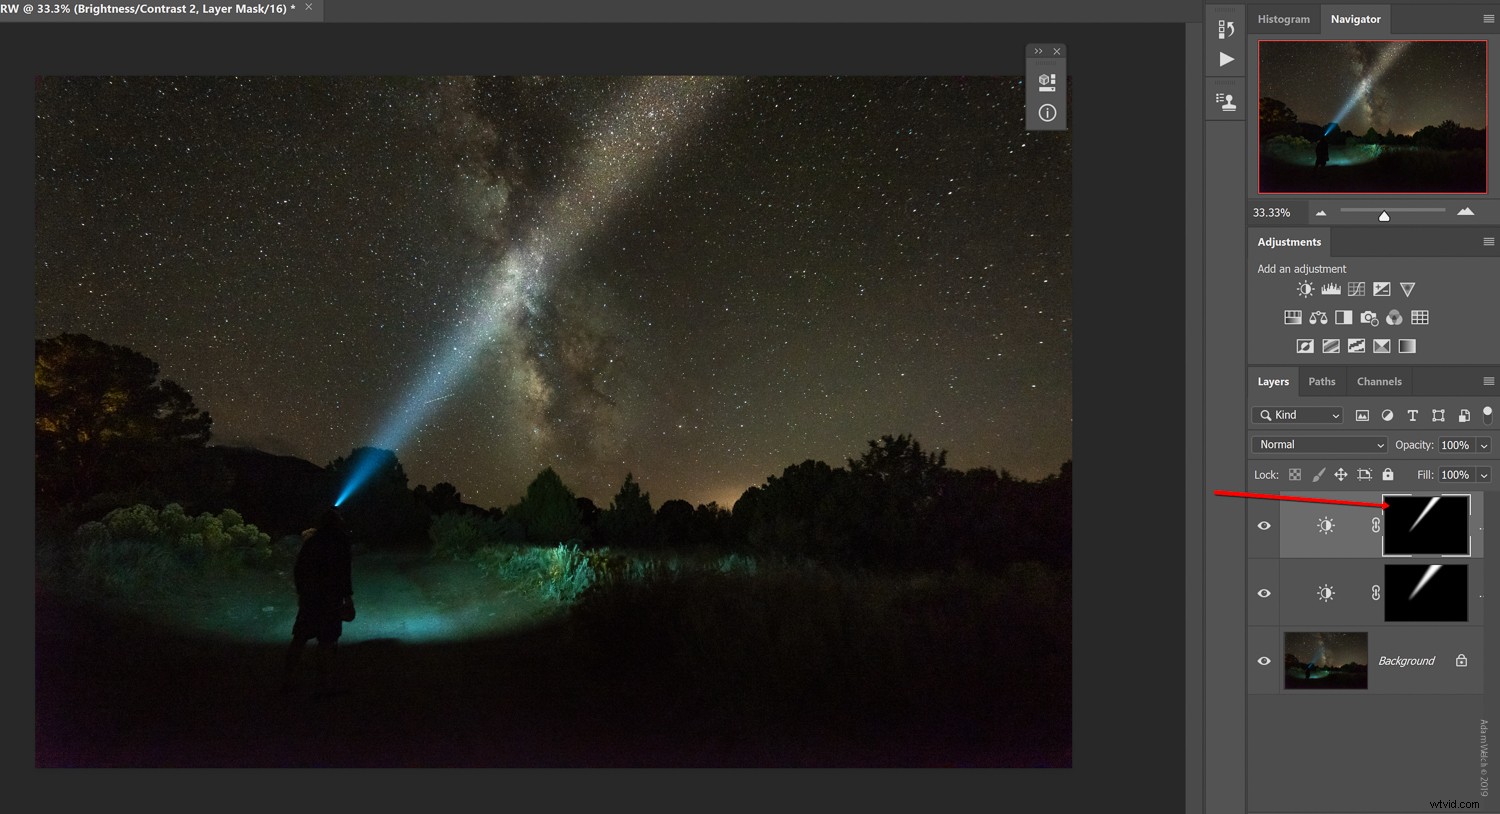
Don’t think that your masks are limited to brightness adjustments. You can add any adjustment that you choose.
In this case, I want to cool down the beam to better match the original color of the headlamp light. To do this, I’ll draw another shape with the polygonal lasso tool, but this time, I’ll select the ‘photo filter’ adjustment and add a cooling filter.
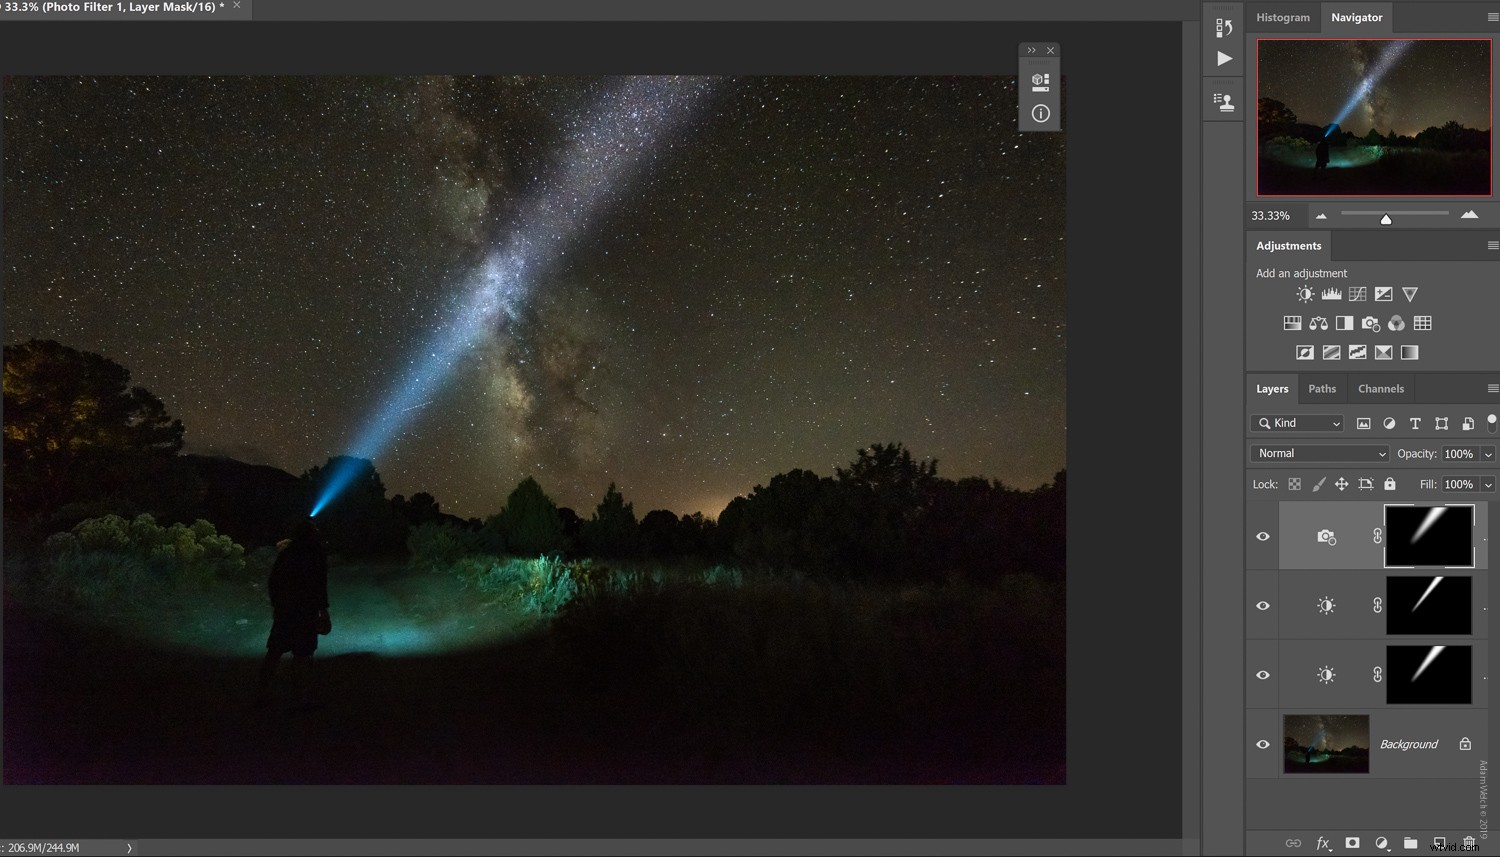
And remember when I said there was a reason we extended the mask past the actual border of the image canvas? We’re going to learn why in the next section. It all comes down to realism.
Fine adjustments
When it comes to this type of adjustment, it’s always crucial you understand the mechanics of the effect you are either simulating or enhancing. In this case, we are enhancing the way light travels from a given source.
As you probably are aware, light diverges as it travels, hence the widening of our light beam. Not only that, but the further it perceivably travels, the less bright it becomes to our eyes. The light essentially disappears into space.
To mimic this natural principle, we will “dim” the light beam as it extends further towards the edge of the frame using the brush tool.
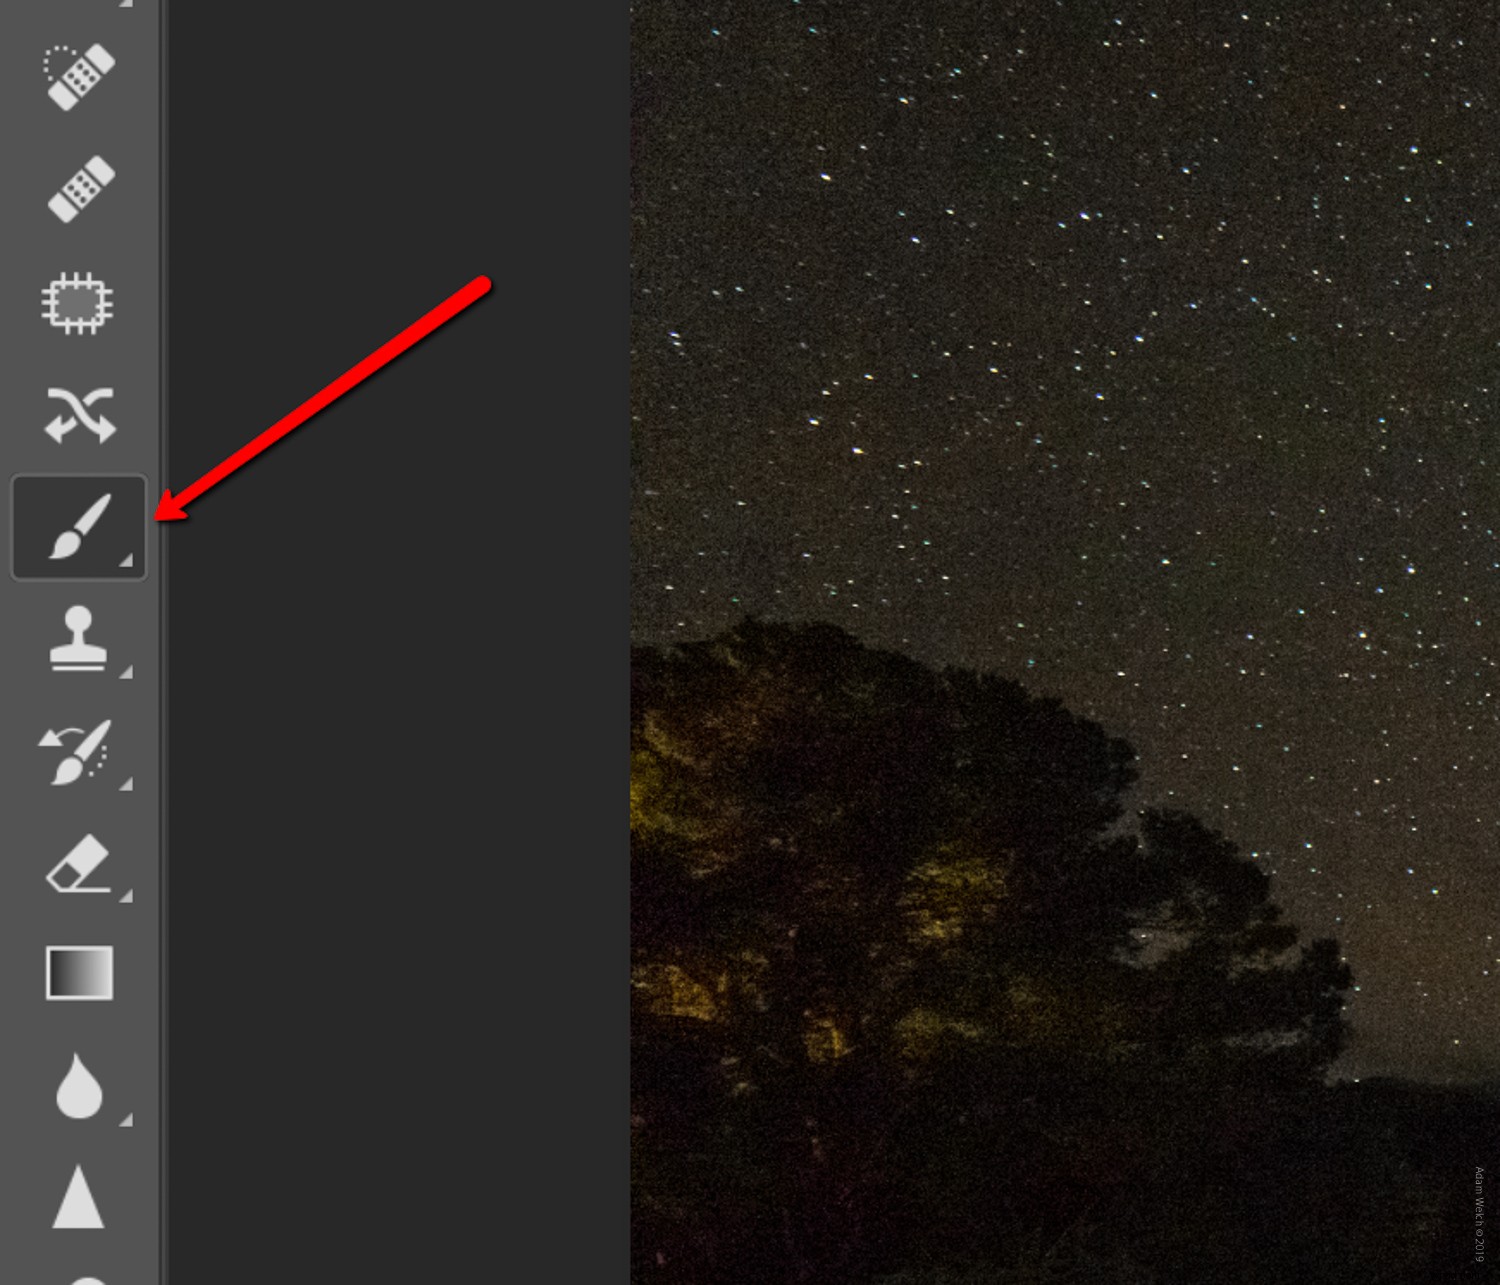
We’ll select each layer, and selectively adjust the masks so that the light appears to dissipate softly. Make sure you set your brush to black.
This is where you will need to exercise your own judgment based on your particular image. Experiment with different opacity and flow rates. If you remove too much, just switch the brush to white and paint the effect back in as needed.
Isn’t Photoshop great?
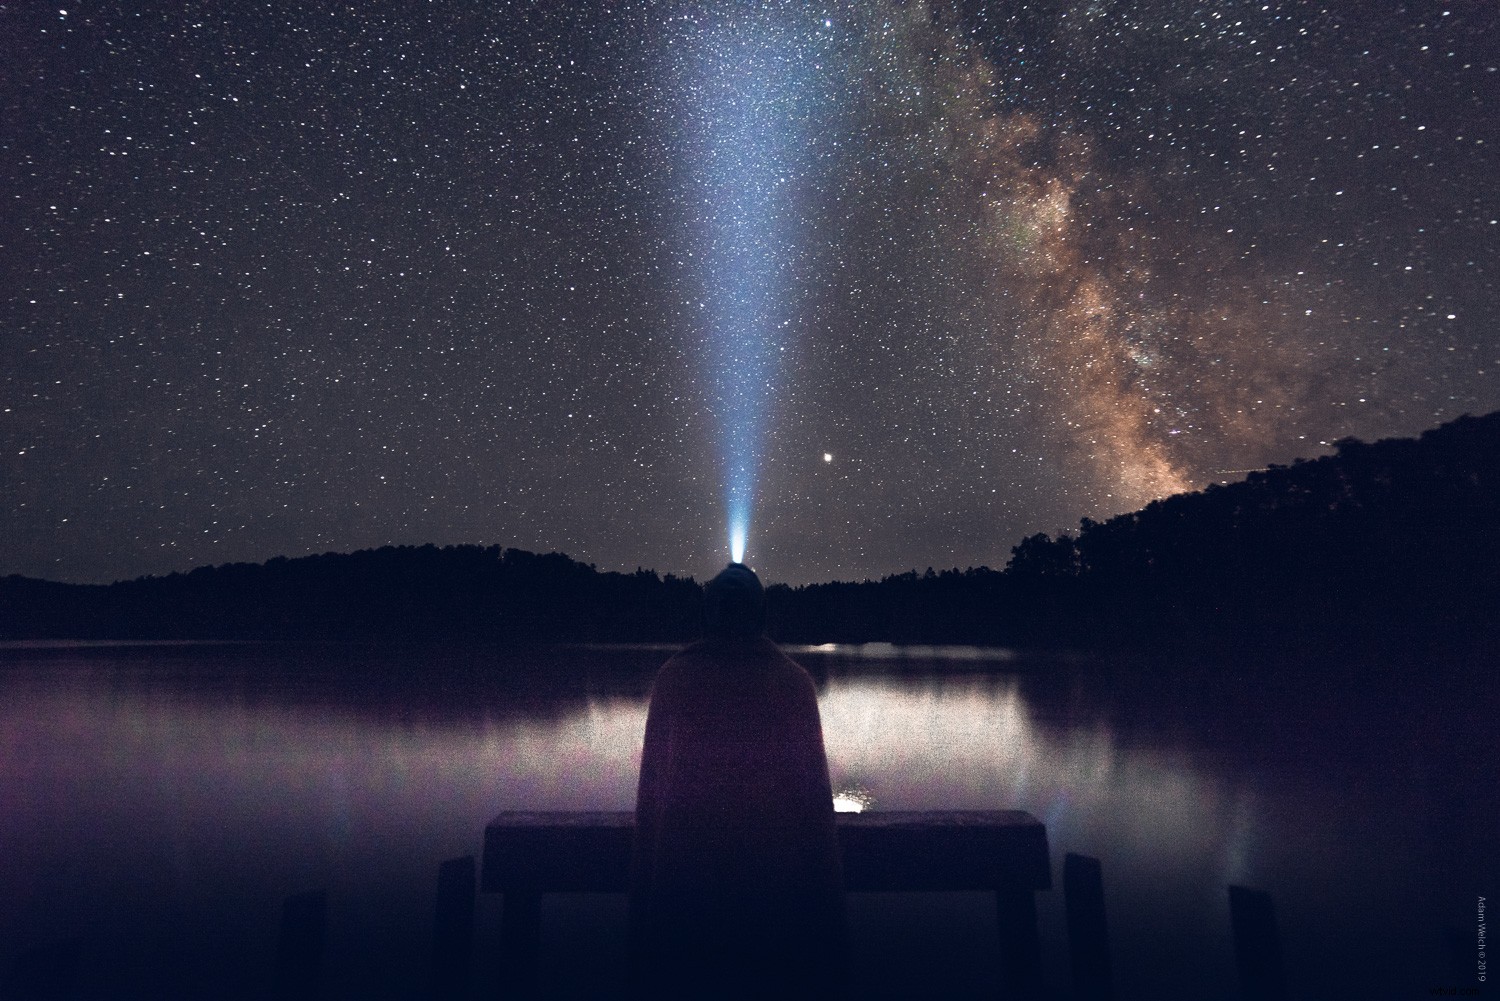
And that’s it! Here is our final photo with the enhanced light beam.
Considering this is what we started with…
…the overall creative power of this cool edit is obvious.
Let’s recap
When it comes to enhancing (and even simulating) light beams in your images, you’ll want to remember a few key guidelines:
- Begin with the best image possible
- Save your light beam enhancements until the very end of your processing
- Maintain realism by understanding light – it diverges and dissipates (in our perception) as it travels
- Stack as many masks as you need
- Remember to feather your masks!
- Don’t be afraid to adjust the color of the enhanced light beams
At its core, enhancing light beams in Photoshop is an extremely easy way to add some immediate power to your images. Even though we’ve used the example shown here, you can apply this technique to any scene with point sources of light such as car headlights, street lights or in any scenario where you might want to creatively pump up the luminosity of light beams.
Try it out, experiment and, as always, be sure to share your results with us!