You should always try to get the exposure as good as possible when taking a photo.
Sometimes, however, you need to over- or underexpose to save the details in highlights or shadows.
You can then use several Photoshop Exposure tools to correct it. Here’s how to correct exposure in Photoshop.
How to Correct Exposure in Photoshop
First of all, you can try an Exposure adjustment layer. It’s the easiest way to correct exposure.
Step 1: Add an Adjustment Layer
Add a Photoshop Exposure adjustment layer by clicking on the “Create new fill or adjustment layer” icon.
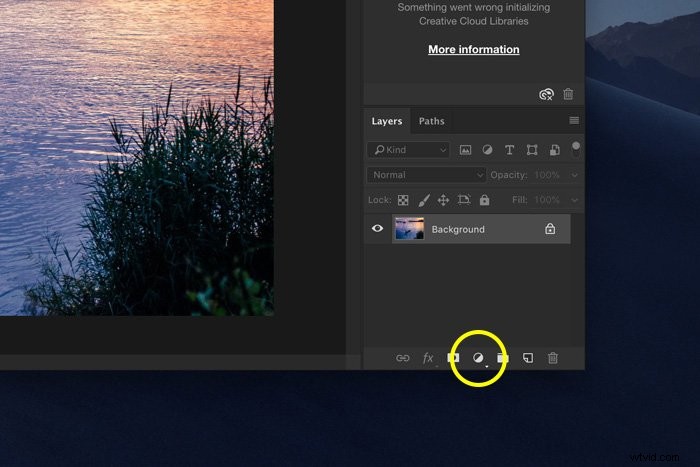
Choose “Exposure”.
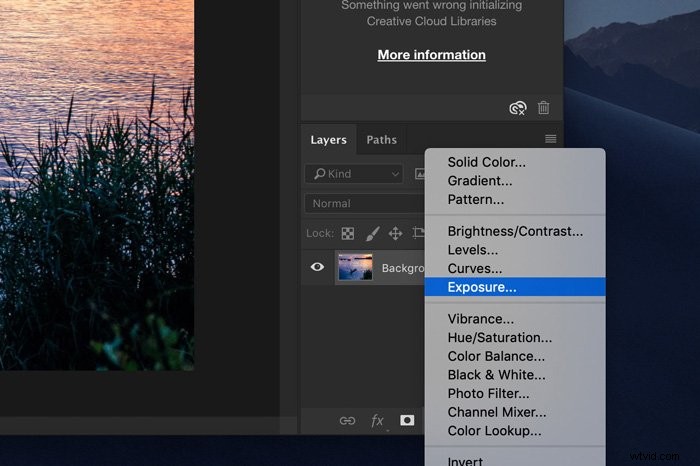
Photoshop will add a layer on top of the background layer and the Exposure window will pop up.
Step 2: Adjust the Exposure
Slide the Exposure slider to the left or right to adjust the exposure.
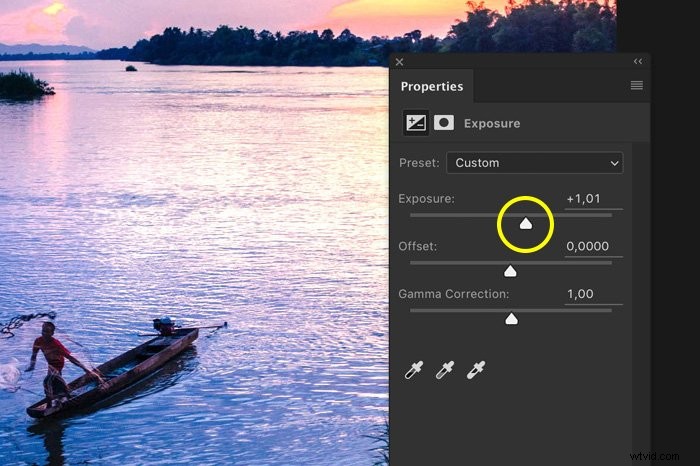
It’s very easy but the problem is that for most images, Photoshop will overdo it when you use this technique.
Best Photoshop Exposure Techniques
There are two other tools you can use for Photoshop Exposure correction. First the Levels.
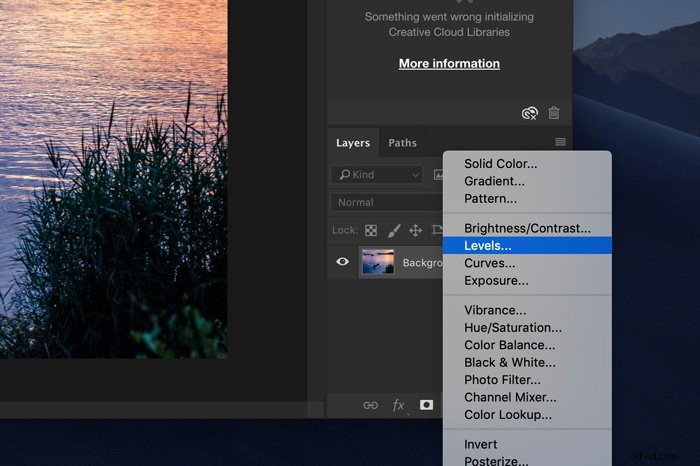
Step 1: Add a Levels Adjustment Layer
Click on the “Create new fill or adjustment layer” icon. Choose “Levels”. The Levels window will open and show you the histogram of the photo.
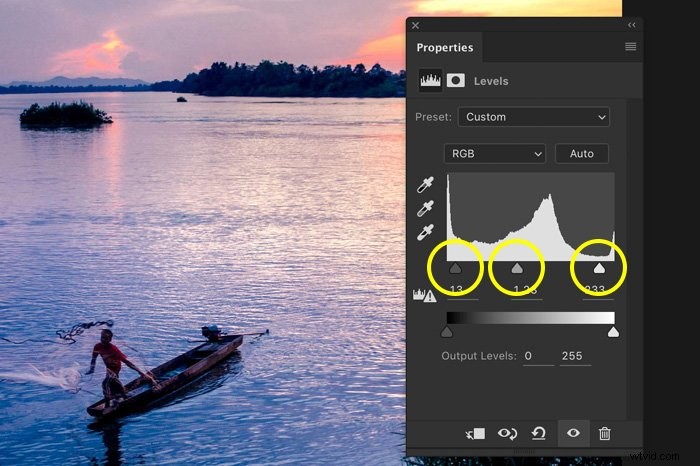
The histogram is a visual representation of the exposure of the image. A “good” histogram should show a lot of pixels in the mid-tones.
If it shows a lot of tones on the left, the image is underexposed. Too much to the right? Then your image is overexposed.
Step 2: Adjust the Exposure
Use the grey coloured slider in the middle to adjust the mid-tones. This will make the overall image brighter or darker.
Use the black and white slider to adjust the shadows and highlights. This will add contrast to the image.
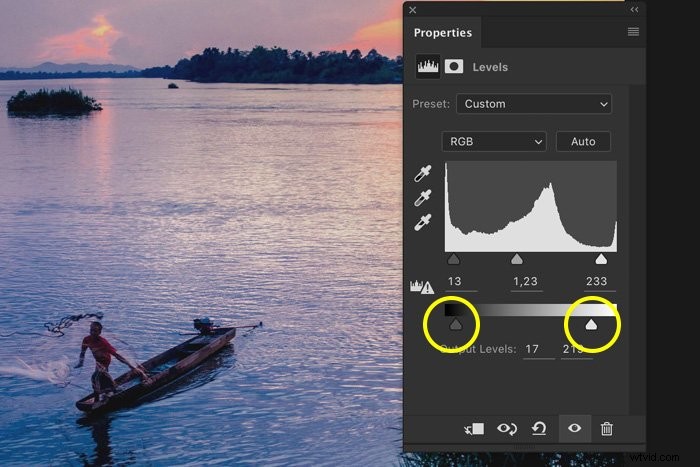
Step 3: Output Levels
Use this slider to set a value for darkest and brightest pixels in your image. Usually, it should be black and white but you can use this to make overexposed areas a little bit greyer for example. That way, they’re less overpowering.
Don’t overdo it because it will give your image a faded look.
Curves
Using Curves is another great tool for Photoshop exposure correction.
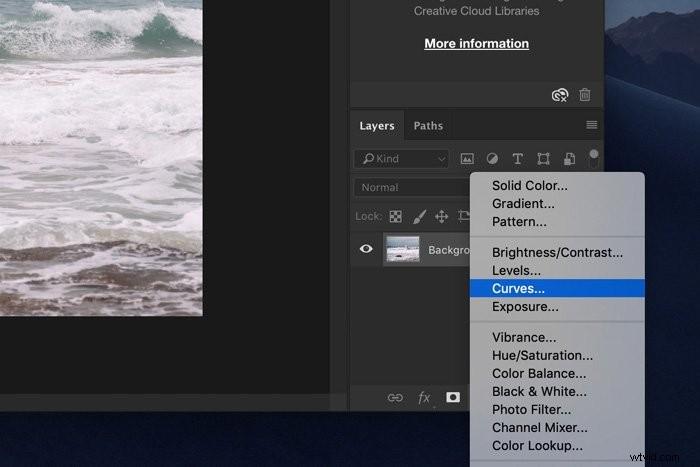
Step 1: Add an Adjustment Layer
Click on the “Create new fill or adjustment layer” icon. Choose “Curves”. The Curves window will pop up.
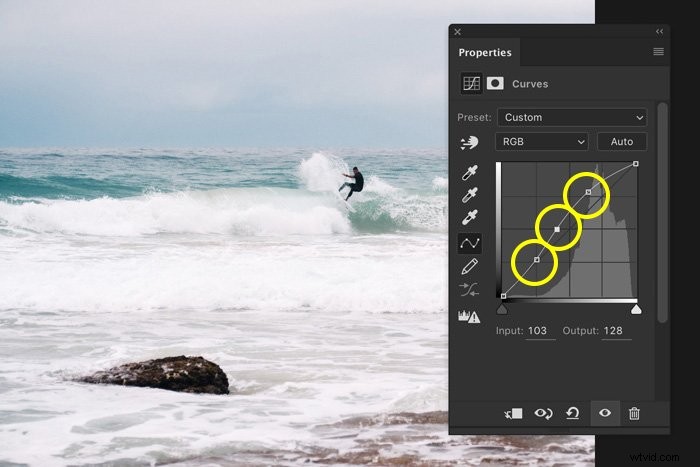
Step 2: Adjust the Exposure
To adjust the dark tones, you can change the curve in the bottom section. The highlights are in the top section of the curve.
By lifting the curve in the middle, you can adjust the exposure of an image.
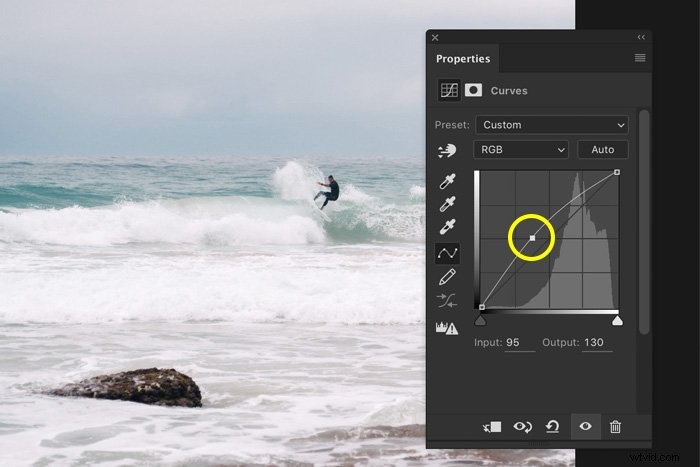
Every time you click on the curve, an anchor point will appear. Use these anchor points to adjust certain areas only. You can adjust highlights, shadows, and midtones separately.
Common Exposure Questions
How Do I Darken an Overexposed Area in Photoshop?
To darken an area in your photo, use the Burn tool. Set it to “Highlights” in the top menu and just paint over the area you want to darken. The ”Exposure” is set to 50% by default but you should start with a value of around 10%.
How Do You Fix an Overexposed Picture in Photoshop?
In digital photography, it’s a lot harder to fix overexposed images compared to an underexposed one. The best tools for the job are “Curves” and “Levels”. They allow you to gain full control over your adjustments.
How Do I Even Out the Brightness in Photoshop?
The best way to do this is to create two versions of the image in Photoshop. A dark one and a bright one. Then, using the masking technique, you can blend both images together.
What Is Gamma Correction in Photoshop?
Gamma correction enables you to adjust how an image is displayed on your monitor. The wrong gamma settings can make your image too dark or faded, for example.
It’s different from brightness settings because it adjusts both light and dark tones.
Conclusion
It doesn’t matter if you’ve made a mistake or adjusted the exposure on purpose. Photoshop has a bunch of tools available to easily correct exposure, shadows, and highlights.