With several video-sharing platforms and billions of videos on those platforms, it is very difficult and competitive to make your mark and have an identity. There are hundreds of categories of videos that you can find on the platforms like Youtube, Dailymotion, Vimeo, and more. Among all those categories, reaction videos are one of the most popular categories. It allows a person to review another person's opinion, view, or idea about any particular issue or instance. Most of the video-sharing platforms enable their users to make all kinds of reaction videos without any restriction. Having such a huge competition makes it hard to stand out and attract viewers.
Have you ever seen videos where the reactor has a transparent background instead of the rectangle box in the corner? They look nice and engaging, right? The process of making such videos will require so many materials such as a green screen, stand, and other materials to support it. It is difficult for everyone to afford all these and secondly, it is very difficult to carry from one place to another.
With Filmora X, you can create such transparent background reaction videos without such expensive material. Filmora has launched a new feature name AI Portrait that uses artificial intelligence to create amazing and cool effects. It uses the latest technology to separate the background and humans in the footage to help you remove the background with a single click. So, let's get started with the process of making stunning reaction videos with Filmora's AI Portrait.
You might be interested in:
- How to Make Game Streaming Video in 30s
- How to Make Thumbnail Freely
Step 01: Open Filmora X. If it is not already installed on your PC, you can download it from here and install it on your PC.
Step 02: Import the video that you want to react to and your reaction video. If you have not already recorded your reaction, then record it first using any camera or smartphone.
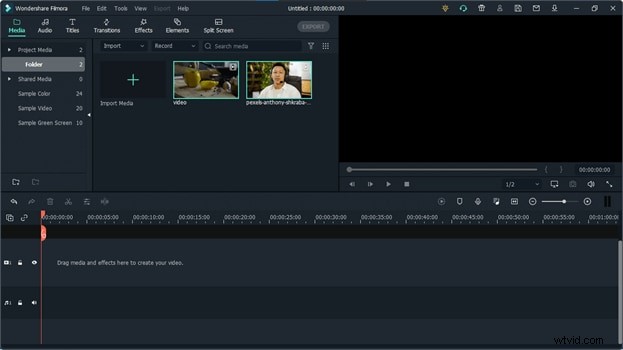
Step 03: Place both of these videos into the timeline. Make sure to place your reaction above.

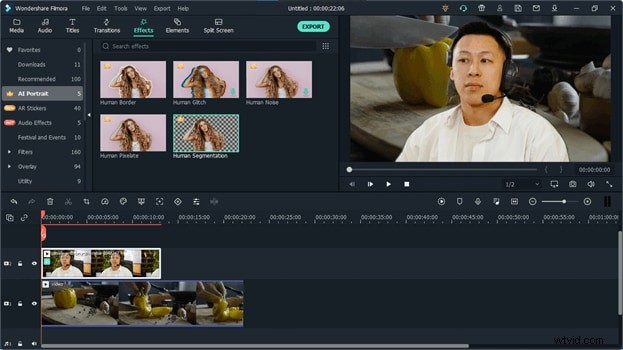
Step 04: Select your reaction video on the timeline and go to the "Effects". Here you will find a new folder named "AI Portrait", open it. Here you will find multiple AI portrait effects.
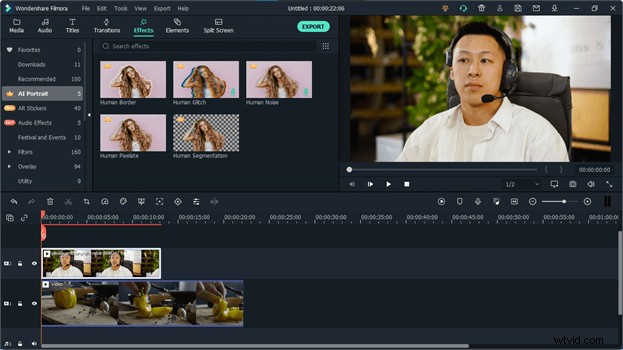
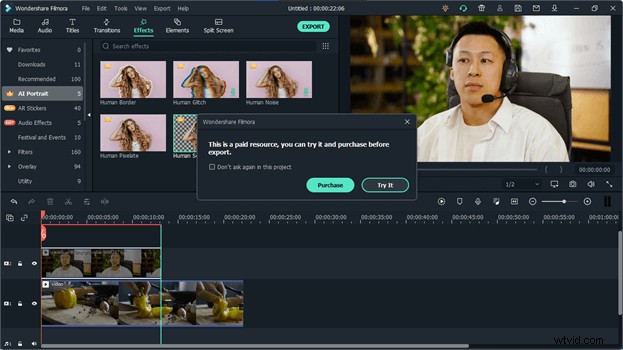
Step 05: Our goal is to remove the background of the reaction. To do that, we will use Human Segmentation. Drag and drop Human Segmentation into the reaction video. If you haven't purchased this effect already, it will ask you to buy it to export the video. But you want to try it first, click on "Try It."
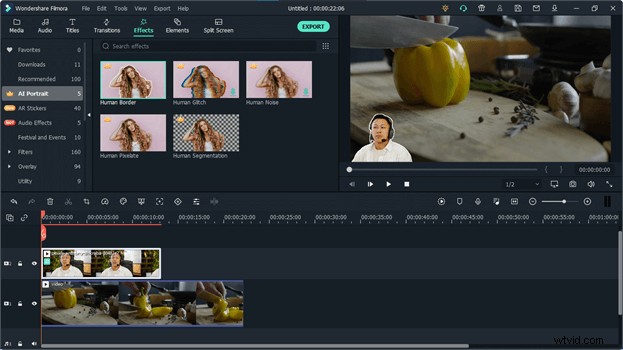
Step 06: Once the effect is successfully applied to the video, its background will be removed automatically.
Step 07: Adjust the video by making it smaller and place it in the bottom left corner of the screen. Your reaction video is ready to be uploaded on video-sharing platforms.

Step 08: To make your video look cool and stunning, you can also add multiple other effects to your reaction. AI portrait allows you to add a border around the character to make it look more visible and separate it from another video. Go to the AI portrait and drag Human Border Effect and drop it into your reaction. It will create an outline around the character and make it look more visible.
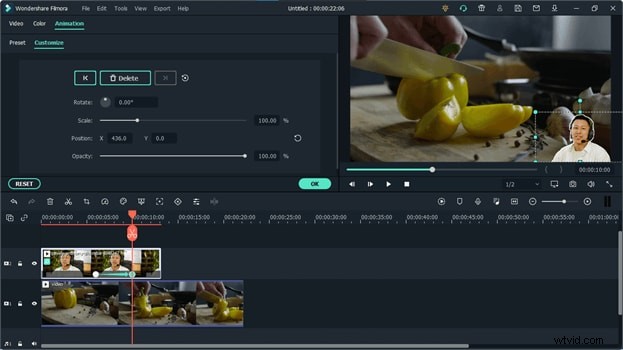
Step 09: In some instances, you might need to change the position or size of your reaction. You can easily do that by applying the Keyframes to it. If you feel like changing the part of your reaction at some point in the video, go to that point in the timeline and click on the keyframe button above the timeline.
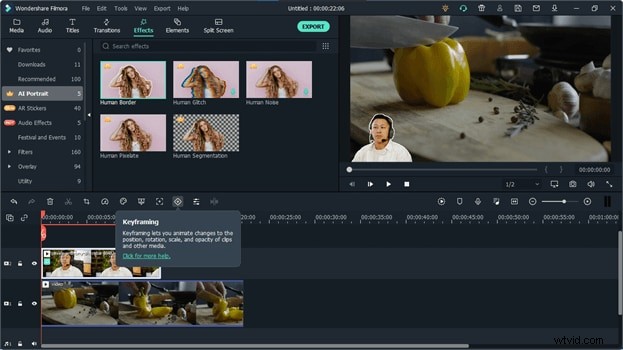
Step 10: Once you click on the keyframe, it will add a keyframe to the video. Now move forward into the timeline to a point and adjust your character's position by dragging it. Let's move it to the bottom right corner. It will add another keyframe to the video in the timeline. Now the character will change its position from the left corner to the right corner once it reaches that specific point in time.
Conclusion:
AI Portrait allows you to create wonderful effects using artificial intelligence. This is one of the best uses of AI to make stunning reaction videos. It will not only save you a lot of time but will also help you save a lot of money by helping you remove the background of your video without expensive materials such as a green screen and other materials related to it.