Adobe Premiere Pro’s Auto Save feature is a lifesaver for editors. By automatically preserving your project at set intervals, it protects you from crashes, power outages, and unexpected system updates.
To activate Auto Save, follow these simple steps:
- Navigate to Edit → Preferences → Auto Save.
- Set the interval for automatic saves and the maximum number of project versions you wish to keep.
- Check the box labeled Automatically save projects.
- Click OK to apply the changes.

Where Are Premiere Pro Auto Save Files Stored?
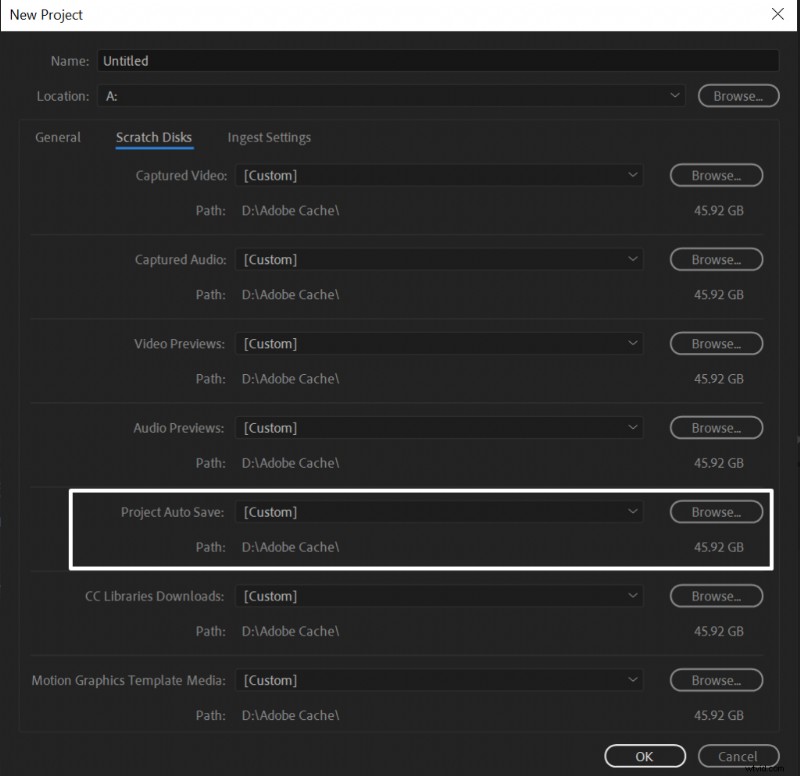
When you create a new project, Premiere Pro allows you to specify the destination for your auto‑save files. To locate the default folder:
- Open File → New → Project.
- In the Scratch Disks section, note the Project Auto Save Path.
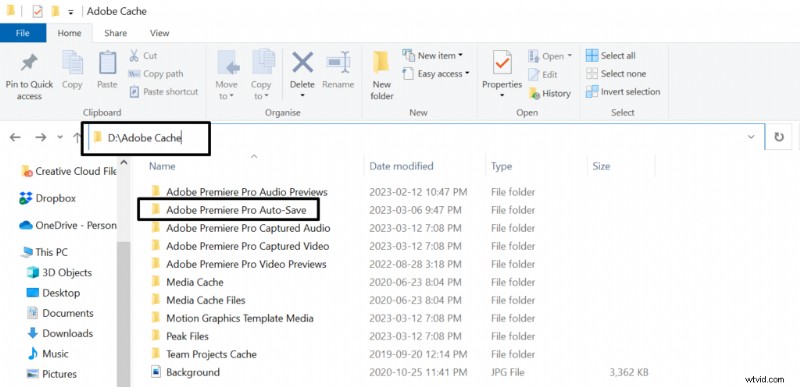
- Navigate to that path on your drive; you’ll find a folder named Adobe Premiere Pro Auto‑Save containing all your auto‑save versions.