Audio peak normalization is a process that brings the highest peak of your recording to a predetermined level, scaling the entire track so that the overall loudness increases without exceeding 0 dB and causing clipping. It’s an essential tool for voice‑over professionals who need consistent, clear levels across all takes.
Step‑by‑step: Normalizing an item in Reaper
- Double‑click the audio clip to select it.
- Navigate to Actions → Show action list.
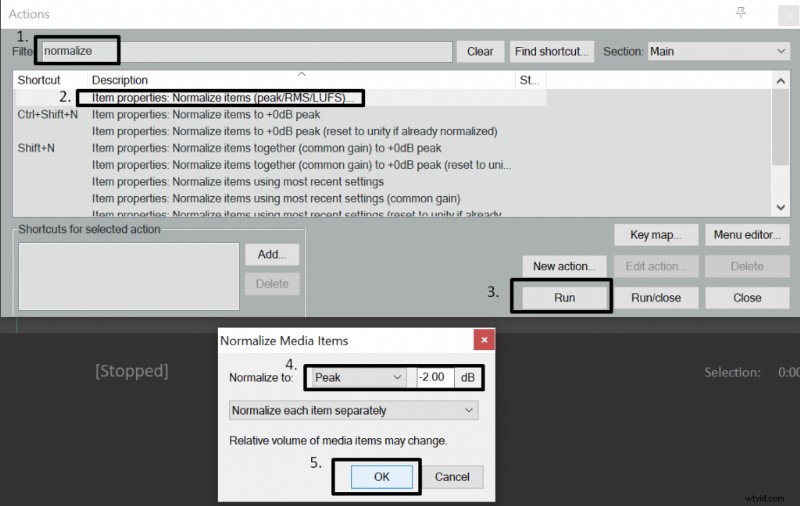
- Search for “Normalize” in the filter box.
- From the dropdown, pick Item properties: Normalize items (peak/RMS/LUFS).
- Click Run.
- In the dialog, set the desired peak level (e.g., –1 dB).
- Confirm with OK and Reaper will adjust the clip’s gain accordingly.
By using Reaper’s built‑in normalization, you can quickly match the loudness of all voice‑over takes, ensuring a professional, polished final mix.