Color is the heartbeat of any video. Whether you’re editing a casual clip for friends or crafting a professional production, thoughtful color grading transforms raw footage into a polished visual narrative. In this guide, we’ll walk through the fundamentals of color grading, explain the key differences between light‑lit and dark‑tone videos, and show you how Wondershare Filmora empowers you to achieve studio‑quality results with ease.
In this article
- How to Color Grade a Video Perfectly
- Differences Between Light and Dark Videos
- Wondershare Filmora: Your Color Grading Companion
- Conclusion
Color Grading in Video
The best editors guide you through histograms and waveforms, giving you precise control over exposure, contrast, and color balance.
Part 1: How to Color Grade a Video Perfectly
Color grading is the art of adjusting hue, saturation, and luminance to achieve a specific look, mood, and narrative tone.
1. Analyze Your Project’s Story
Begin by understanding the narrative, emotional arc, and visual context of your footage. This insight will inform every color decision you make.
2. Choose a Relatable Color Palette
Select a palette that aligns with the desired mood—warm, cool, muted, or vibrant—so the colors reinforce the story.
3. Pick Advanced Editing Software
Using professional tools gives you robust options for color correction. Filmora, for instance, offers both manual controls and preset overlays.
4. Stabilize Exposure Levels
Adjust exposure and contrast to ensure shadows and highlights are balanced and details are visible.
5. Define Black and White Points
Set the black and white levels to control the depth of shadows and brightness of highlights, shaping the overall tonal range.
6. Balance the Colors
Use color wheels or temperature sliders to neutralize unwanted color casts and achieve a natural or stylized look.
7. Apply Secondary Adjustments
Enhance specific hues, add LUTs, or overlay textures to add depth and texture to your footage.
8. Preview and Refine
Review the graded footage on calibrated monitors, adjust as needed, and gather feedback before final export.
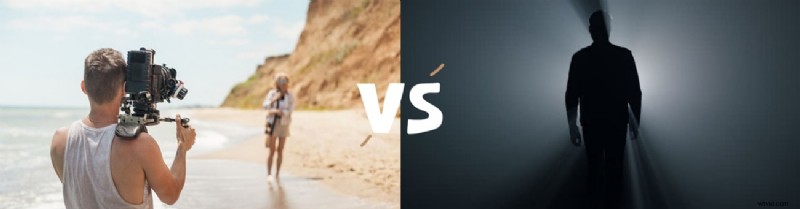
Part 2: Differences Between Light and Dark Videos
“Light” and “dark” videos refer to overall brightness, contrast, and tonal quality. The following table highlights key distinctions.
| Light Video | Dark Video |
| Brightness: Higher luminance levels. | Brightness: Lower luminance, more shadows. |
| Lighting: High‑key – even, low contrast. | Lighting: Low‑key – deep shadows, high contrast. |
| Colors: Vibrant, vivid tones. | Colors: Muted, subdued palettes. |
| Atmosphere: Open, optimistic feel. | Atmosphere: Intimate, dramatic, or mysterious. |
| Typical Genres: Comedy, romance, family. | Typical Genres: Horror, thriller, suspense. |
| Visibility: Clear details in both shadows and highlights. | Contrast: Sharper differences, pronounced highlights. |
Part 3: Wondershare Filmora – Your Color Grading Companion
Filmora offers a full spectrum of color tools, from basic adjustments to advanced grading with waveforms and histograms. It also supports overlay presets and masking for targeted corrections.
Using Color Grading Waveforms
Waveforms provide a visual representation of luminance and color across the frame. Follow these steps to fine‑tune your footage:
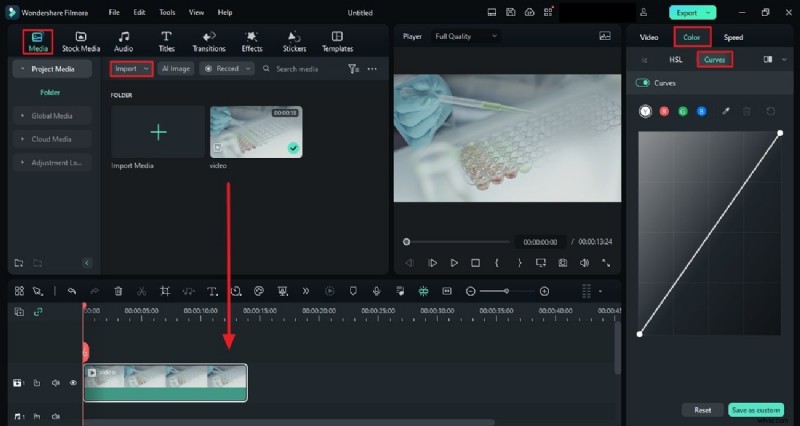
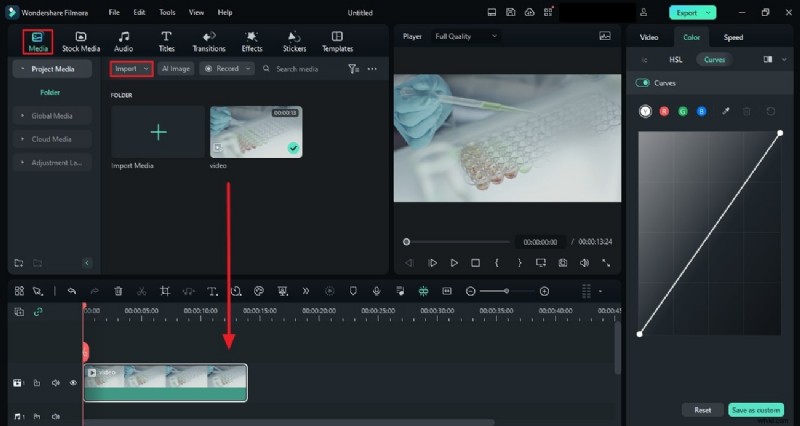
Step 1 – Import Video and Access Curves
Start a new project, import your clip, and drag it to the timeline. Click the Color tab, then select Curves to bring up the waveform display.
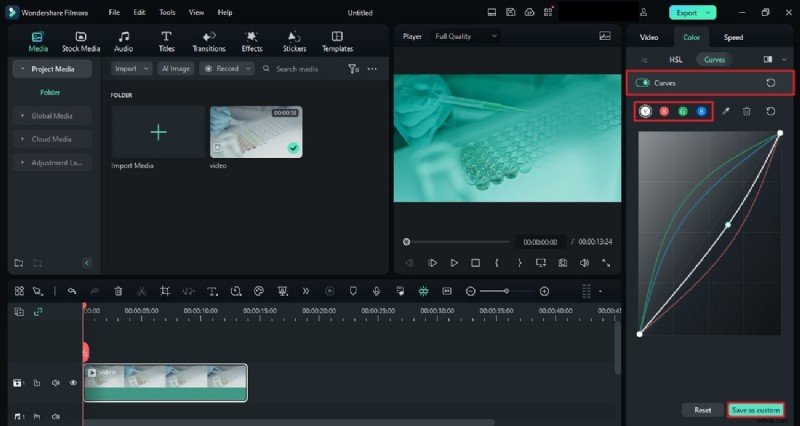
Step 2 – Customize Using Waveforms
Adjust the Y (luminance), R, G, and B curves individually. Preview changes in real time and save custom settings for future use.
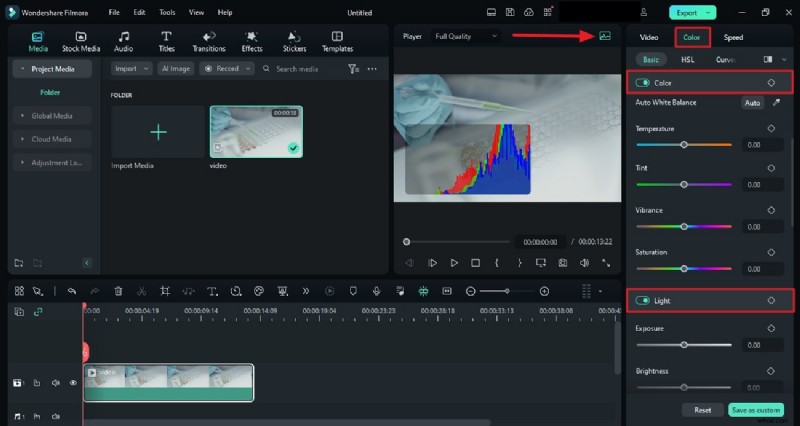
Using the Color Grading Histogram
The histogram shows the distribution of pixel values across the tonal range, helping you avoid clipping and maintain detail.
Step 1 – Create a New Project
Launch Filmora, start a new project, and drag your media into the Project Media pane.
Step 2 – Access the Histogram
Place the clip on the timeline, then click the Histogram button in the preview window. Use the Color panel to adjust each channel as needed.
Conclusion
Color grading is essential for adding depth, context, and storytelling power to your videos. With Filmora’s intuitive interface and powerful tools, even beginners can achieve professional‑grade results. Master the techniques outlined above—histograms, waveforms, and thoughtful color balance—to elevate every frame.