Effects created by understanding the perspective of your video content always make the video better. You will get to know at what places you want to add an effect or not. Moreover, even if it is a simple zoom effect, it makes the video look more professional. You can use optical or lens zoom to create a zoom effect in your video.
Moreover, you can also create fake camera movements like pan and zoom effects in video editing tools. So, not capturing the right shot won't bother you because you can create it in editing. This comprehensive guide will help you understand the importance of video editors. There are techniques that you will learn to add zoom effects in this article.
In this article
- Part 1: How Does the Use of Effects Benefit Video Editors?
- Part 2: Using Effects with Wondershare Filmora: An Introduction
- Part 3: How to Create Fake Camera Movement Effect with Wondershare Filmora
- Conclusion
Fake Camera Movement
The best editor helps you create fake camera movements like pan and zoom effects in video editing tools.
Part 1: How Does the Use of Effects Benefit Video Editors?
The use of effects in video editing offers many different benefits to video editors. Video editing tools help you to improve your video with edits and modifications. In this section, you will learn the key advantages of using effects like pan and zoom in video editing.
1. Better Visual Outlook
Effects can add visual flair and creativity to videos, which makes your videos more exciting. Moreover, your videos will look even better using the right effects.
2. Creating Mood Relative Effects
Right effects can add specific emotions and set the mood of a scene. For example, effects like color grading and lighting adjustments can help you create a dramatic or romantic moment.
3. Uplifts the Story Plot
Correct effects can highlight key story elements, transitions, and plot points. These elements will help you to support your story in your video.
4. Assists in Achieving Dramatic Effects
Certain effects, such as depth of field simulation, lens flares, and film grain, also help improve content. These effects can give videos a cinematic quality that mimics the look of movies.
5. Creates Brand Identity
Consistent use of effects can help establish recognition for your brand or label. This also helps to visually identify your videos with specific brands, logos, or labels.
Part 2: Using Effects with Wondershare Filmora: An Introduction
You will find effects in many other editing tools, but with Wondershare Filmora, you will get more than that. Filmora offers an insane amount of effects in this tool that you can try and use for your content. A list of over 900 free video effects is available for you to use in your videos. The list doesn't end here because you will get over 50+ dynamic countdown effects in Filmora.
Not only this, but the list continues and offers you over 26 beauty filters, too. It offers you premium effects and more than 40 3D text animation effects. However, Filmora is not restricted to simple dolly or tilt camera effects, as you can create your own. Last, Filmora offers more than just effects; it is a complete video editing package.
Part 3: How to Create Fake Camera Movement Effect with Wondershare Filmora
In Wondershare Filmora, there are many different ways to fake camera movements. You will learn some of the popular ones to fake movements of a camera in your video in this section. Here is your guide to achieving this effect using Wondershare Filmora:
Step 1Import and Access the Crop Option
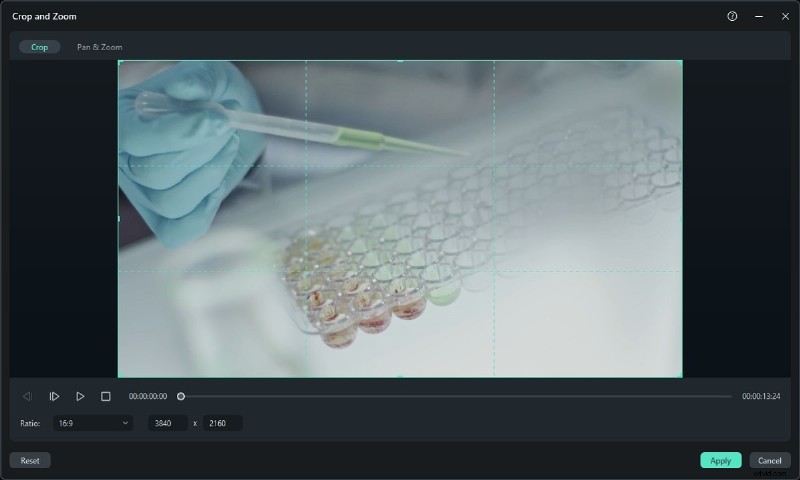
After importing media into the Project Media, bring the media into the timeline. Continue to select the "Crop" button, or press "Alt + C" to access the "Crop and Zoom" window.
Step 2Adjust Points for Pan and Zoom
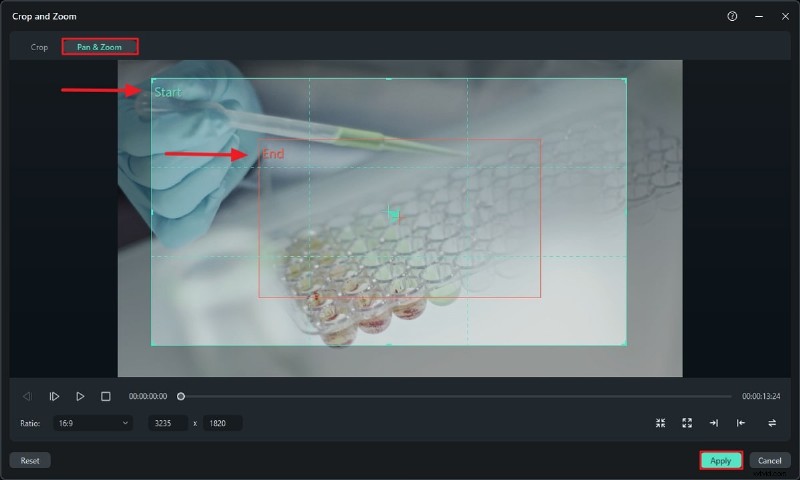
Select the "Pan & Zoom" tab from the following window. Adjust the "Start" and "End" squares using your mouse. Depending on your requirements, you can also click the square-shaped icons in the window to change the starting and ending points. Finally, press "Apply" to apply the pan and zoom effect to your video.
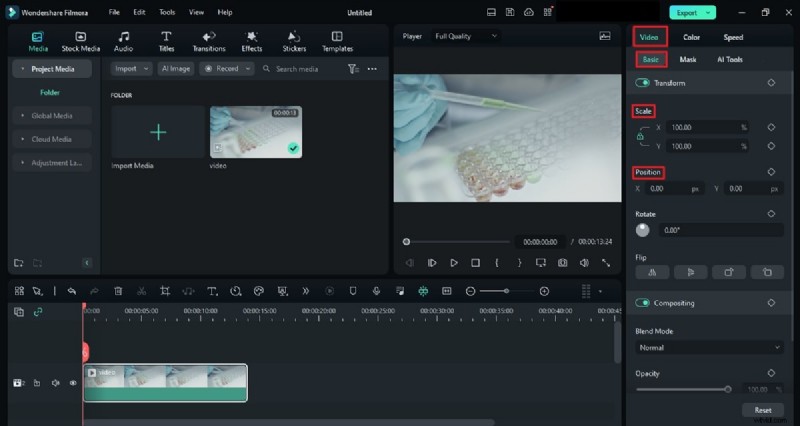
Step 3Use Keyframes for More Adjustments
Once you've applied the pan and zoom effect, go to "Basic" from the "Video" tab once the video is selected. Add a "Scale" keyframe from the panel that appears at the start of your video and adjust its values. After that, add another keyframe to the point and change the "Scale" value where you want to see the effect appearing. This way, you can add more seamless zoom-in or out effects to your video.

Step 4Adding Pan Sideways Effect
The moment you've imported your media files into the timeline, it's time to press "Alt + C" from your keyboard. In the "Crop & Zoom" window, access the "Pan & Zoom" tab from the top of the window.

Step 5Click the Designated Options
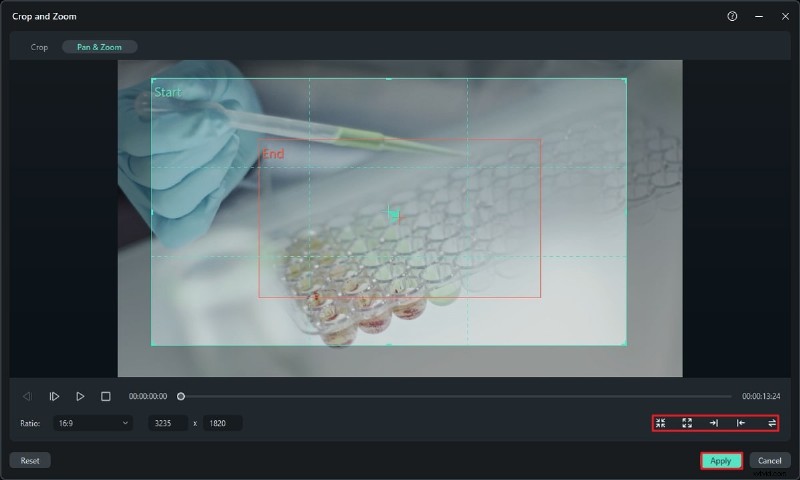
At the bottom of the screen, you will find two arrow buttons, each with a different sideways direction. One is from left to right, and the other is from right to left. Select the option you want, adjust the "Start" and "End" boxes, and push the "Apply" button.
Step 6Tweak with Options (Alternative Method)
If you want to create this effect manually, go to the "Video" tab and select "Basic." From the panel that appears, change the "Scale" and add a keyframe from the start of the video. Continue to change the values of "Position" and add its keyframe, too.
Repeat this same process, but this time, make sure the Playhead is placed where you want to end this effect. Similarly, change the values of "Position" and "Scale" and add a keyframe. Render your video by hitting "Enter," and you are good to go.
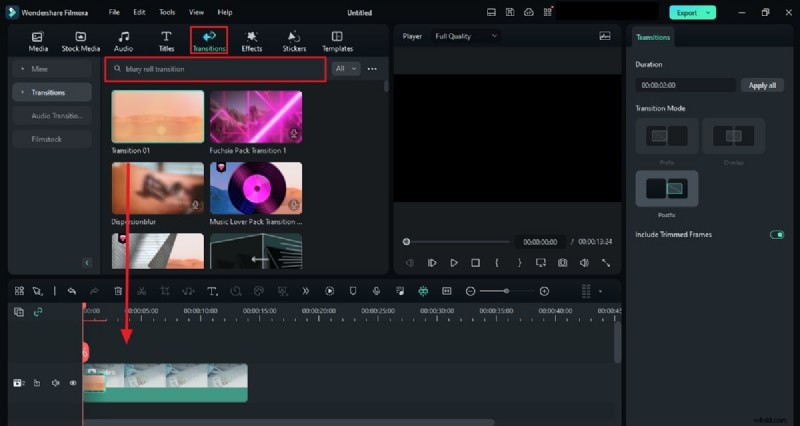
Step 7Apply Transition and Modify
Now, we are going to achieve the whip-pan effect. Then, click the video in the timeline, go to the "Transitions" tab, and search for any Blurry Roll transition effect. Drop the transition effect between the two clips and change its duration according to your requirements. View the result in the Preview Screen and then save your final video.
Step 8Apply Shakiness and Adjust the Values
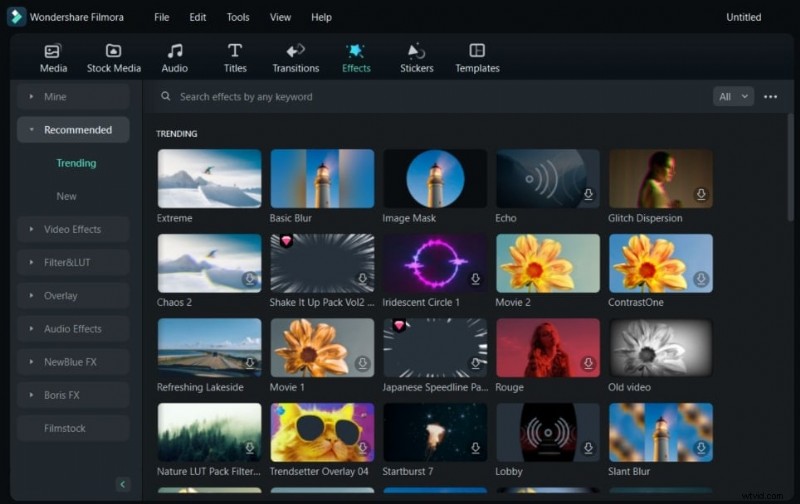
Access the "Effects" tab to search for any Mild shake effect. Click and hold the effect and drop it onto your video clip to apply the shake effect. Select "Effects" from the panel in the right corner and make changes. Customize values of "Frequency," "Position X," "Position Y," and "Position Z." You can also make other changes to your effect, and once satisfied, save your video.

Conclusion
To summarize this article, camera movements in a video make it appear more authentic. However, we sometimes need to catch these small details while recording videos. You don't have to worry about this; you can always add fake camera movements while editing. In this article, you’ve learned to add these movements while using Wondershare Filmora in a go.