Increasing the size of a low-resolution image is not always a good idea. However, Resolve 15’s new Super Scale feature changes the game.
There are many ways to use SD footage on an HD timeline: you can give the SD layer a background (as most news broadcasts do), you could duplicate the SD layer and expand and blur the bottom layer (as documented here), or you could increase the scale of the low-resolution media to fit the resolution of the timeline. However, increasing low-resolution media causes a handful of problems, such as pixelation, noise, and a loss of sharpness. Simply put, it makes the image look tacky.
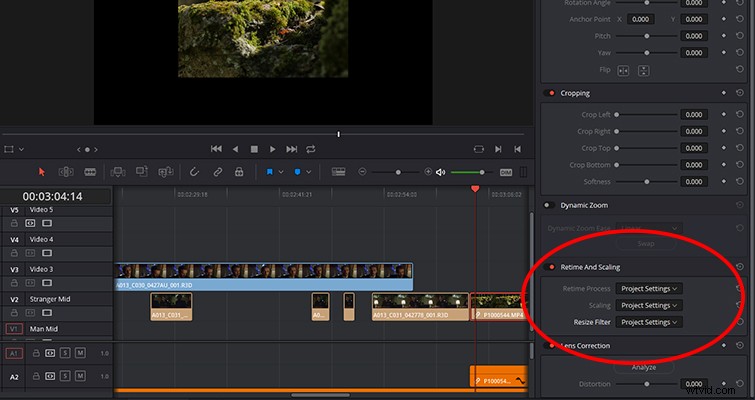
Many software features can help with the resizing process and make an image appear clearer than it would if you simply increased the scale of the media. Now In Resolve 15, there’s a new upscaling feature that can resize HD to 8K. It’s called Super Scale. Resolve already has a fantastic image rescaling filter, which you can set up according to the requirements of your project — either through the setup menu or in the inspector.
The Super Scale tool is different. It uses an advanced algorithm that improves image detail upon enlarging — so it’s a processor-intensive operation. For the first several seconds of a clip that I enlarged from 1080p to 4k, I was getting 9 frames-per-second playback. The tool is more for SD media in a UHD timeline — or for when you need to zoom way into a 1080p clip on a timeline with a significantly higher resolution.
Where Is It?
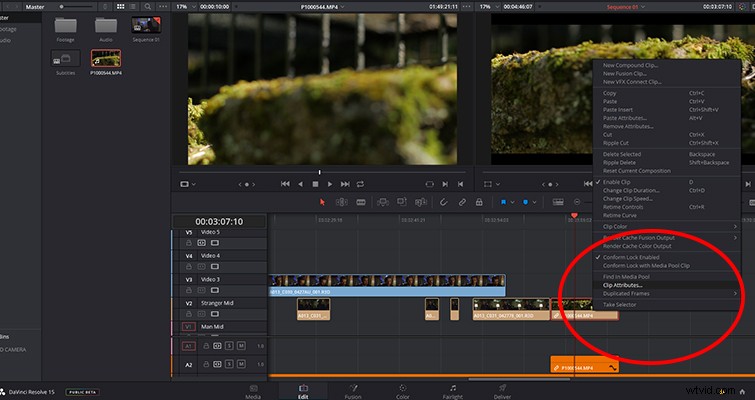
The Super Scale isn’t as accessible as many other features — you won’t find it in the inspector, nor in any menu panels. To get to Super Scale options, right-click your media, and select “Clip Attributes.”
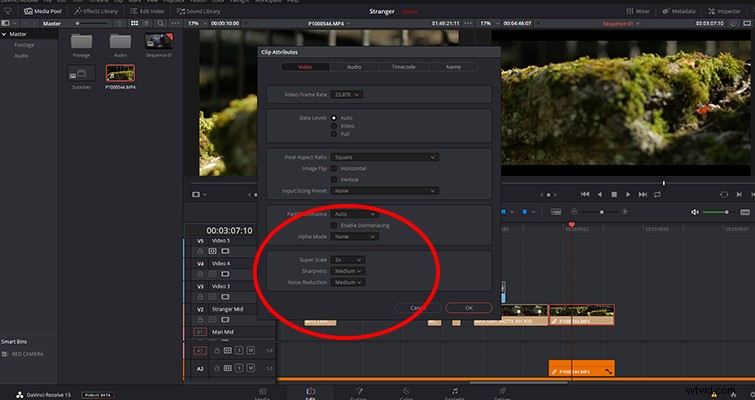
From there, you’ll find the Super Scale menu at the bottom of the video tab with three settings to work with: Super Scale, Sharpness, and Noise Reduction. The first setting changes the size of the file. You can choose from 2x, 4x, and 6x. The sharpness and noise reduction settings will then help you fine-tune the resize.
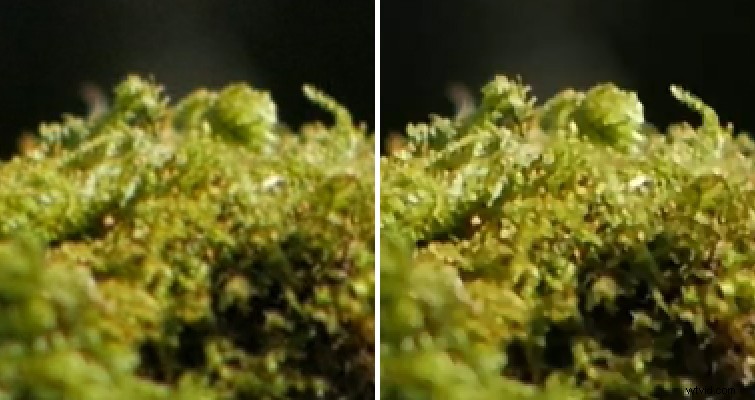
The still below is a screenshot zoomed in at 200% with the Super Scaled image on the right. It was a 1080p file Super Scaled to fit a UHD timeline. I’m not too sure how well the comparison image below is going to convey the results — perhaps not at all since we can only upload stills at a specific resolution (we have to make sure these tips load at lightning speed right?), but I encourage you to test out the Super Scale feature. There is a significant difference in quality between Resolve’s standard resize filter and the Super Scale feature. It’s magical.
Lewis McGregor is a certified DaVinci Resolve trainer.