Social media platforms are more popular than ever. Let’s check out a new tool from Adobe that elevates what you can do with these platforms.
Publishing video to social media platforms has become a messy jungle, crowded with technical requirements and recommendations. These include specifications for video length, file size, resolution, and aspect ratio — just to name a few.
Due to these obstacles, publishing your video to each of these individual platforms can be tedious. For example, editing 16:9 source content for square or vertical formats can take time. Not only do you have to reframe your shot, but you might even have to animate the position to keep a moving subject in frame over the course of a shot.

In the latest version of Premiere Pro, Adobe introduced a new tool that can optimize this process. It’s called Auto Reframe, and it allows users to quickly change aspect ratios by using AI to automatically reframe assets. Let’s have a closer look at how it works.
The Auto Reframe Effect
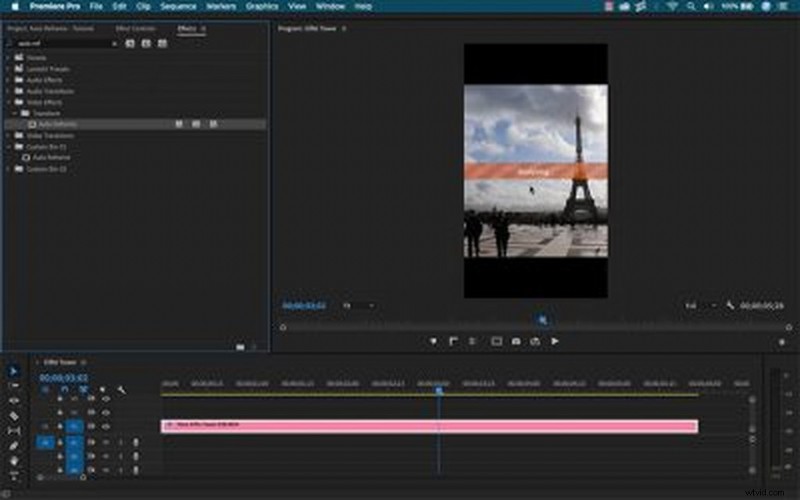
Auto Reframe works as an effect. Let’s say I’m preparing a clip for Instagram, and I’ve created a new sequence with a vertical (9:16) aspect ratio. Once I bring my 16:9 source clip into the sequence, I’ll most likely need to reposition it to keep my subject perfectly in frame.
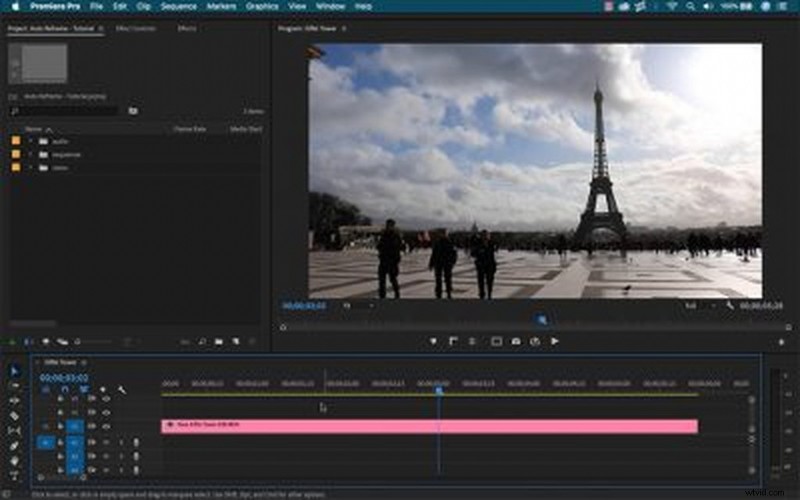
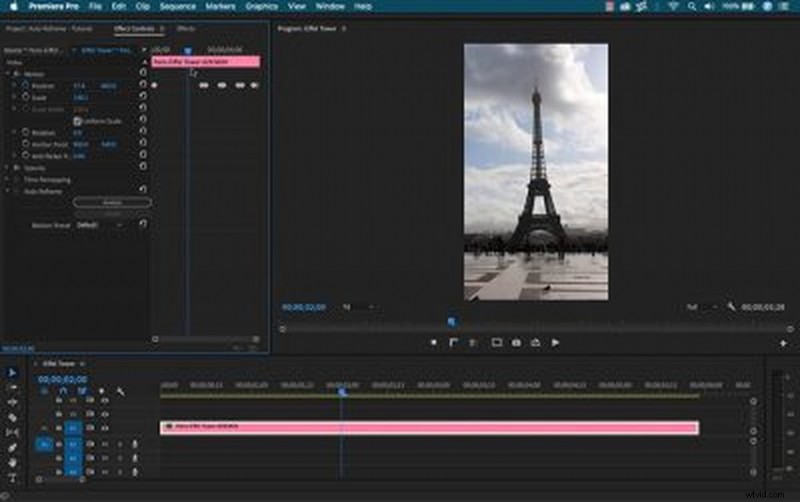
For Auto Reframe, I simply go to the Effects panel and grab the Transform > Auto Reframe effect. Once applied, it’ll automatically analyze the clip and reframe it accordingly. Position keyframes control the motion of the content.
Motion Presets
The Auto Reframe effect is quite simple, and it includes an Analyze button and three Motion Preset options. These presets help the effect determine how to apply the reframing process. They include the following:
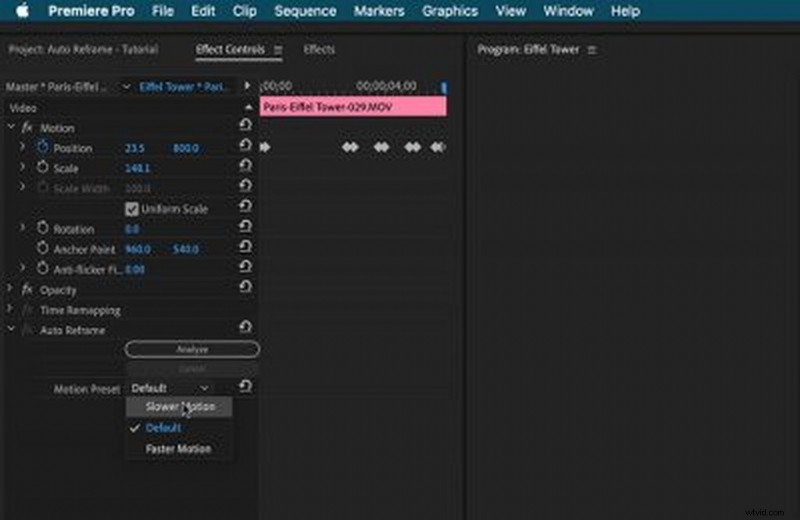
- Slower Motion: this works well when there’s very little or no camera motion, such as interviews or vlog shots. This preset generates very few keyframes.
- Default: this works well for most content. The results can vary if the motion is too fast.
- Faster Motion: this is great for action sports, or anything that’s moving fast through the frame. This preset generates a lot of keyframes.
Reframe Entire Sequences
Changing sequence settings and using the Auto Reframe effect on each individual clip is not an efficient workflow. It’s much easier to use this tool on entire sequences, which Auto Reframe is designed to do.
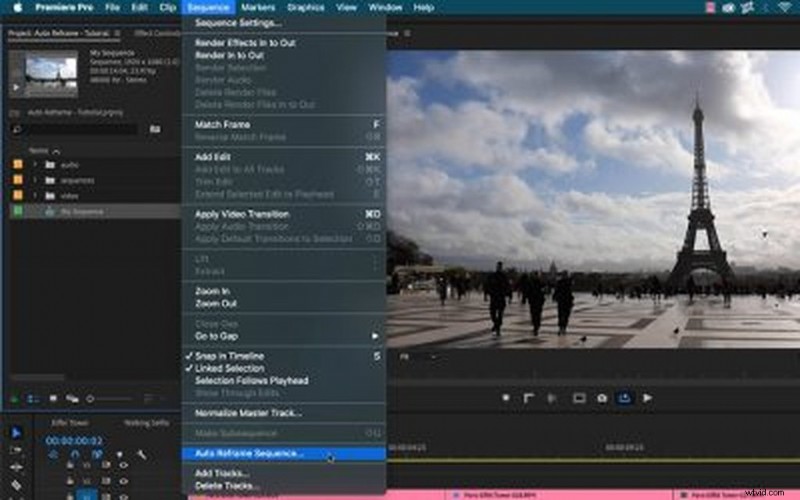
For this, select a sequence in the Timeline or Project panel and go to Sequence > Auto Reframe Sequence. The dialog box allows me to specify between four preset aspect ratios, including the following:
- Square 1:1
- Vertical 4:5
- Vertical 9:16
- Horizontal 16:9
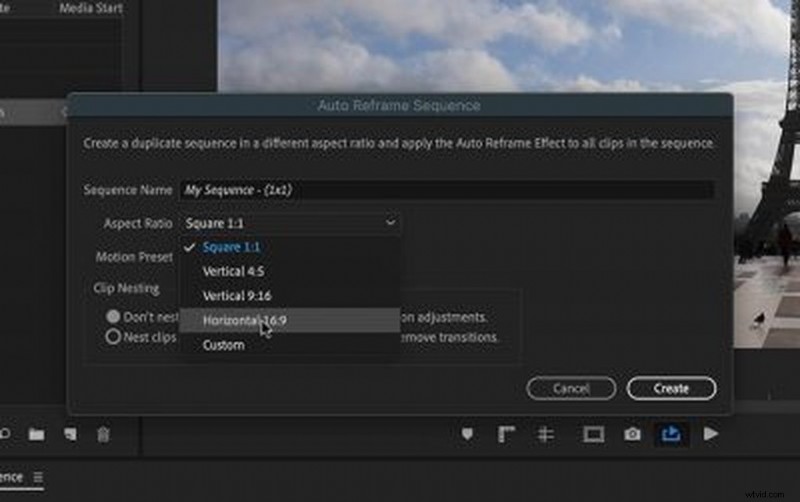
If none of the above presets work, I can enter a custom aspect ratio. With the aspect ratio selected, I’ll specify the Motion Preset and select whether or not I want to nest my clips. If I already have keyframes applied to my motion attributes, nesting clips will preserve these animations.
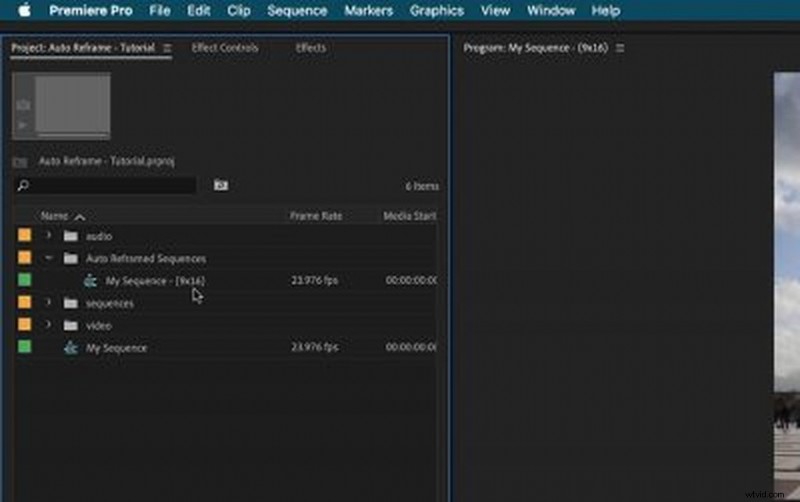
The beauty of this workflow is that it creates an entirely new sequence with the new aspect ratio included in the sequence name. It even places the duplicated sequence in a new Auto Reframed Sequences folder, making it incredibly easy to stay organized.
Oh yeah, I almost forgot to mention — it also works with graphics.
Be sure to check out the video above, where I test out Auto Reframe using a variety of shots to see how it holds up.
Looking for more on video production? Check these out.
- November Fresh: New Content We Love
- Free Week at PremiumBeat — 200+ Video Assets, Completely Free!
- Top 10 DIY Lighting Rig Tutorials to Light Up Your Set
- Using Tungsten Lighting in a Daylight-balanced Scene
- The Gels You Should Have No Matter Your Budget Scale