Depending upon the software, aspect ratio, and the kind of project you’re working on, the task of cropping videos can be very complicated. And, the complication ranges to a great extent that it can even consume your whole day.
That’s insane! Right? As we’ll talk about the Auto Reframe feature in this guide, let’s discuss what it looks like to crop a video manually with Adobe Premiere Pro first. It contains inbuilt and in-depth crop effect, during which you’ll have to go for loads of settings in terms of Edge Feather, Position, Motion, and Scaling. Thus, it is pretty hectic unless you’ve mastered the skills of this high-end software. There shouldn’t be such an issue when Premiere Pro is also available with the Auto Reframe feature. In this guide, we’ll talk about Adobe Premiere Pro’s Auto Reframe, and its usage process.
So, let’s get started with the introduction of Auto Reframe in Premiere Pro as follows!
Part 1: What’s Auto Reframe?
Adobe launched the Auto Reframe feature in the recent updates of Premiere Pro CC 2020. This Premiere Pro Auto Reframe feature automatically converts existing sequence or video clips into different aspect ratios. It has almost five options to aspect ratios to choose from, namely the square (1:1), vertical (4:5), vertical (9:16), horizontal (16:9), and custom.
All in all, the launch of Premiere Pro Auto Reframe is great for broadcasters or any other video editors looking to optimize their content for various platforms. Thus, it is highly beneficial to create single video content into different platform layouts such as Instagram, Twitter, Facebook, YouTube, etc.
You can auto reframe video clips via Premiere Pro either through individual clips or completed sequences.
Part 2: How to Use Auto Reframe in Adobe Premiere Pro?
Let’s now understand the Premiere Pro Auto Reframe sequence in the following steps! Well, it’s a super cool idea because the Adobe Premiere Pro will automatically generate all the keyframes via the Auto Reframe feature. So, let’s check out this cool thing below without further ado!
Note: We’re assuming that you’ve already imported the media file into Adobe Premiere Pro.
Steps to Use Auto Reframe in Adobe Premiere Pro
Step 1: Select the sequence rather than the clip
The first step requires you to move into a sequence with a different aspect ratio than the video clip. It’s from there; you have to right-click and select the Auto Reframe Sequence option.
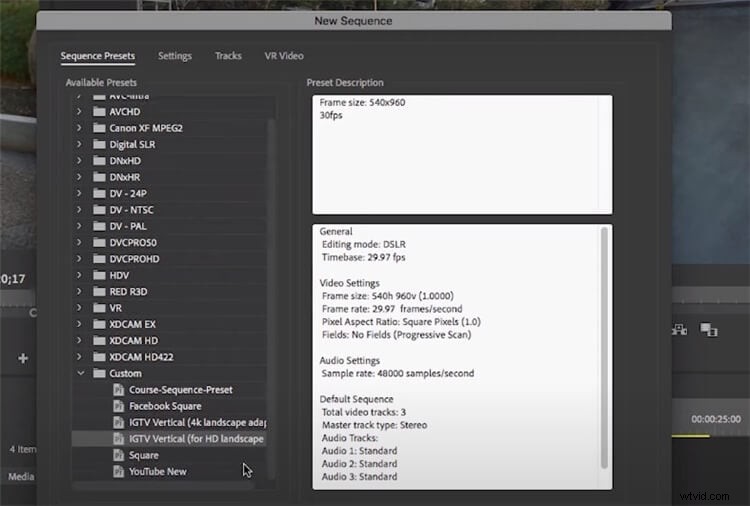
What’s a sequence?
To create a sequence from scratch in Adobe Premiere Pro, you have to click New Item > Sequence, and from there, you can make own custom presets for video of different aspect. For reference, we’ve already a shot from Envato Elements and drag and drop it into the timeline.
Step 2: Apply Auto Reframe
Select a specific sequence into the timeline, go to Effects, and search Auto Reframe in the search bar. Also, make sure you’ve downloaded the latest version to find this feature.
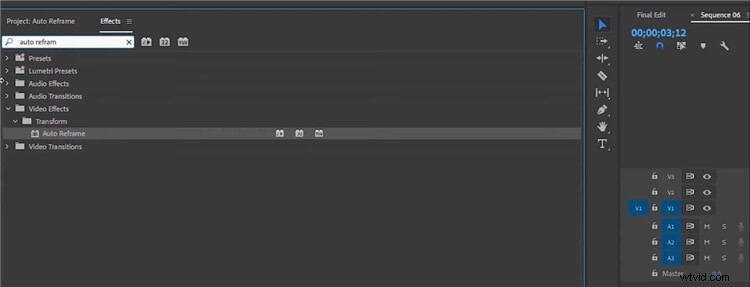
Double-click the Auto Reframe tab, and it will take a few seconds for analyzing to apply the effect.
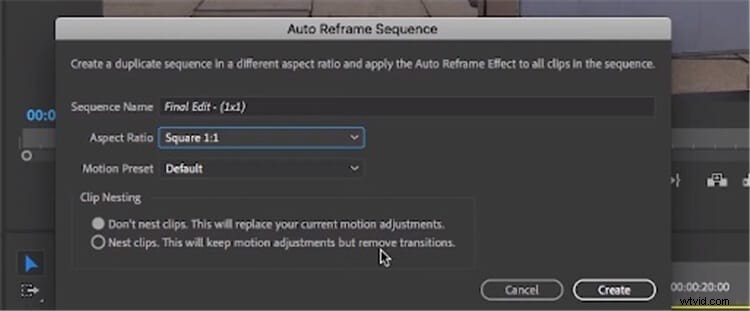
Now, let’s say you already have an edited clip that you want to crop in different formats. This edited clip consists of transitions, sounds, and other elements. Thus, follow the same clicking Auto Reframe Sequence process, which lets you enter the following window. From here, you can select the Aspect Ratio and always “Don’t nest clips” options as it’s an edited video.
Then, hit the Create tab after you finish.
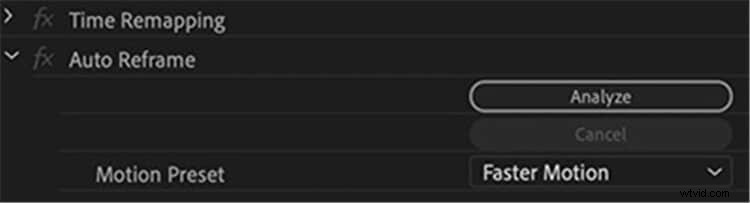
Due to the kind of motion present in a particular clip, you can select Faster Motion in the Motion Preset as well.
Similarly, you can select Auto-Reframe, again and again, to put the same video clip into different aspect ratios.
Part 3: Apply Auto Reframe on Mac Using the Best Alternative to Premiere Pro – Wondershare Filmora
In our detailed analysis on the ease of use of the Auto Reframe feature, we’ve discovered the new launch of this feature by Wondershare Filmora for Mac as well. Not only this, Wondershare has some other exciting updates in its Version 10.2 for all Mac users.
Compared to Adobe Premiere Pro, we’ve found the Auto Reframe feature relatively easy in Wondershare Filmora for Mac. Let’s see how it is in the following steps!
Steps to Use Auto Reframe in Wondershare Filmora for Mac
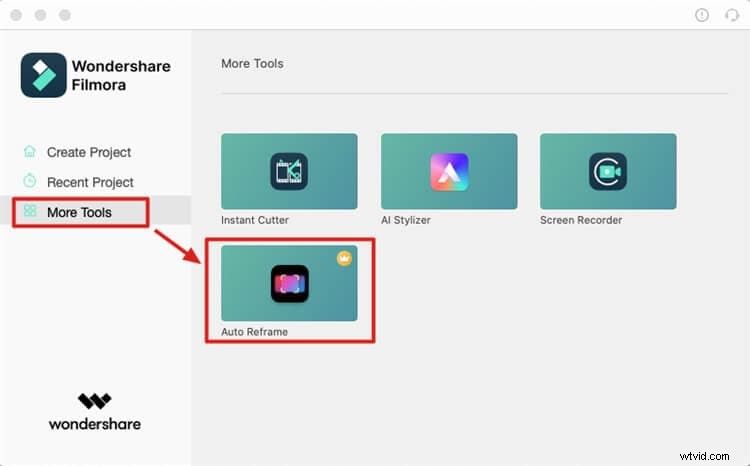
Step 1: Install Wondershare Filmora for Mac
Install and launch the latest version of Wondershare Filmora for Mac, and select Auto Reframe under the More Tools tab.
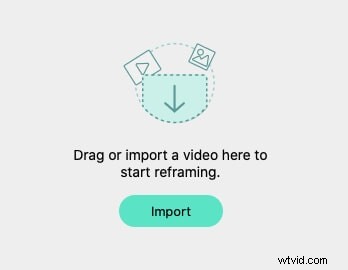
Step 2: Import media files
Insert the media into the Auto Reframe tool by clicking the Import button as shown below.
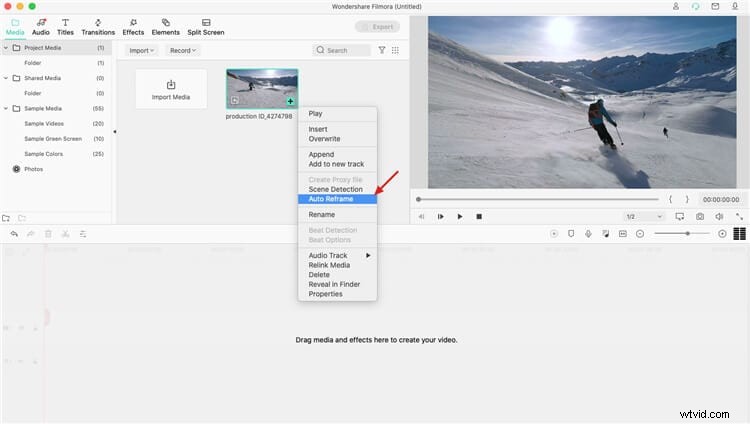
Or you can launch Filmora and select Create Project. Drag the video clip to the Media area, right click on it and choose Auto Reframe from the pop-up menu.
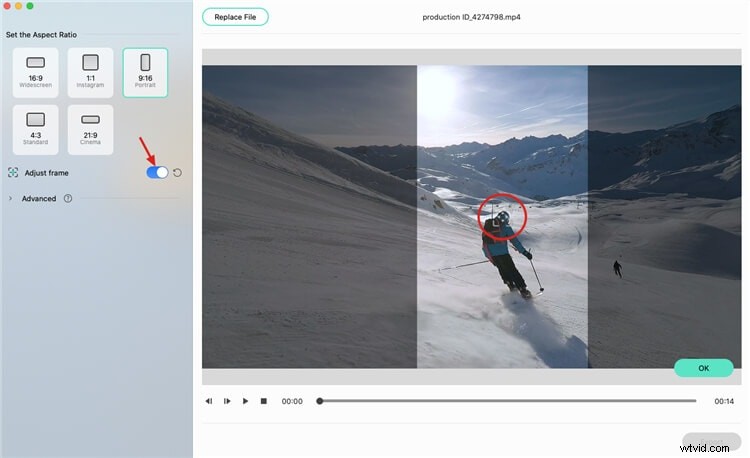
Step 3: Select Aspect ratio
Select the aspect ratio among five different options.
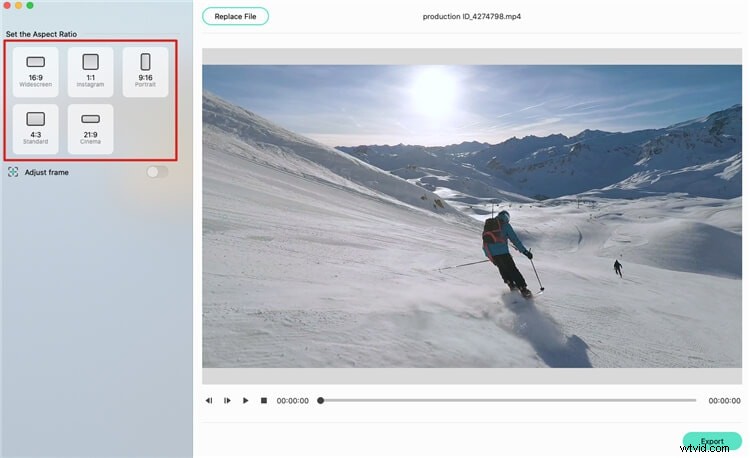
Then the reframing starts, you can see the result in the preview window. There’s an option to adjust the frame if you need.
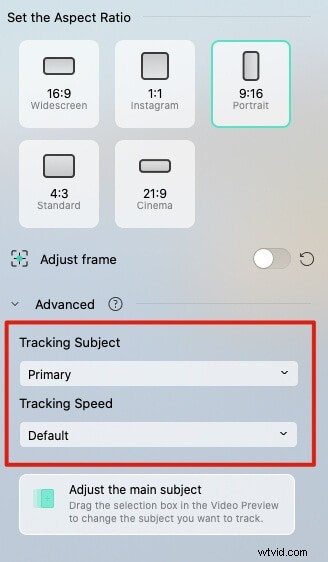
Also, you can adjust the Advanced settings as shown below.
When the reframing and adjustment are completed, click the Export button to save the cropped clip.
Conclusion
So, this's how to apply Auto Reframe in Premiere Pro and Wondershare Filmora for Mac. Yes, the launch of auto reframe is quite facilitating in this quick world where you have to create videos for different aspect ratios as per different platforms. Otherwise, you have to set keyframes and all other manual editing processes to apply cropping to the video clips. Now, the auto reframe feature launched specifically by two high-end software, namely the Adobe Premiere Pro and Wondershare Filmora for Mac, is a sign to your advantage. After knowing the Premiere Pro Auto Reframe feature, we’ve researched a bit more about the easiness of the same. Thus, our best alternative to use Auto Reframe in Wondershare Filmora for Mac comes up. Yes, the steps here are pretty straightforward as compared to Premiere Pro.
So, that’s one of our guide series for the day!