In today’s audio landscape, equalizers (EQs) are the unsung heroes that shape how we experience sound—whether you’re cranking up your car stereo, binge‑watching on a smart TV, or sinking into a quiet night with headphones. By fine‑tuning frequency bands, an EQ can bring clarity, depth, and warmth to any audio playback, tailoring the experience to your ears and environment. This guide walks you through the fundamentals of EQ, a step‑by‑step workflow in Filmora, device‑specific presets, and troubleshooting common pitfalls.
Table of Contents
-
- Types of Equalizers
- Importance of Equalization
-
- Step‑by‑Step Guide
-
- Overview
- Car Audio Systems
- Home Theater Systems
- Headphones
- Smart TVs
- Portable Speakers
-
- Common Problems
- Solutions
Part 1: Understanding Equalizer Settings
What is an Equalizer?
An EQ is a digital or analog tool that lets you boost or cut specific frequency ranges within an audio signal. By sculpting the tonal balance, you can enhance warmth, presence, and clarity—crucial for both casual listening and professional mixing.
Types of Equalizers
- Graphic Equalizers – Fixed‑band sliders that provide a visual snapshot of the spectrum. Ideal for quick adjustments on consumer gear and car stereos.
- Parametric Equalizers – Offer precision by letting you select any frequency, adjust its gain, and control the bandwidth (Q factor). Preferred in studio environments for targeted tweaks.
- Shelving Equalizers – Raise or lower all frequencies above or below a chosen cutoff. Common for broad bass or treble boosts.
Choosing the right type depends on your workflow and the level of control you need.
Importance of Equalization
EQ shapes the way we perceive sound. For example, boosting mid‑range vocals (around 1–3 kHz) can make singers cut through a mix, while cutting low‑mid frequencies (200–400 Hz) reduces muddiness. According to the Audio Engineering Society (AES), balanced EQ reduces listener fatigue and enhances speech intelligibility in noisy environments.
Part 2: How to Set Up Equalizer Settings Using Filmora
Filmora’s built‑in EQ lets beginners and pros alike shape audio without complex plugins. Follow these steps:
Step‑by‑Step Guide
1. Import Your Media
Open Filmora, click Import, and add your audio or video files.
2. Access the EQ Panel
Drag the clip to the timeline, double‑click it, and open the Audio tab. Click Equalizer to reveal the slider interface.
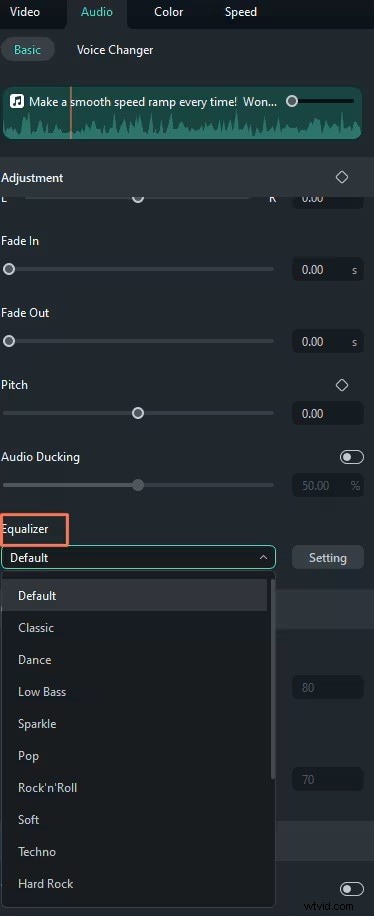
3. Choose a Preset or Build Your Own
Filmora offers presets like “Pop,” “Rock,” and “Classical.” Start with a preset that matches your genre, then fine‑tune each band to suit your headphones, speakers, or room acoustics.

4. Preview & Adjust
Use the timeline’s preview to hear your changes in context. Make subtle tweaks until the balance feels natural.
5. Export
Click Export, choose your format, and save. Your audio now carries the precise tonal balance you crafted.
Filmora’s intuitive interface lowers the barrier to high‑quality audio editing, making professional‑level EQ accessible to everyone.
Part 3: Recommended Equalizer Settings by Device
Overview
Each playback device has unique acoustic characteristics. Below are proven starting points that you can adjust to taste.
Car Audio Systems
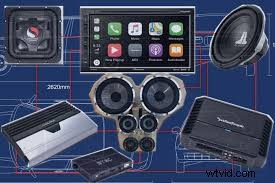
Boost bass around 60–80 Hz (+3 dB) for punch, and cut mid‑range 300–500 Hz to eliminate cabin muddiness. A typical baseline: Bass +3 dB, Treble +2 dB.
Home Theater Systems
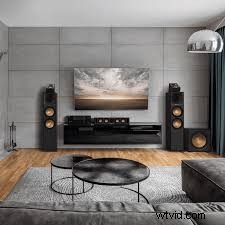
Enhance dialogue by boosting 1–3 kHz (+3 dB) while keeping bass (~80 Hz) and treble (~10 kHz) neutral or slightly raised (+2 dB). This creates a cinematic feel without overpowering the surround.
Headphones

For clarity, lift high frequencies around 8–12 kHz (+2 dB) while maintaining flat mids and lows. This adds brightness without introducing harshness.
Smart TVs

Smart TV speakers often lack depth; a modest +3 dB boost at 1–3 kHz ensures dialogue remains intelligible against action scenes.
Portable Speakers
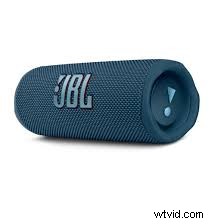
Boost high frequencies around 10 kHz (+4 dB) to counteract the limited driver size, while moderating bass to prevent distortion at higher volumes.
Part 4: Troubleshooting Common Equalization Issues
Common Problems
Users often face:
- Muddiness – Too many low‑mid frequencies overlap.
- Harshness – Excessive high‑frequency boosts causing ear fatigue.
Solutions
For muddiness, cut 200–400 Hz and modestly raise 3–5 kHz. To tame harshness, reduce frequencies above 8 kHz until the sound feels balanced. Always validate changes with critical listening and, if possible, reference a professional mix.
Sharing your settings with peers or on audio forums can also reveal hidden issues and improve your EQ craft.
Conclusion
Mastering EQ transforms every listening session into a tailored sonic experience. By understanding the three primary EQ types, applying precise adjustments in tools like Filmora, and using device‑specific presets, you can achieve professional‑grade audio on any platform. Embrace experimentation, listen critically, and let your sound tell the story you want to hear.