Let’s learn some basic audio tips, tricks, and advice that will instantly improve your video edits in Premiere Pro.
Let’s cover some audio tips and tricks that I use on nearly every video I edit in Premiere Pro. These tips may not be the flashiest, but they’re tips that will make your editing experience better and improve your videos!
1. How to Remove “Pops” at the End of an Audio Clip
Have you ever heard a weird “pop” sound at the end of an audio clip you’re working with? This happens in my edits all the time. I’ll be editing some audio, and there will be an odd “pop” sound at the end of the clip.
The apparent fix seems like it would be just to trim back the audio clip. But, weirdly enough, sometimes these “pops” are a result of how Premiere Pro is reading the end of the audio clip.
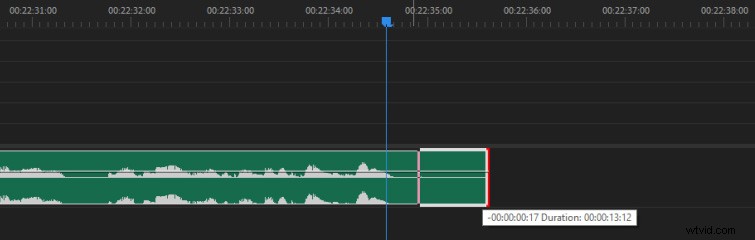
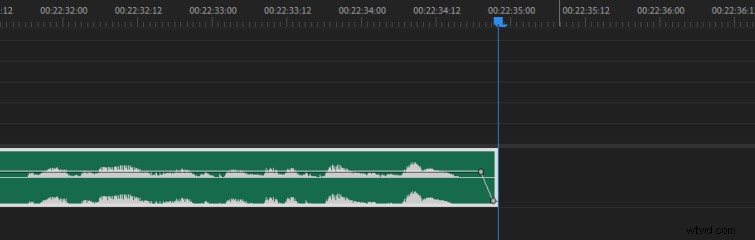
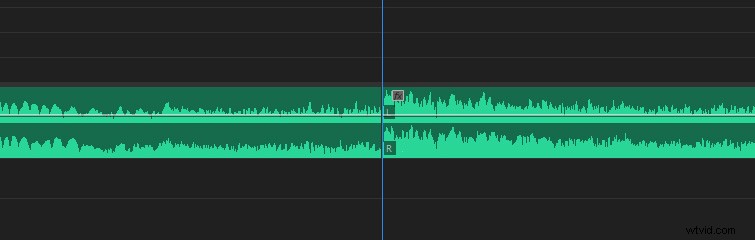
The simple fix is just to fade the audio out at the end quickly. Zoom-in on the end of your audio clip, hold Ctrl and click to create two keyframes on the Volume Level (hold CMD on Mac).
Then drag the second keyframe to the bottom. That will eliminate any stubborn pops at the end of your audio clips.
2. How to Cut an Audio Clip More Precisely
Have you ever tried to cut an audio clip or sound effect right on a beat, but Premiere Pro will only let you cut a little before or after the beat? This is because the Current Time Indicator (the Playhead) only lets you cut a clip on a video frame by default.
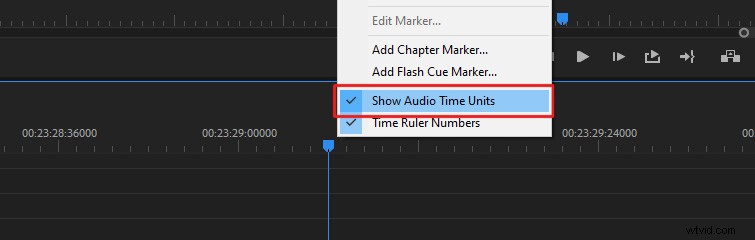
However, the solution to this problem is simple. Just right-click on the Time Ruler section of your Sequence and select Show Audio Time Units.
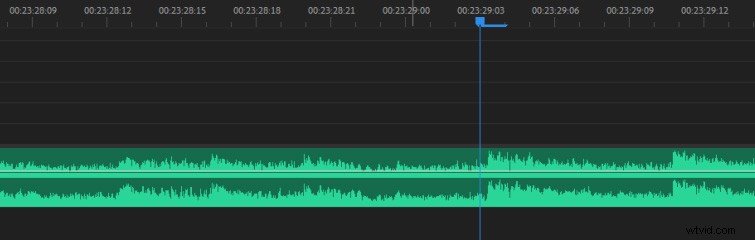
You can zoom in closer to your audio clips (using the + key at the top of the keyboard) and make more precise cuts.
This is because audio has a much higher sample rate, whereas video has a frame rate. After you make your audio edit, I recommend turning Show Audio Time Units back off since, in most cases, you’ll want to be editing by video frames.
3. Add Bass to Improve Low-Quality Mics
Adding bass to audio in Premiere Pro is an excellent way to improve the sound of lower-quality microphones. Lavalier mics typically don’t capture a lot of bass compared to other microphones, such as shotgun mics.
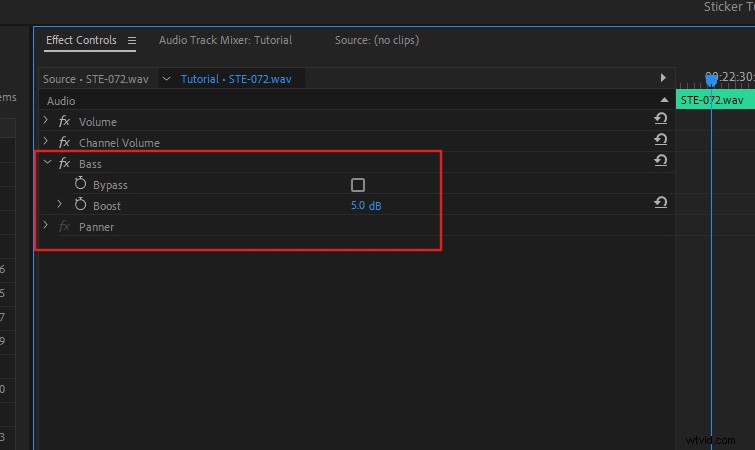
If you’re working with recorded audio that sounds a bit shallow, add the Bass effect to your audio and increase the Boost setting. A Boost value between 3 and 8 works best in most cases. This is also a nice way you can match audio that’s been recorded from two different microphones.
Check out our Blind Microphone Comparison video if you want to hear the differences between five different microphone types.
4. Change Stereo Audio to Mono (or Mono to Stereo)
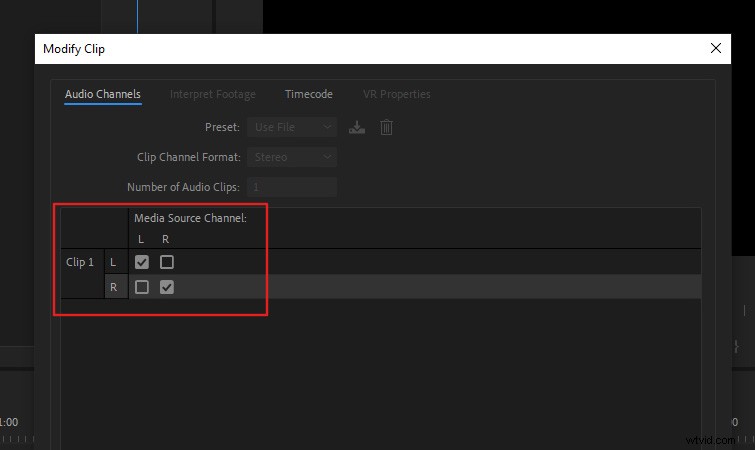
If you need to adjust the channels of an audio clip, right-click on it in your sequence, then select Audio Channels. This will allow you to select which audio channels you want manually.
This is helpful if you want to make a stereo clip mono by setting both channels to the same audio source. Or, vice versa.
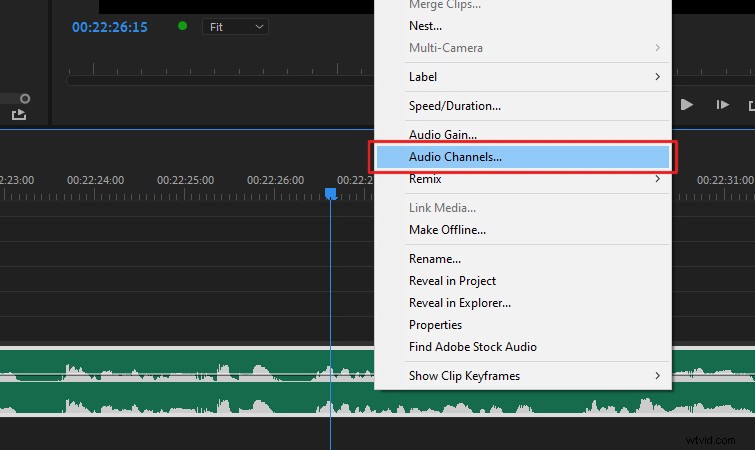
It also allows you to fix many other issues you might encounter. For example, if one of your audio channels is showing up blank or if a stereo clip has the audio channels swapped.
You can fix all of those issues this way.
5. Adjust Audio Balance
Sometimes, you may need to adjust the balance of your audio, like if you want a sound effect to be heard more on the right-side speaker. Or, you may want to have a sound “pan” across, from one side to the other, like if a car is passing by.
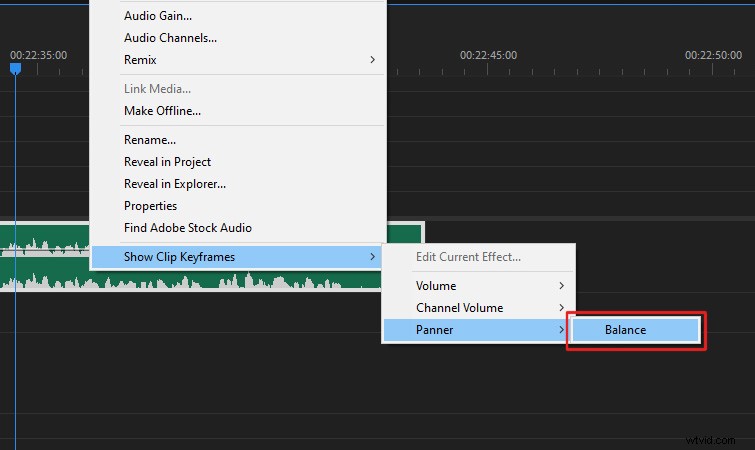
To adjust the audio balance of a clip, right-click on it in your sequence, then navigate to Show Clip Keyframes > Panner > Balance.
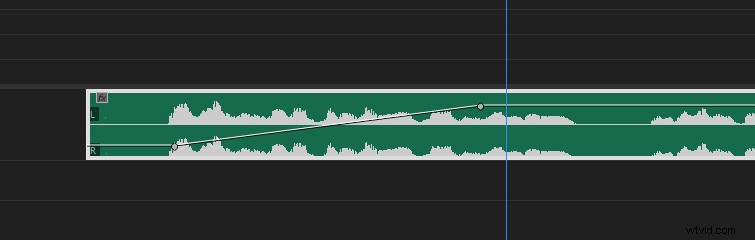
Now, the clip keyframe line will adjust the audio balance instead of the volume. So, if you move the keyframe line upwards, it’ll shift the audio to the left speaker. If you move it downwards, it’ll shift the audio to the right speaker.
You can also keyframe the audio balance on the clip if you want a sound to pan from one side to another.
6. Noise Reduction (Removing Room Tone)
The fastest way to apply noise reduction to your audio in Premiere Pro is to send the audio clip to Adobe Audition via Dynamic Link. This process is much more straightforward than it sounds, and it works nicely for things like narrations.
First, right-click on your audio in your sequence, then select Edit Clip in Adobe Audition. (This will then Render and Replace your audio clip, so you don’t have to worry about saving over the original audio.)

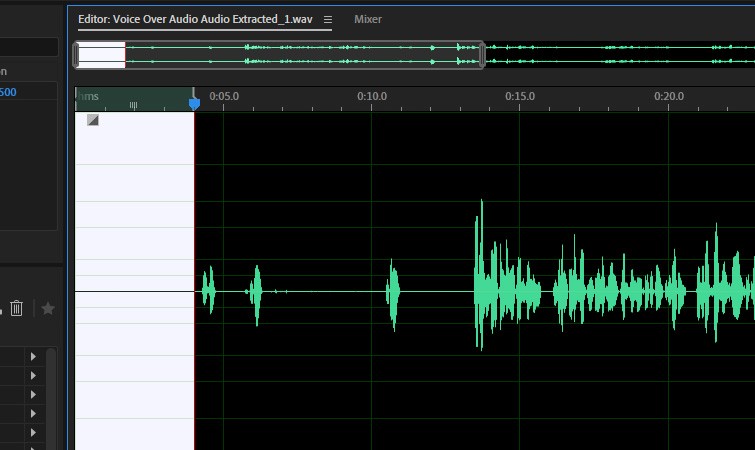
Once your clip has finished rendering, Adobe Audition will launch, and you’ll see your audio. Zoom into your audio and find an area of the audio with no sound, just the room tone. Ideally, you can find an area that is a few seconds long.
Once you’ve found an area with no sound, put an in-point at the beginning of the blank audio by using the shortcut “i.”
Next, set an out-point at the end of the blank audio area by pressing “o.”
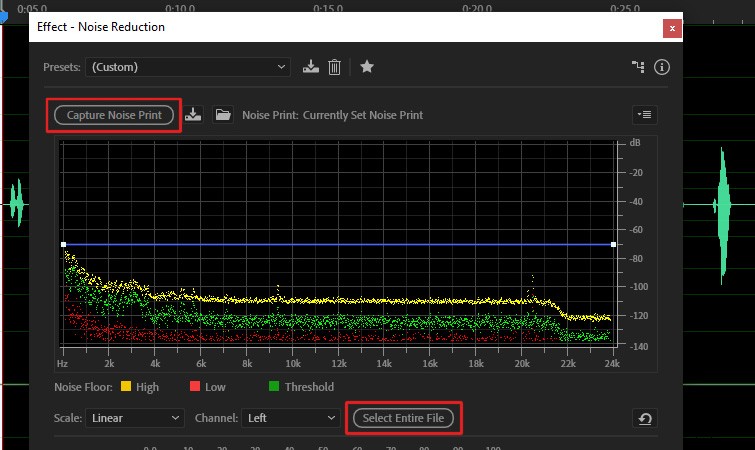
Now, navigate to Effects > Noise Reduction > Noise Reduction (process). You’ll see the Noise Reduction effect settings open up.
Click Capture Noise Print. This will sample the room tone area you selected on your audio. Next, click the button that says Select Entire File.
Finally, click Apply.
Now just close Audition and return to Premiere Pro. You’ll see that the de-noised version from Adobe Audition has replaced your original audio clip.
More Audio Tips and Freebies
Looking to up your audio game even more? Check out Audio Mixing Your Films in Adobe Audition if you want to expand your audio skills beyond Premiere Pro.
And, if you need some amazing sounds for your next project, check out our roundup of Over 280 Free Sound Effects for Videos, Apps, Films, and Games!