In this video tutorial, we cover some core editing and organization techniques as well as tips for speeding up your workflow in Premiere Pro.
Following up on Premiere Pro Playbook: Part 1, let’s explore ten more workflow tips that can make your life easier in Premiere Pro.
1. How to Render and Replace Dynamic Linked Comps

You may already know about Dynamic Linking in Premiere Pro, the process of sending a clip from Premiere into After Effects. This allows you to seamlessly reap the benefits of After Effects for more effects-heavy shots. Premiere will then replace the video clip in your timeline with an .aep file. Premiere Pro can frequently lag when previewing a Dynamic Linked Comp, but you can quickly render and replace it.
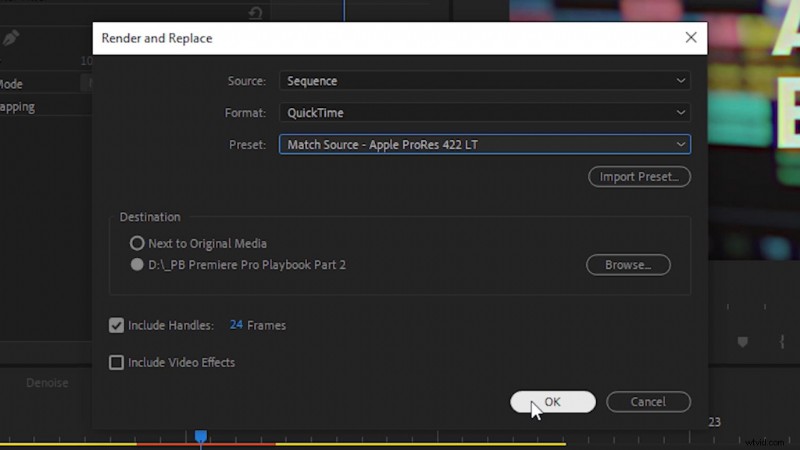
Just right-click on any Dynamic Linked Comp, then select Render and Replace. This will automatically render out a video clip from your After Effects file and replace it in your sequence timeline.
2. Create and Control Audio Keyframes
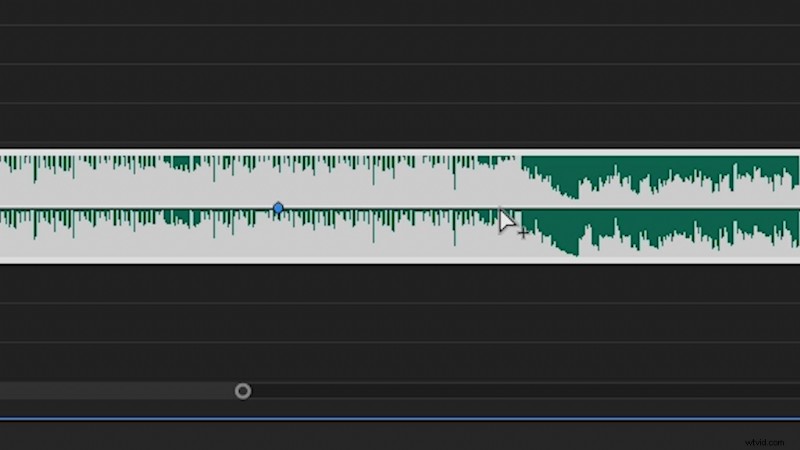
With an audio track in your sequence timeline, hold down CTRL and click on the audio level to create a keyframe. (Hold down CMD and click on Mac.) You can also make fine-tuned adjustments to keyframe values by holding down CTRL when you click and move around the keyframe. This is great when you need precise control of an audio level.
3. Denoise Audio with Adobe Audition

Just as we can Dynamic Link video clips to After Effects, we can also edit audio clips in Adobe Audition — all from within Premiere Pro. Right-click on an audio track you’d like to denoise, then select Edit Clip in Adobe Audition. This will render and replace your current audio clip with a new Audition file. (So, anything you change won’t have a negative impact on your original audio clip.)
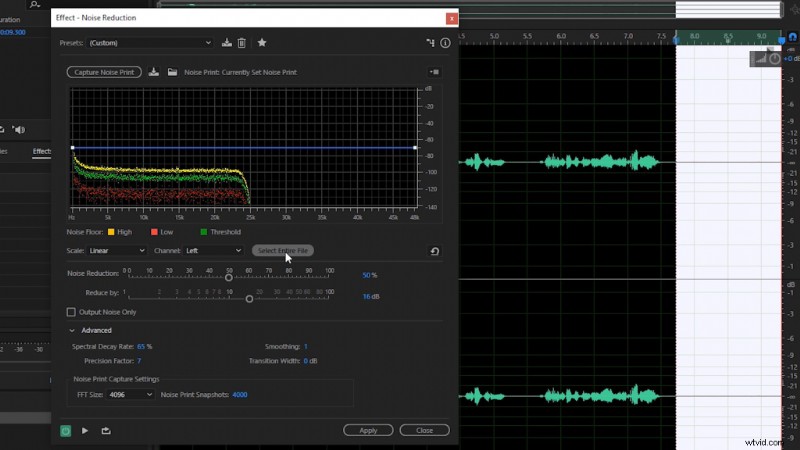
In Audition, set the In and Out points over some blank audio to capture the room ambiance. Then, navigate to Effects > Noise Reduction > Noise Reduction (Process). This will launch the Noise Reduction effect. Next, select Capture Noise Print. (This will then process the room ambiance between the In and Out points.) Once that processes, choose Select Entire File, then click Apply. Your audio track should now be denoised. Navigate to File > Save before closing Adobe Audition. Back in Premiere Pro, your audio track should also now be denoised.
4. Change the Frame Rate of a Video Clip
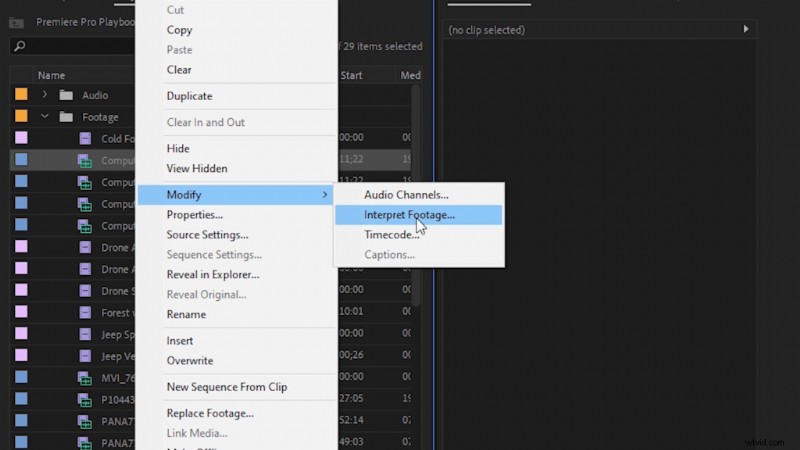
Sometimes, you may need to change the frame rate of a video clip to match your sequence frame rate. To do this, locate the video clip in the Project panel, then right-click on the clip and navigate to Modify > Interpret Footage. That will launch the Modify Clip Options. From there, check on Assume this Frame Rate, and input the frame rate you need.
5. Add a Timecode on Your Video
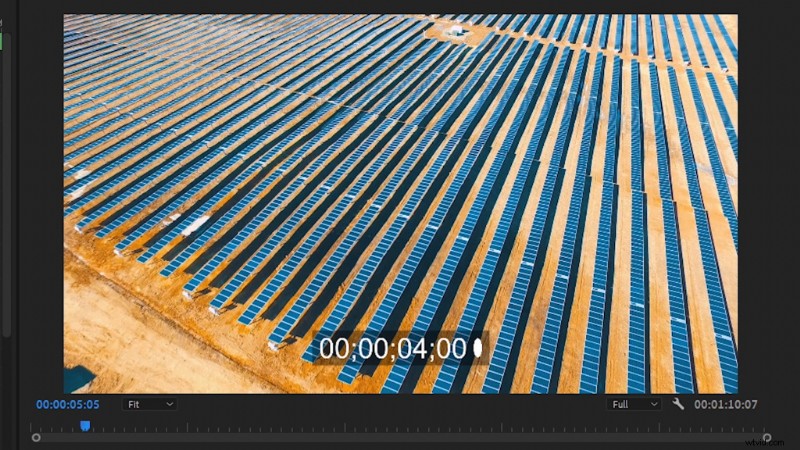
To add a timecode on top of your video project, I recommend locating your finished project sequence in the Project panel. Then, add that sequence to a brand new empty sequence. (This effectively nests everything in your project, which is what we need before we apply the Timecode effect.) Then, search the Effects panel for the effect Timecode. Drag and drop it onto your nested footage. Then, you can adjust how the timecode appears on top of your footage to match your preferences.
6. Button Editor and Monitor Settings
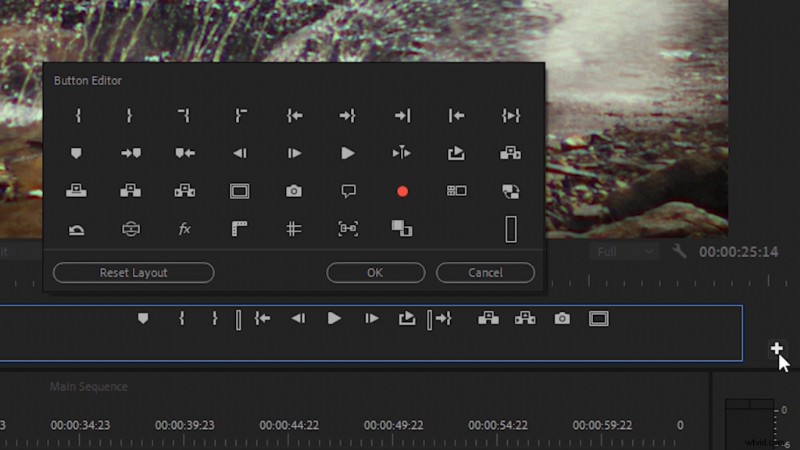
The Button Editor is a toolbar that handles several tasks, such as exporting a frame, turning effects on and off, looping playback, and more. It’s located directly below the Program Monitor, which is usually above your timeline, on the right-side of the screen. Click on the + icon on the far-right of the Button Editor to add or remove various buttons to the toolbar. You can also reorder them, if you prefer.

In some cases, you may want to access these settings, but you may not want them on the Button Editor toolbar. Luckily, all of these preview settings are also available in the Program Monitor Settings. You can find it by clicking the wrench icon just below the video preview.
7. Measuring Time with In and Out Points
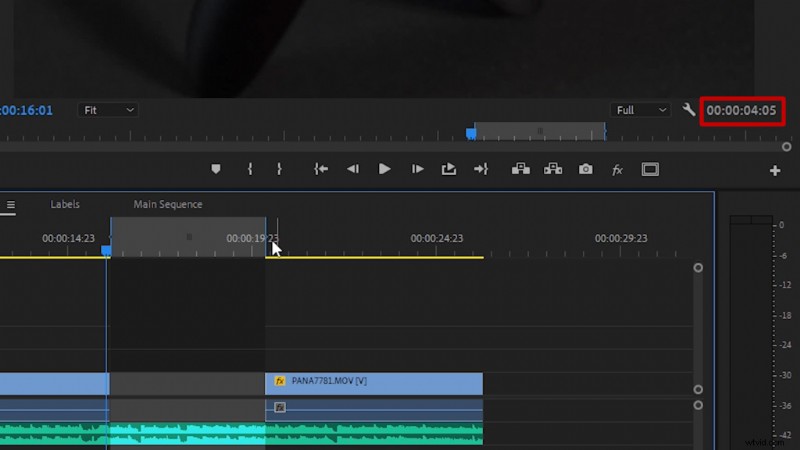
You can set an In-point on the timeline by pressing “i,” and you can set an Out-point by pressing “o.” This will ensure that when you export a video you only export what you want, which will be between these two points. However, you can also use the in and out points to measure the length of clips, or the distance between clips. After you set an in and out point, the distance between the two points is visible on the far right side of the screen, under the video preview.
8. Edit Label Colors and Names
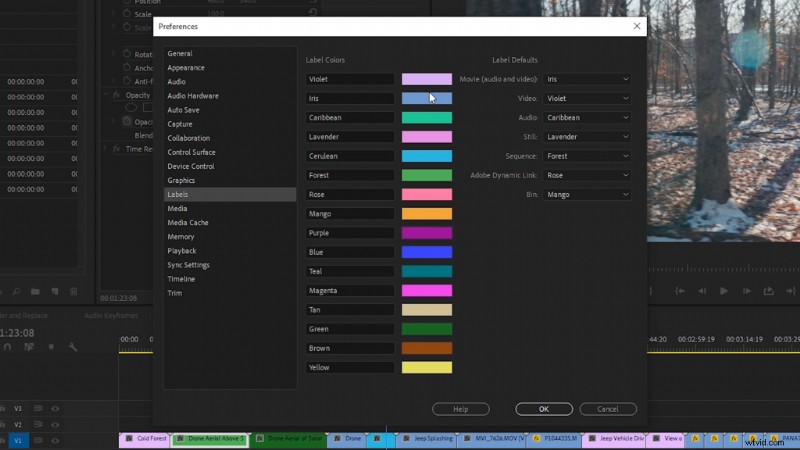
In Premiere Pro, you have the option to edit label names and colors. To do this, navigate to Edit > Preferences > Labels. From there, you’ll see numerous edit options, including setting the default label settings for different media types, such as video, audio, still, etc.
9. Delete Media Cache Files
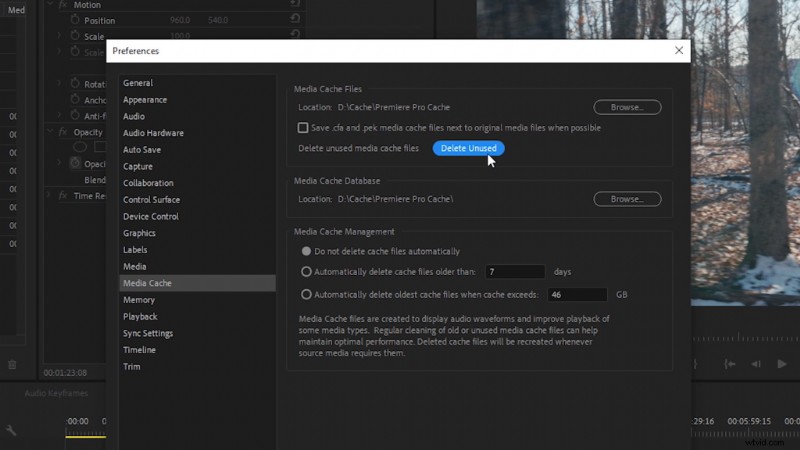
If you’re having slowdowns in Premiere Pro, try deleting your Media Cache. Navigate to Edit>Preferences>Media Cache. From there, select Delete Unused. This will delete older media cache files that might be taking up space in the media cache folder. Another useful tip is to set your media cache location on a SSD, if you have one available.
10. Adjust the RAM Memory Settings
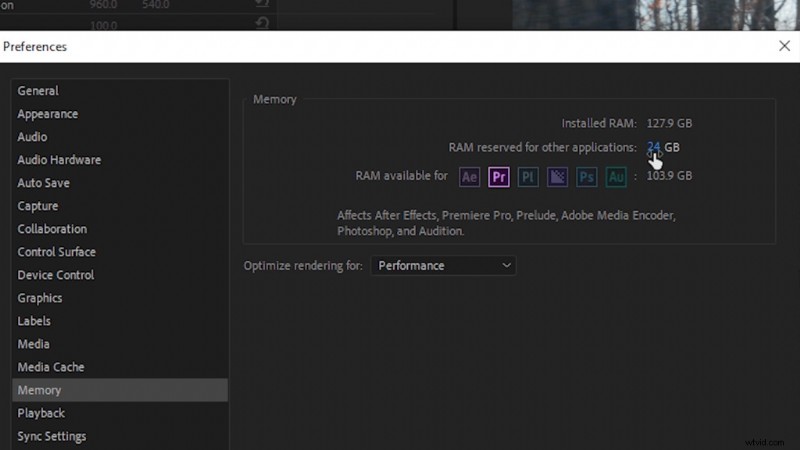
Recently, Adobe’s support team released some new recommendations for RAM memory allocation in Premiere Pro. Depending on how much total RAM memory you have installed on your editing computer will depend on how much RAM is recommended you leave for other applications. (If you don’t have enough memory left for other applications, Premiere Pro’s RAM usage can actually choke out the Operating System, which, in turn, will slow down Premiere Pro.)
To edit Premiere’s memory settings, navigate to Edit>Preferences>Memory. Then, set the RAM Reserved for Other Applications based on the following recommendations:
- For 128 GB of installed RAM, reserve 24 GB for other apps.
- For 64 GB of installed RAM, reserve 12 GB for other apps.
- For 32 GB of installed RAM, reserve 6 GB for other apps.
- For 16 GB (or less) of installed RAM, reserve 3 GB for other apps.
Cover image via Charles Yeager.
Interested in the tracks we used to make this video?
- “Fresh Hip Hop” by Trending Music
- “UX Paradise” by Tiny Music
- “Rain Rain Go Away” by Cosmo
- “Lo-Fi Dreams” by Trending Music
- “Ambient” by Sugar Beats
- “Lo Fi Abstract Chillhop” by Trending Music
- “Adapta” by Tonemassif
Want to learn more about Premiere Pro and video production? Check these out.
- 9 Beginner Tips For Editing Footage in Final Cut Pro X
- Things to Consider Before Building a Video Editing Computer
- Premiere Pro Playbook: 10 Video Editing Workflow Tips
- 5 Questions to Ask When Shopping for a New Video Camera
- Video Tutorial: How to Change Colors on Footage in Premiere Pro