Adobe Premiere Pro is a professional‑grade editing suite designed to give videographers full control over every element of a project. With advanced audio‑mixing, color‑grading, and support for a wide range of formats, it turns raw footage into polished productions.
Seamless integration with Adobe Creative Cloud apps—such as After Effects, Audition, and Media Encoder—lets you move assets between programs without hassle, streamlining the entire post‑production workflow.
This guide walks you through extracting audio from a video clip in Premiere Pro, and shows how to accomplish the same task in Wondershare Filmora as an alternative.
How to Detach Audio from a Video in Adobe Premiere Pro
Premiere Pro’s intuitive interface makes separating audio from video straightforward and efficient. Below is a step‑by‑step tutorial for both Windows and macOS users.
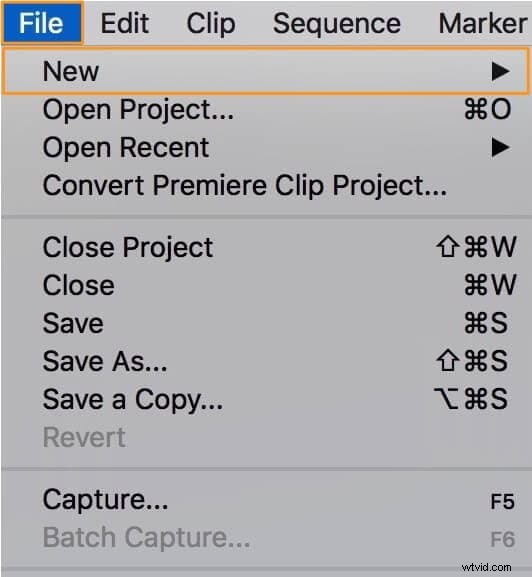
Step 1: Create a new project. Go to File → New → Project and give it a name.
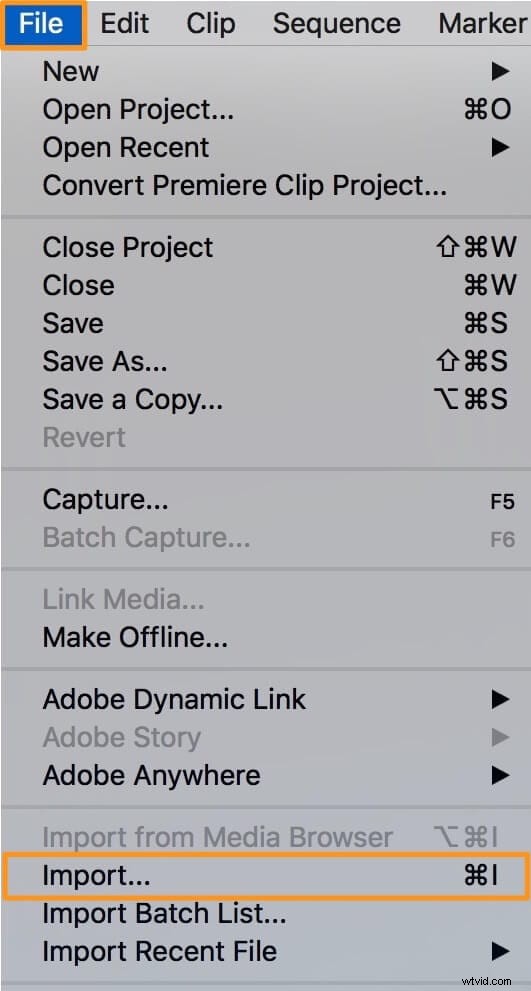
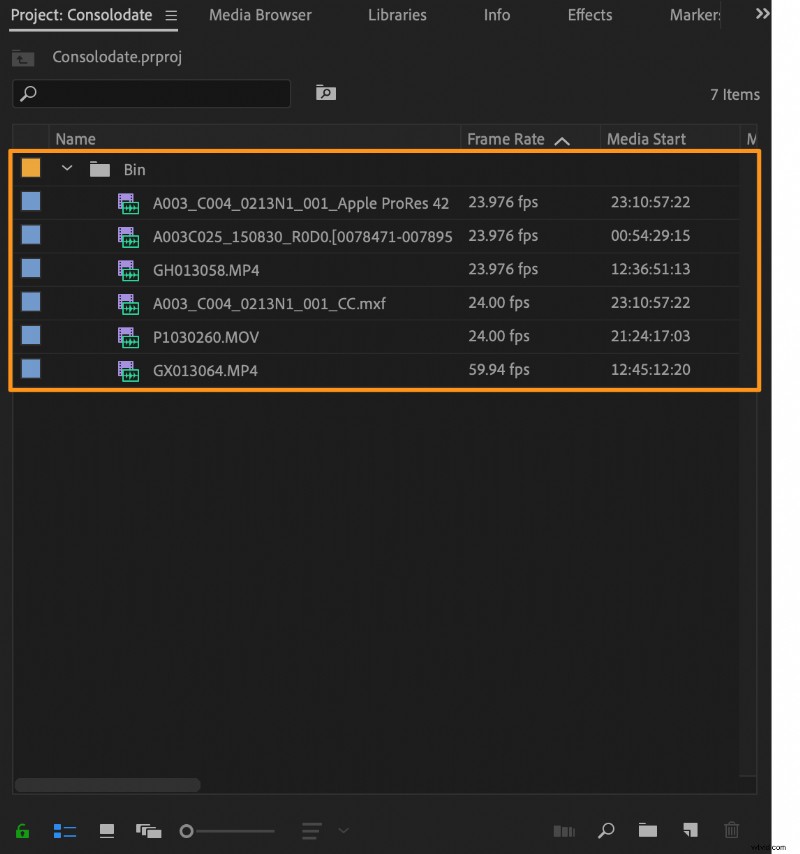
Step 2: Import the clip you want to edit. Choose File → Import or drag the file into the Project panel.
Step 3: Drag the clip from the Project panel onto the Timeline.
Step 4: Select the clip on the Timeline by clicking it.
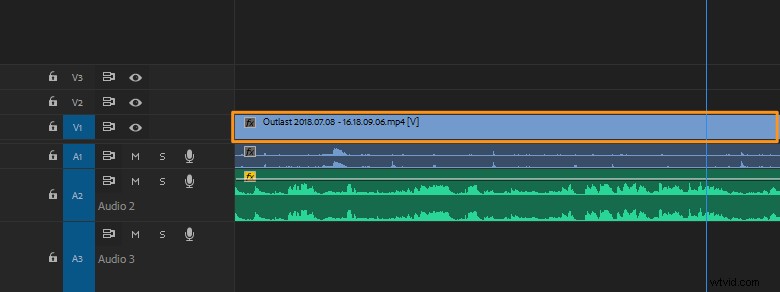
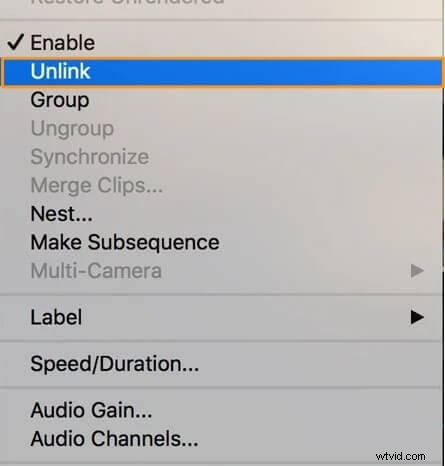
Step 5: Right‑click the clip and choose Unlink from the context menu. The audio and video will now appear as separate tracks.
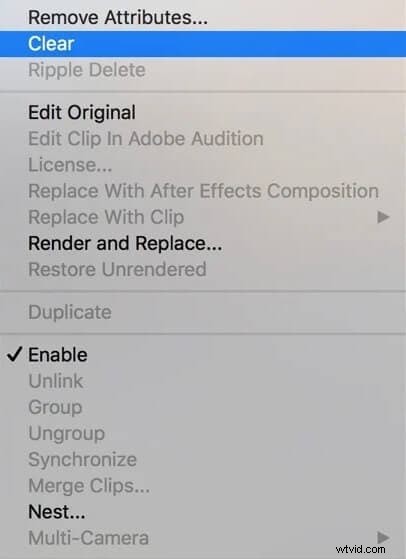
Step 6: Click on the audio track and press Delete (or right‑click and choose Clear) to remove the audio from the clip.
Once the audio is detached, you can edit it independently or export the video without sound.
An Even Simpler Alternative: Wondershare Filmora
For editors who prefer a lightweight, free solution, Wondershare Filmora offers a clean interface and all the essential tools. It runs on Windows and macOS, and you can separate audio from video with just a few clicks.
Key Features
- Real‑time preview before applying changes
- Comprehensive video and image editing tools
- Clip and screen splitting
- Graphics and animation integration
- Drag‑and‑drop timeline
- Audio mixing and noise removal
Step 1: Launch Filmora and create a new project.
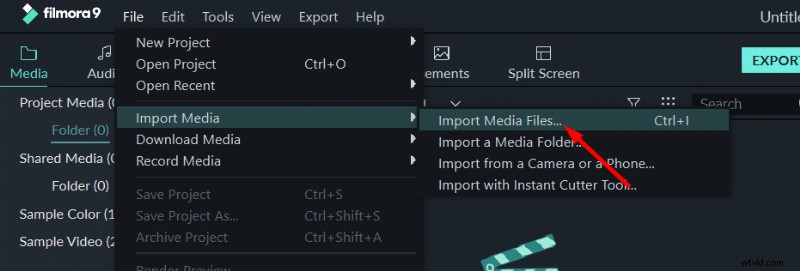
Step 2: Import your media file via File → Import or by pressing Ctrl + I.
Step 3: Drag the clip onto the timeline.

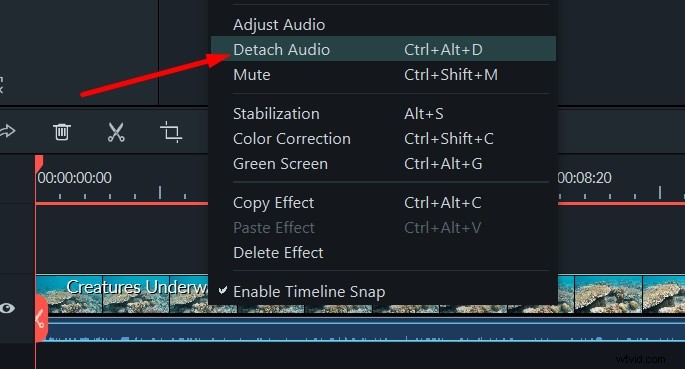
Step 4: Right‑click the clip and select Detach Audio. The audio track will appear below the video.
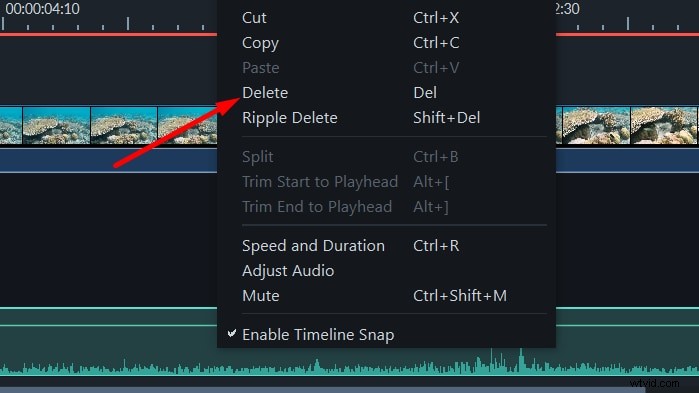
Step 5: Click the newly created audio track and hit Delete to remove it.
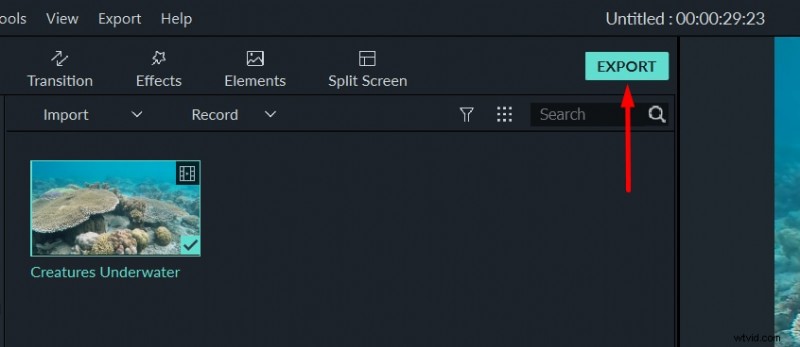
Step 6: Click Export to render the final video.
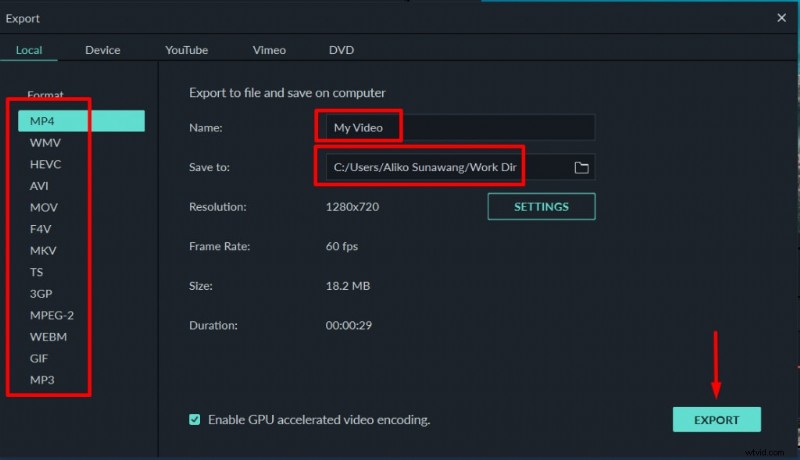
Step 7: Choose your preferred format, name the file, and set the destination folder. Filmora supports 4K output and offers extensive export settings for resolution, codec, and frame rate.
Whether you’re working on a professional project or a social‑media clip, both Premiere Pro and Filmora provide reliable ways to detach audio from video. Pick the tool that best fits your workflow and start editing today.