Twixtor is a plug‑in for After Effects that lets you craft ultra‑smooth slow‑motion footage by interpolating new frames. In this guide we explain what Twixtor is, why it’s the industry standard, and how to harness its power in Premiere Pro, After Effects, and even on iPhone.
Part 1: What Is Twixtor and How It Works
Twixtor, developed by Re:Vision Effects, is a commercial plugin that can accelerate, decelerate, or change the frame rate of any footage. Its core strength lies in its pixel‑level motion analysis, which synthesizes new frames through warping and interpolation, delivering frame‑rate conversion that outperforms standard blending methods.
Unlike Premiere’s Optical Flow or After Effects’ Pixel Motion, Twixtor’s proprietary tracking engine predicts each pixel’s motion across the entire clip. This allows it to handle complex scenes—such as overlapping objects or fast camera movements—with fewer artifacts, making it the go‑to solution for high‑quality slow‑motion work.
In the Pro edition, you can fine‑tune auto‑track parameters, add mattes and alpha layers, and even integrate 3D motion vectors, giving editors maximum control over the retiming process.
Part 2: Create Super Slow‑Mo in Adobe Premiere Pro
Below is a step‑by‑step workflow to apply Twixtor in Premiere Pro.
Step 1 – Prepare Your Clip
Import the footage, trim it, and remove any unwanted audio. A clean source simplifies the retiming process.
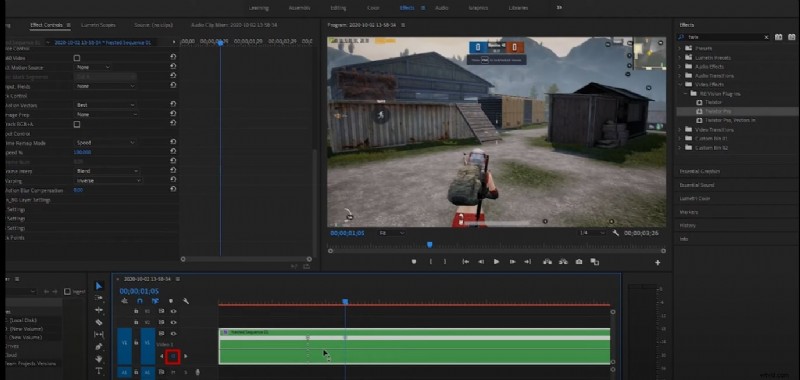
Step 2 – Nest the Sequence
Nest the clip to create a new sequence. This isolates the effect and keeps the timeline tidy.
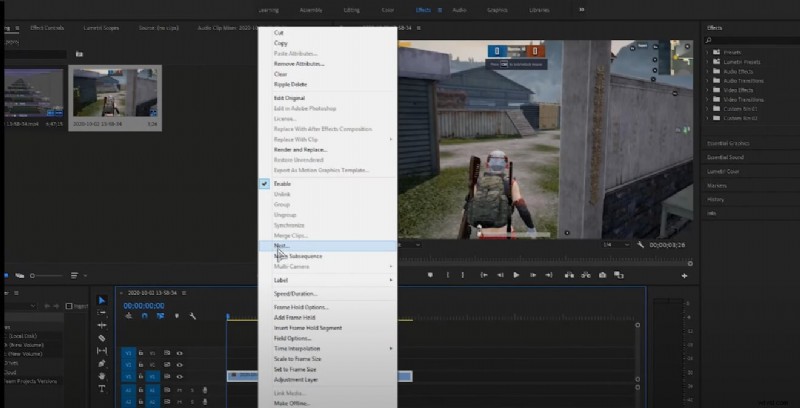
Step 3 – Apply Twixtor
Open the Effects panel, search for “Twixtor Pro,” and drag it onto the clip.

Step 4 – Enable Time Remapping
Right‑click the clip, choose “Show Clip Keyframes” → “Time Remapping” → “Speed.” Enable GPU acceleration if available.
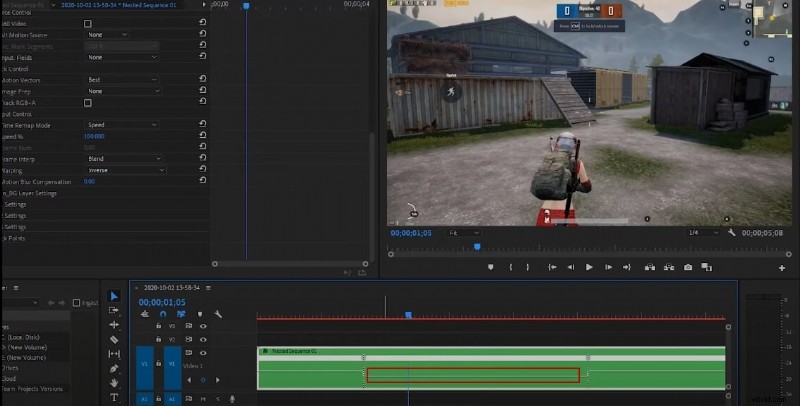
Step 5 – Set Keyframes
Click the keyframe icon to mark the start and end of the slow‑motion section.
Step 6 – Adjust Speed Curve
Drag the speed line down to lower the playback rate. Avoid setting the speed too low, which can cause jitter; fine‑tune the curve for smooth motion.
Part 3: Create Super Slow‑Mo in After Effects
Twixtor integrates seamlessly with After Effects, providing granular control over frame‑rate conversion.
Step 1 – Import Footage
File → Import → File, then drag the clip onto the timeline and choose “New Composition from Selection.”
Step 2 – Apply Twixtor
Select the layer, open the Effects & Presets panel, find “Twixtor” or “Twixtor Pro,” and drop it onto the layer.
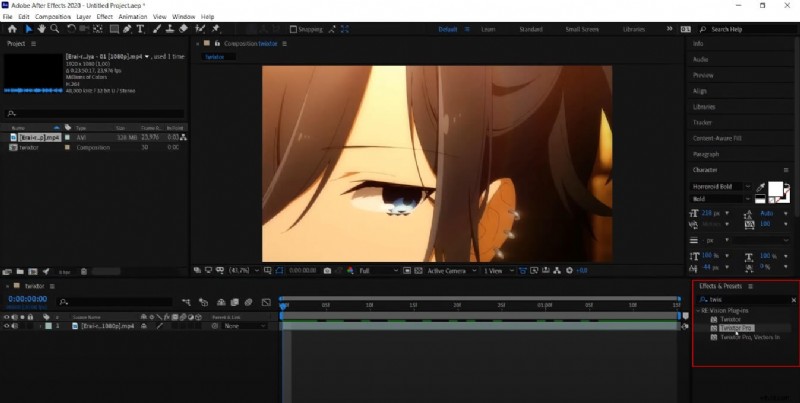
Step 3 – Configure Frame Rate
In the Twixtor controls, set the Input: Frame Rate (found under Source Control) to the original footage’s frame rate—e.g., 29.97 fps. Then adjust the Speed and Time Remap settings to achieve the desired slow‑motion effect.

Part 4: Apply Twixtor‑Style Slow‑Mo on iPhone
For on‑the‑go editing, SloPro (1000fps Slow Motion Video) offers a mobile‑friendly interface that mimics Twixtor’s optical flow.
Step 1 – Open Edit
After importing your clip, tap the red “Edit” button in the top‑right corner.
Step 2 – Trim the Clip
Use the Clip In/Out handles to isolate the section you want to modify.
Step 3 – Select Speed
Tap the top‑left box to reveal fast and slow speed options. Drag across the clip to preview the speed change.
Step 4 – Enable Optical Flow
For the slow‑motion effect, tap the upper‑right box and choose “Optical Flow.” The app renders the clip with Twixtor‑style interpolation. A watermark appears in the free version, but it can be cropped out.

Conclusion
Twixtor delivers the highest‑quality slow‑motion footage you’ll find in post‑production. Whether you’re working in Premiere Pro, After Effects, or on a mobile device, mastering this plugin unlocks a level of detail that standard frame‑blending simply can’t match. Use the steps above to start creating cinematic slow‑motion sequences that captivate your audience.
Enjoy experimenting and bring your footage to life!