Adobe Captivate is a leading tool for creating interactive e‑learning content, and its built‑in screen‑recording feature makes it a powerful choice for educators, trainers, and professionals who need to capture desktop sessions. Whether you’re documenting a software walkthrough or recording a live webinar, Captivate offers a range of options to tailor the recording to your needs.
Key Features of Adobe Captivate Screen Recorder
- Full‑screen or custom area capture – simply drag the edges to select the exact region you want to record.
- Mouse‑motion and keyboard‑activity tracking to highlight user actions.
- Optional audio capture – record system sound, microphone input, or both.
- Basic editing tools such as overlays, animations, and interactive hotspots.
- SCORM and xAPI export to integrate recordings directly into learning management systems.
Follow these steps to record your screen with Adobe Captivate:
- Download the latest version from the official Adobe Captivate page and install it.
- Open Captivate, then select File > Record Video Demo from the menu.
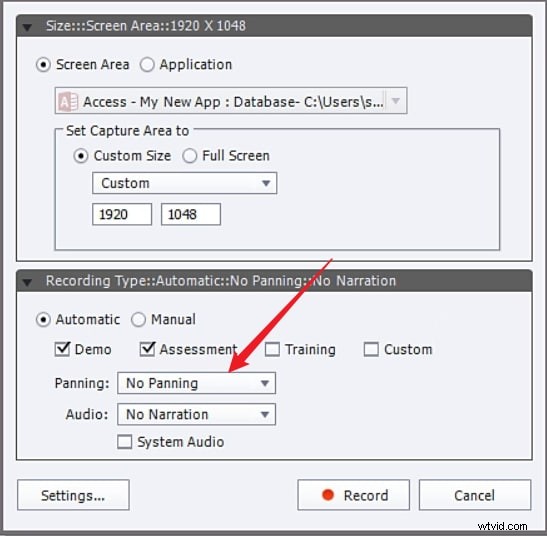
- Choose the recording area:
- Full Screen – captures the entire desktop.
- Screen Area – record a selected portion.
- Custom Size – specify exact dimensions.

- Configure preferences:
- Enable Mouse Panning to show cursor movement.
- Toggle System Audio and Microphone based on your recording requirements.
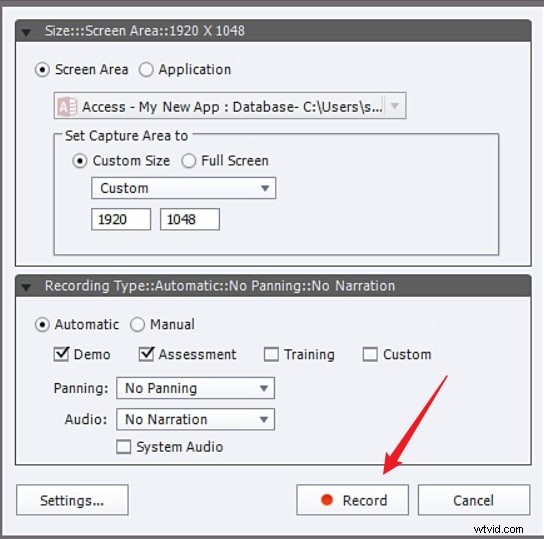
- Click the Record button to start. The countdown will begin, then the recording will launch automatically.
- When finished, press the End key (or F10) to stop. The file appears in the editor where you can trim, add transitions, or insert interactive elements.
- Export the finished video in your preferred format, or publish directly to a learning management system.
Why Consider an Alternative?
While Captivate excels at creating instructional content, its learning curve and limited post‑recording editing options can be a hurdle for casual users or those needing higher‑quality video output. For those scenarios, Wondershare Filmora offers a more streamlined experience.
Wondershare Filmora – A Strong Alternative
Filmora is a cross‑platform video editor known for its intuitive interface and extensive feature set, making it ideal for screen recordings of any size and duration.


Feature Comparison
| Feature | Adobe Captivate | Wondershare Filmora |
|---|---|---|
| Editing Tools | Basic edits; advanced editing requires Adobe Video Editor add‑on. | Comprehensive editing suite (basic, advanced, AI‑powered). |
| Ease of Use | Steep learning curve, better suited for experienced users. | User‑friendly, beginner‑ready interface. |
| Pricing | Subscription‑based, comparatively expensive. | Affordable plans with flexible licensing. |
| Scheduled Recording | No built‑in scheduling. | Supports scheduled start and stop. |
Filmora’s Key Recording Features
- Simultaneous webcam, screen, system sound, and microphone capture.
- Color‑coded mouse click highlights.
- Custom screen size – full screen, specific area, or custom dimensions.
- Post‑recording editing: noise removal, speech enhancement, AI background music generation.
- Export options up to 4K with adjustable FPS and resolution.
How to Record with Wondershare Filmora
- Download and install Filmora from the official website.
- Open Filmora, choose File > Record Media, then select Record PC Screen.
- Set the recording area, enable or disable microphone, system audio, or camera, and adjust additional settings in the Settings tab.
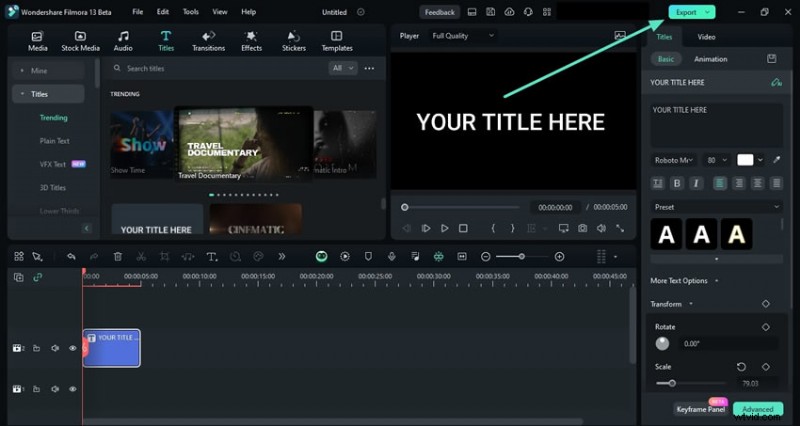
- Click the red Record button to begin.
- Stop with F9 (default hotkey), then click Export and choose your output preferences.

Conclusion
Adobe Captivate remains a top choice for educational content creators who need integrated SCORM/xAPI support. However, if you require a smoother workflow, richer editing tools, or higher video quality, Wondershare Filmora provides a compelling alternative that caters to a broader range of users.
Frequently Asked Questions
- What is Adobe Captivate best used for? Captivate excels at creating low‑frame‑rate instructional videos and interactive demos that integrate seamlessly with learning management systems.
- Is Adobe Captivate free? No. Captivate is subscription‑based, with plans starting at $33.99/month for individuals.
- Which is better, Captivate or Camtasia? Captivate offers richer interactivity for demos, while Camtasia is more suited for quick, straightforward video production.