“I need a reliable way to capture my video calls and share the recordings with my team. How can I record a video call in the best way?” The answer is straightforward: use a reputable video‑chat platform that offers built‑in recording capabilities.
Video‑call recorders are essential tools for staying connected with teammates, friends, and family—no matter where they are. With a high‑quality recording, you can revisit discussions, capture insights, and keep a permanent record of important conversations.
In this article
- Popular video‑call apps
- Recording on Zoom
- Recording on Skype
- Recording on Google Meet
- Limitations of built‑in tools
- Using Filmora for advanced recording
- Benefits of recording video calls
- FAQs
Popular Video‑Call Apps
These platforms are widely used in both personal and professional settings. They all provide native support for video‑call recording, though the exact features and limits vary.
Zoom
Zoom is renowned for its ease of use and robust feature set. It allows a host to record meetings with up to 100 participants for free. Additional tools include live annotations, screen sharing, whiteboards, real‑time transcription, and more.
Skype
Skype supports up to 50 participants on a video call and offers international texting, live transcription, and in‑chat translation. It’s a trusted choice for both personal and business users.
Google Meet
Google Meet delivers reliable, high‑quality recording for professional use. The free tier supports up to 100 participants, and it integrates seamlessly with Google Workspace, providing automatic note sharing and transcription.

Recording on Zoom
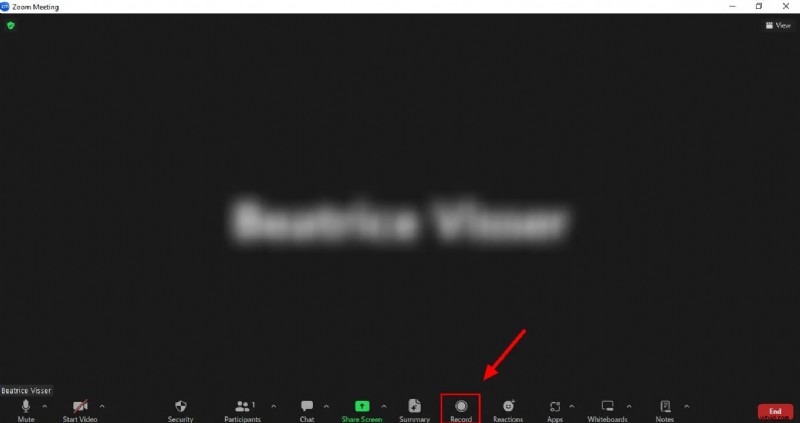
Zoom’s recording feature is powerful but requires host permission. The platform offers three screen‑layout options: shared screen with active speakers, shared screen with a large active speaker thumbnail, and active speaker view.
- Download and install the Zoom client.
- Log in and start a video call.
- At the bottom of the meeting window, click the Record button.
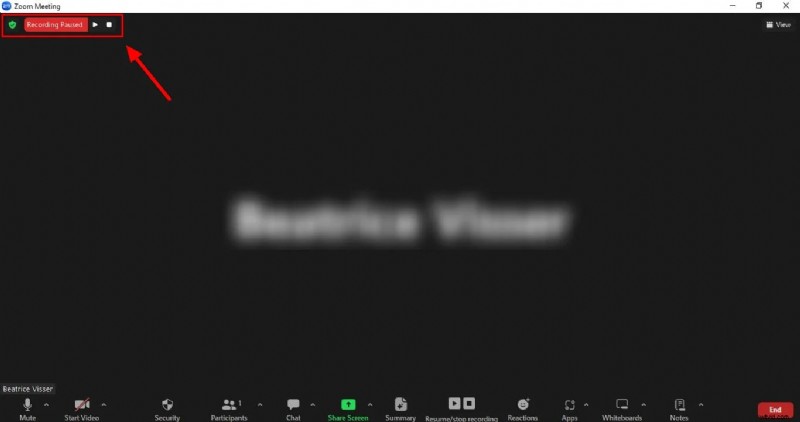
- For free accounts, the recording is saved locally; for paid plans, you can choose to record to the cloud or to your computer.
- Use the Pause and Stop buttons as needed.
Recording on Skype
Skype’s recording function is straightforward and accessible to all participants. Once a call starts, you can begin recording at any time.
- Launch Skype and join a video call.
- Click the screen‑recording icon at the bottom of the window and select Start recording. Skype will notify all participants.
- When finished, click Stop Recording to save the file.
- Locate the recording in the chat where the call took place.
Recording on Google Meet
Google Meet’s recording feature is integrated into the meeting interface and automatically saves recordings to Google Drive.
- Open meet.google.com and start a call.
- From the Activities panel, select Recording > Start recording.

- To stop, choose Recording > Stop recording. The file will appear in Google Drive > My Drive > Meet Recordings.
Limitations of Built‑in Recording Tools
- Recording resolution and frame rate are fixed.
- Only a single video format is available.
- Audio and video cannot be saved separately.
- Advanced editing features are absent.
- Host permission is often required to initiate recording.
For users who need more control over quality and editing, a dedicated screen‑recording application is advisable.


Using Filmora for Advanced Recording
Filmora Screen Recorder offers robust customization: choose recording region, adjust resolution, set frame rate, and capture both screen and webcam simultaneously. It also provides audio cleanup, background noise removal, and AI‑powered editing tools.
Key Features
- Record any portion of your screen or full screen.
- Schedule automatic start/stop.
- Export up to 4K resolution.
- Show mouse clicks and cursor movements.
- Capture webcam and microphone audio concurrently.
- Noise reduction and vocal extraction.
- Background replacement after recording.
- AI‑generated thumbnails.
- Rich library of effects, transitions, stickers, and text overlays.
How to Record Video Calls with Filmora Screen Recorder
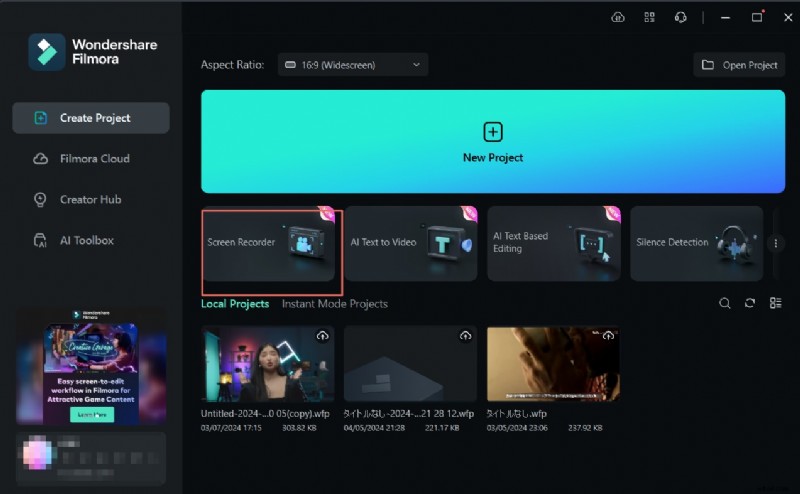
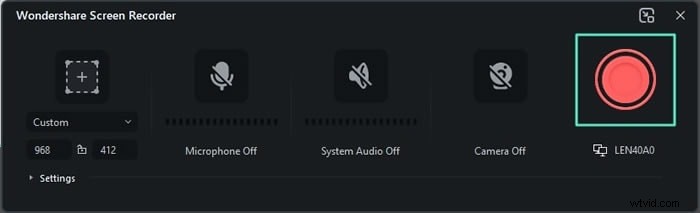
- Launch Filmora and choose Create Project > Screen Recorder.
- Select the recording mode (full screen, target window, or custom) and set the desired resolution. Adjust width, height, and length as needed.
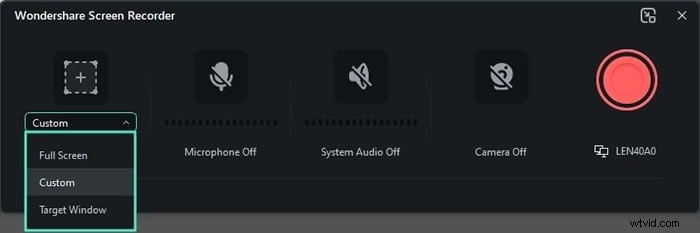
- Enable system and microphone audio; connect your webcam if you wish to record video from it.

- Configure frame rate and video quality via the Settings menu.
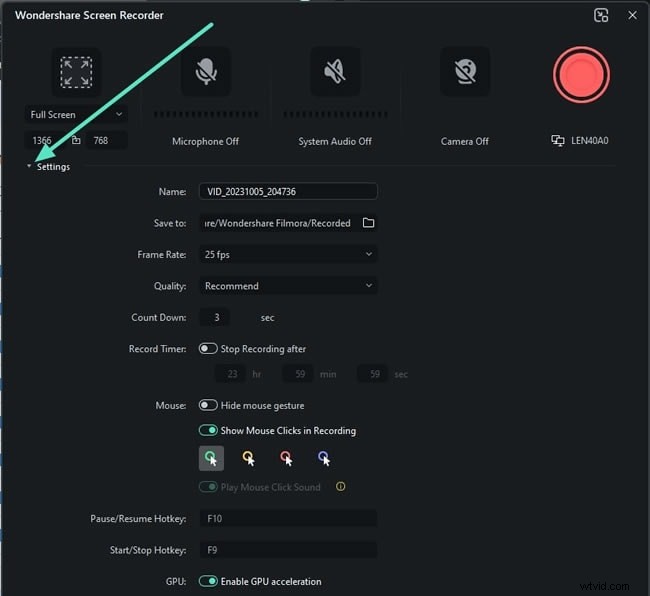
- Start your video call and click the red REC button to begin recording.
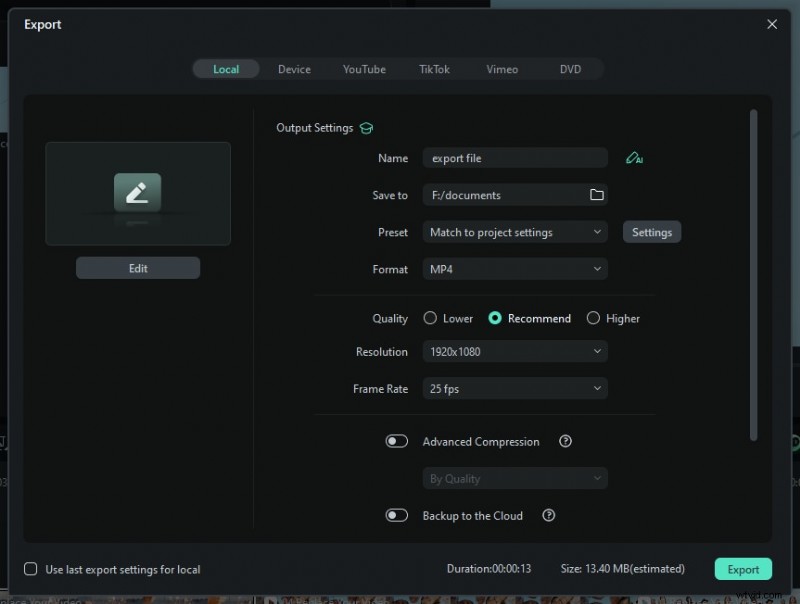
- Press Stop or press F9 to end the session. Click Export to save the file in your preferred format.
7 Benefits of Recording Video Calls
- Captures critical discussions for later review.
- Facilitates data extraction and actionable insights.
- Allows flexible scheduling for playback.
- Ensures clarity and accuracy of communicated information.
- Supports seamless collaboration across remote teams.
- Provides documented evidence for decisions, agreements, and transactions.
- Helps maintain compliance and fulfill legal record‑keeping requirements.
Conclusion
We’ve covered the primary methods for recording video calls on Zoom, Skype, and Google Meet, and we’ve highlighted the constraints of native tools. For users seeking higher quality and more editing flexibility, Filmora Screen Recorder delivers a comprehensive solution. By leveraging these tools, you can capture, edit, share, and repurpose video call recordings with confidence.
FAQs
-
Can we record a normal video call?
Yes. All major platforms—Zoom, Skype, and Google Meet—offer built‑in recording features that allow you to capture and save video conversations.
-
Which video call app allows recording?
Zoom, Skype, and Google Meet support recording, though host permission is typically required.
-
Can you record an online video conversation?
Absolutely. While native tools suffice for basic needs, a dedicated recorder like Filmora provides superior audio‑video quality and editing options.